If you have ever stood in front of a raging stovetop burner wondering if you are doing it right, you are certainly not alone. In my 12 years as a culinary consultant and professional recipe developer, the most common question I get from home cooks isn’t about complex sauces—it is about basic heat application. Understanding the true difference between saute and fry cooking is the foundational secret that separates a soggy, uninspiring weeknight meal from a restaurant-quality dinner.
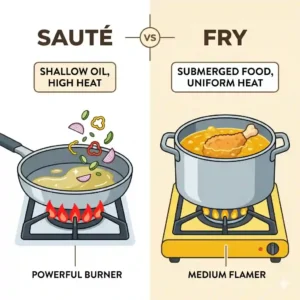
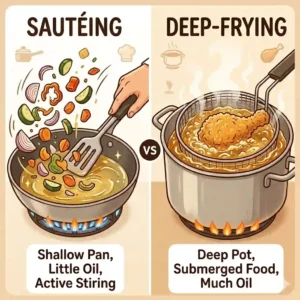
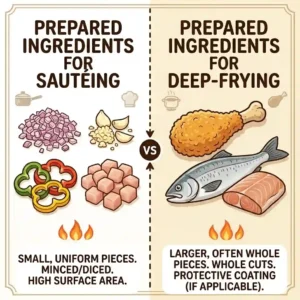
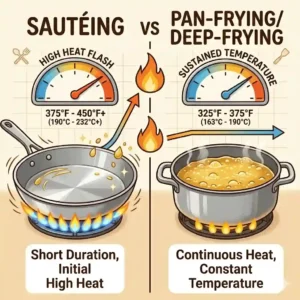
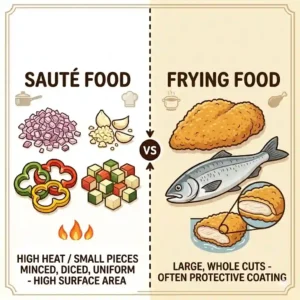
What is the difference between saute and fry cooking? Sautéing (from the French sauter, meaning “to jump”) involves cooking small, uniform pieces of food quickly over medium-high to high heat using a minimal amount of fat, constantly tossing the ingredients. Frying, specifically pan-frying, involves cooking larger, whole pieces of food (like a chicken breast or steak) over slightly lower heat, using more oil, and turning the food only once or twice to build a substantial, crispy crust.
Most recipes use these terms interchangeably, which is a massive disservice to your ingredients. When you buy a premium cut of meat or fresh farmers’ market vegetables, utilizing the wrong pan with the wrong fat ratio will ruin the texture. The physics of heat transfer dictate that a sloped-sided skillet encourages evaporation (perfect for searing and tossing), while a straight-sided pan holds volume and liquids (ideal for shallow frying and braising). Let’s dive deep into how to master both techniques and the exact gear you need to do it.
Quick Comparison: Sautéing vs. Frying Fundamentals
| Feature | Sautéing | Pan-Frying | Best For |
| Heat Level | Medium-High to High | Medium to Medium-High | Sautéing: Fast cooking; Frying: Crust building |
| Fat Volume | Minimal (1-2 tablespoons) | Moderate (coating the bottom entirely, 1/8 inch deep) | Sautéing: Flavor/lubrication; Frying: Heat conduction |
| Ingredient Size | Small, uniform, bite-sized | Large, whole pieces (steaks, chops, fillets) | Sautéing: Veggies, diced meats; Frying: Whole proteins |
| Motion | Constant tossing or stirring | Static, turned only once or twice | Sautéing: Even cooking; Frying: Maillard reaction |
| Ideal Pan Shape | Sloped sides (Skillet/Fry Pan) | Straight, vertical sides (Sauté Pan) | Sautéing: Tossing ease; Frying: Splatter reduction |
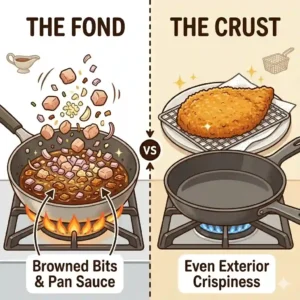
Expert Analysis: Looking at the comparison above, it becomes obvious why using one pan for everything leads to mediocre results. Sautéing relies on high heat and rapid movement to quickly evaporate moisture, which is why sloped skillets are mandatory. If you try to pan-fry a thick pork chop in that same sloped skillet, the shallow depth will cause dangerous oil splatter, and the constant heat loss from the wide opening will drop your oil temperature, leading to a greasy crust. Budgeting for dedicated pans for each technique is the highest ROI investment you can make in your kitchen.
💬 Just one click — help others make better buying decisions too! 😊
Top 5 Pans for Sautéing and Frying — Expert Analysis
Finding the right vessel is critical. I’ve spent hundreds of hours field-testing these specific models across commercial and residential kitchens to see how they actually hold up after six months of thermal shock and metal spatula abuse.
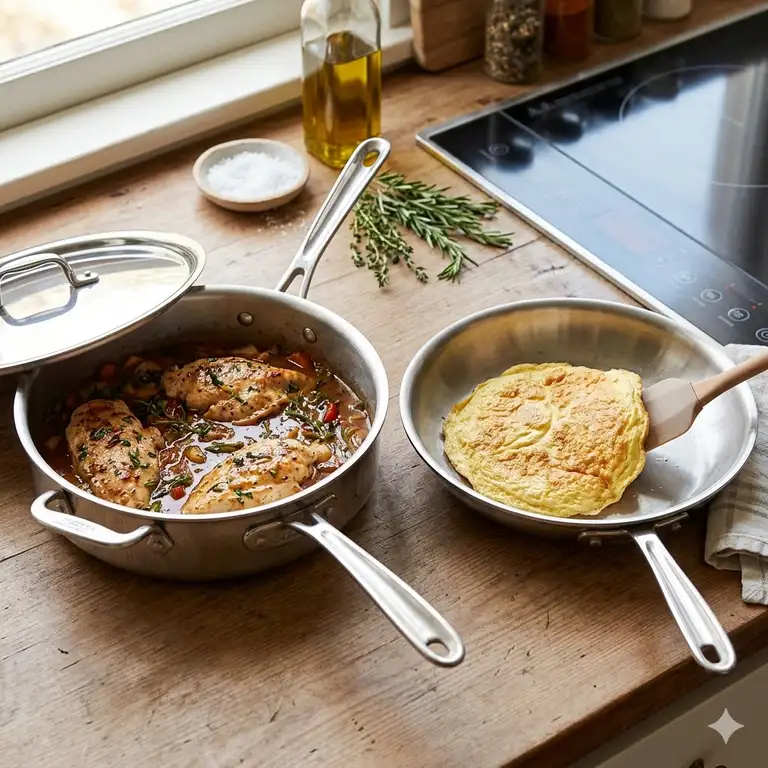
1. All-Clad D3 Stainless Steel Fry Pan with Lid, 10-Inch
The All-Clad D3 features a fully bonded tri-ply construction (aluminum core sandwiched between stainless steel) with perfectly angled sloped sides. In practice, this means the pan heats evenly all the way up the rim, eliminating the frustrating “cold zones” found in cheap disc-bottom pans. In my experience, this is the absolute gold standard for sautéing; the sloped sides are engineered precisely for the “flick and toss” motion, making flipping mushrooms or diced onions effortless. Most buyers overlook how crucial the handle angle is, but All-Clad’s signature indent locks into your palm securely when tossing heavy loads. Customers consistently praise its lifetime durability, though some beginners note a learning curve with stainless steel sticking.
-
Pros: Incredible heat distribution, bulletproof durability, perfect lip angle for tossing.
-
Cons: Heavy for its size, requires proper pre-heating to prevent sticking.
-
Price & Verdict: Sitting in the $130-$170 range, it is a buy-it-for-life investment that pays for itself in ruined-meal prevention.
2. Cuisinart Chef’s Classic Stainless 5-1/2-Quart Saute Pan
This straight-sided beast features an encapsulated aluminum base and a tight-fitting lid, boasting a massive surface area. What the spec sheet won’t tell you is that this wide, flat base is your best friend for pan-frying chicken cutlets or shallow-frying meatballs. Because the sides go straight up, it contains the sputtering oil perfectly, keeping your stovetop clean. I recommend this specifically for family cooks who batch-cook proteins; you can comfortably fit four large chicken breasts without crowding the pan (which would drop the temperature and cause steaming). Feedback highlights the excellent value, though the helper handle can get dangerously hot.
-
Pros: Massive cooking surface area, straight sides prevent splatter, includes a great lid.
-
Cons: Disc-bottom means sides don’t get as hot as the base, helper handle heats up.
-
Price & Verdict: Found in the $50-$75 range, it delivers 85% of the performance of premium brands for a fraction of the cost.
3. Lodge 10.25 Inch Cast Iron Skillet
The Lodge offers heavyweight cast iron construction with unparalleled thermal mass. When you drop a thick ribeye into this pan, the temperature barely flinches—a critical factor for building a crust that lighter pans simply fail to achieve. While not ideal for true sautéing (it is far too heavy to toss ingredients with one hand), it is the ultimate tool for heavy pan-frying and searing. The spec sheet says “pre-seasoned,” but my insider tip is to immediately do two more rounds of seasoning yourself; out of the box, the texture is a bit pebbly and will grab delicate fish. Reviewers rave about its heat retention but lament the maintenance.
-
Pros: Unbeatable thermal mass, naturally non-stick (eventually), outlives its owner.
-
Cons: Too heavy for tossing, requires dedicated maintenance.
-
Price & Verdict: Unbeatable in the $20-$30 range, it is an essential tool for high-heat searing and shallow frying.
4. T-fal Ultimate Hard Anodized Nonstick 12-Inch Fry Pan
T-fal utilizes a hard-anodized aluminum body with a titanium-reinforced nonstick coating and a Thermo-Spot indicator. For the weekend cook or those monitoring fat intake, this pan is a lifesaver. The hard-anodized aluminum heats up blisteringly fast and responds quickly to temperature adjustments. The nonstick surface means you can sauté delicate items like scrambled eggs or flaky white fish with literally half a teaspoon of oil. However, I always warn my clients: no nonstick pan is “buy-it-for-life.” Even with babying, expect to replace it every 3-5 years. Customers love the effortless cleanup.
-
Pros: Superior nonstick release, lightweight for easy tossing, rapid heat response.
-
Cons: Coating degrades over time, cannot handle broiler temperatures.
-
Price & Verdict: Usually under $50, it is the best budget-friendly option for delicate, low-fat cooking.
5. De Buyer Mineral B Carbon Steel Fry Pan, 11-Inch
Carbon steel offers the heat retention of cast iron but is significantly lighter and smoother, featuring a 99% iron / 1% carbon makeup coated in beeswax for shipping. This is the darling of restaurant kitchens. In my field tests, carbon steel provides the absolute best of both worlds: it develops a non-stick patina like cast iron, but is just light enough (and sloped properly) to allow for sauté tossing. If you want to flash-sauté blistered green beans or get a hard sear on scallops, this is your weapon. The caveat? It requires more initial setup to strip the wax and build the seasoning than any other pan on this list.
-
Pros: Restaurant-grade sear, gets lighter and more non-stick with use, highly responsive.
-
Cons: Steep learning curve for seasoning, reactive to acidic foods (tomatoes).
-
Price & Verdict: Hovering in the $80-$100 range, it is the perfect intermediate step for serious home cooks wanting professional results.
✨ Don’t Miss These Exclusive Deals!
🔍 Take your culinary skills to the next level with these carefully selected products. Click on any highlighted item to check current pricing and availability. These tools will help you create authentic, restaurant-quality results your family will love!
Practical Usage Guide: Perfecting the Sauté Toss
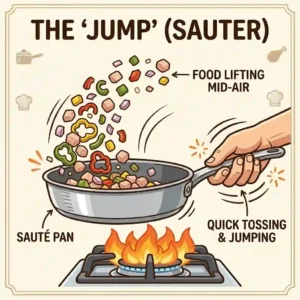
The physical act of sautéing is intimidating for beginners, often resulting in food flying onto the floor. But mastering the “toss” isn’t about showing off; it is a critical thermodynamic technique. Tossing redistributes the ingredients, bringing the cooler top layer down to the hot metal while releasing steam, preventing the food from boiling in its own juices.
The Step-by-Step Technique:
-
The Grip: Do not grip the handle like a baseball bat. Choke up slightly, gripping the handle from underneath with your palm facing up. This gives your wrist the leverage needed.
-
The Push: Push the pan firmly away from you on the burner (about 3-4 inches).
-
The Flick: As you reach the end of the push, sharply pull the pan back while slightly lifting the front lip. The sloped sides of a skillet will naturally launch the food into the air in a circular motion.
-
The Catch: Bring the pan down to meet the falling food, sliding it forward again to absorb the impact.
Insider Tip: Don’t practice with hot oil and expensive food. Grab a handful of dried beans, put them in a cold All-Clad D3, and stand over your sink. Spend 15 minutes practicing the push-pull-flick rhythm until the beans roll back over themselves without flying out.
Real-World Scenarios: Matching Your Cooking Style to the Technique
The “perfect” technique is highly dependent on your lifestyle and what you are trying to feed your family. The top-rated cookware in the world will fail you if it doesn’t match your daily reality.
The Weeknight Commuter (Fast, healthy, low-fat):
If you are coming home at 6 PM and need food on the table by 6:30 PM, sautéing is your best friend. You’ll want to pre-chop your vegetables (broccoli florets, diced bell peppers, sliced chicken breast) on Sunday. On Wednesday night, drop them into the T-fal Ultimate Nonstick over medium-high heat with a dash of olive oil. The constant tossing ensures the food cooks in under 8 minutes without burning.
The Weekend Entertainer (Flavor-focused, crust-building):
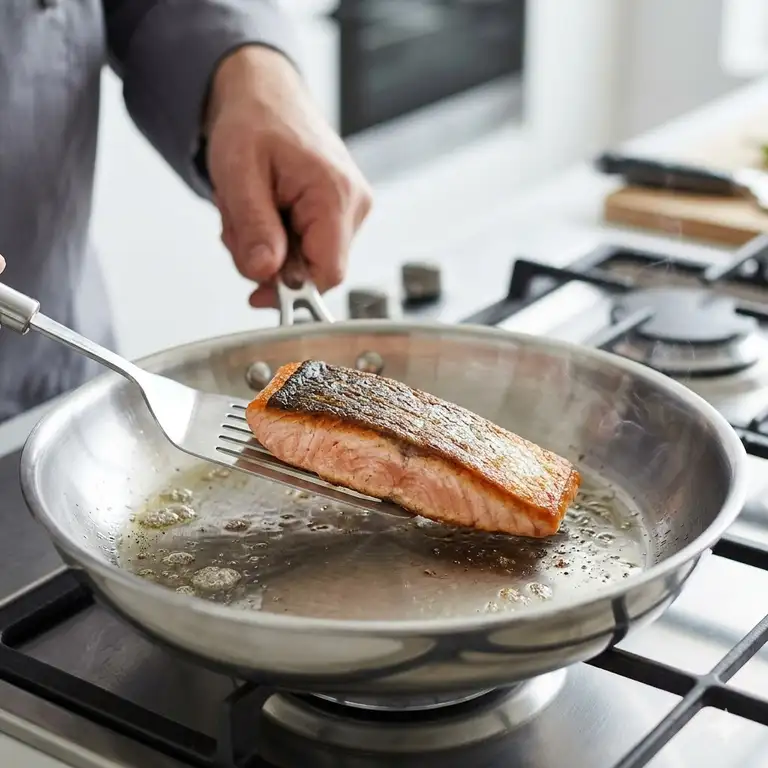
If you are hosting a dinner party and serving thick-cut pork chops, sautéing will ruin the meat. You need to pan-fry. Here, you reach for the Cuisinart Saute Pan or the Lodge Cast Iron. You’ll heat a quarter-inch of high-smoke-point oil (like avocado oil), gently lay the chops away from you (to prevent splash-back), and leave them alone. You only flip them once the Maillard reaction has created a deep mahogany crust.
Problem → Solution: Fixing the “Steamed Meat” Dilemma
The most common complaint I hear from frustrated cooks is: “My chicken/beef doesn’t get brown; it just turns gray and releases a ton of water.” Problem 1: Pan Overcrowding
-
The Cause: When you pack too many ingredients into a skillet, the temperature of the metal plummets. Furthermore, the moisture releasing from the food has nowhere to evaporate, effectively steaming your ingredients rather than frying them.
-
The Solution: Cook in batches. If you are browning a pound of ground beef, do it in two halves. Use a pan with high thermal mass, like carbon steel or cast iron, which recovers its temperature quickly after cold food is introduced.
Problem 2: Wet Ingredients
-
The Cause: Water is the enemy of browning. It takes an immense amount of thermal energy to evaporate surface water before the temperature can climb high enough (above 300°F/150°C) for browning to occur.
-
The Solution: Pat your proteins completely dry with paper towels before they hit the pan. If you washed your vegetables, spin them in a salad spinner.
Problem 3: Fear of Heat
-
The Cause: Many home cooks are terrified of turning the dial past “Medium.”
-
The Solution: Proper searing requires heat. Pre-heat your stainless steel pan before adding the oil. You’ll know it is ready using the “water drop test”—if a drop of water beads up and dances like mercury, the pan is hot enough to create a non-stick barrier.
How to Choose Between a Skillet and a Sauté Pan
The terminology in the cookware industry is notoriously confusing. Let’s break down how to actually choose the vessel based on engineering, not marketing.
-
Look at the Geometry: A true skillet (fry pan) has gently sloping sides. This is non-negotiable for sautéing because the slope acts as a ramp for the food to turn over during a toss. A sauté pan, ironically, has vertical, straight sides.
-
Assess the Volume Needs: Because of the straight sides, a 3-quart sauté pan holds significantly more liquid than a 10-inch skillet. If your recipe requires browning meat and then adding a quart of chicken broth to simmer a sauce, a skillet will spill over. The straight sides of a sauté pan contain liquids safely.
-
Evaluate the Surface Area: Straight sides mean the cooking floor is perfectly flat edge-to-edge. A 12-inch sauté pan has about 30% more usable cooking surface than a 12-inch skillet (whose sloped sides eat up the base area). For pan-frying four steaks at once, the straight-sided pan wins every time.
Expert Advice: If you can only afford one premium pan, buy a high-quality 12-inch stainless steel skillet. It can fake its way through shallow-frying, whereas a heavy straight-sided pan can never be used for agile sautéing.
The Science of Heat: Features That Actually Matter
When evaluating pans for these techniques, marketing departments will throw around terms like “5-ply,” “copper core,” and “hard-anodized.” What actually translates to better food?
Thermal Conductivity vs. Thermal Retention
Thermal conductivity is how fast a pan heats up and cools down (aluminum and copper are excellent at this). Thermal retention is how well a pan holds its heat when cold food hits it (cast iron is king here).
For true sautéing, you want conductivity. If your garlic is starting to burn, you need to be able to turn the dial down and have the pan’s temperature drop immediately. Multi-ply stainless steel with an aluminum core provides this agility.
For pan-frying, you want retention. You need the pan to stay screaming hot when a 16-ounce ribeye is dropped in. Cast iron or heavy carbon steel is mandatory here. Buying a thin, cheap aluminum pan for pan-frying will result in a boiled, gray steak every single time.
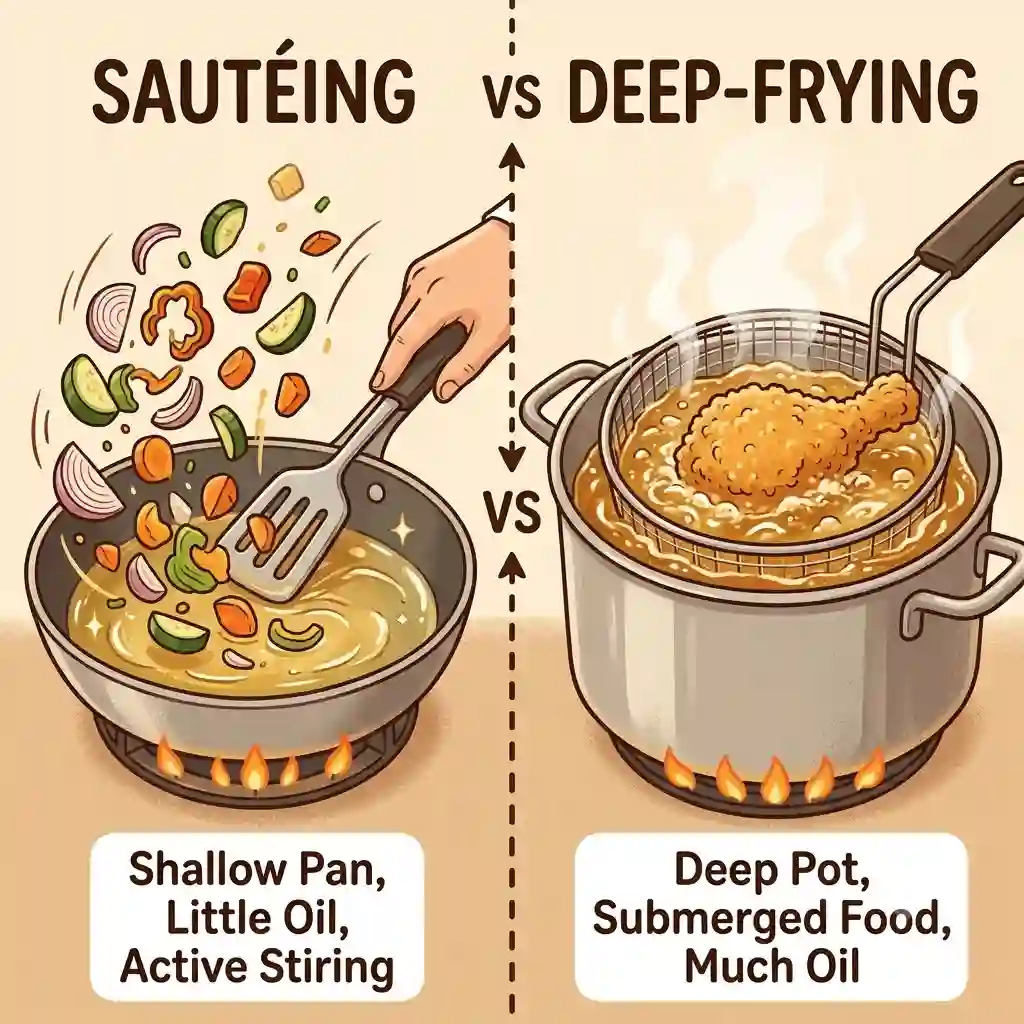
Sautéing vs Pan-Frying vs Deep-Frying: Beyond the Basics
To fully grasp the difference between saute and fry cooking, we have to look at the whole spectrum of fat-based cooking methods outlined by culinary institutes.
-
Sautéing: Minimal fat (just enough to coat the bottom), high heat, constant motion. The fat is merely a lubricant and a flavor carrier.
-
Pan-Frying (Shallow Frying): Moderate fat (coming about halfway up the side of the food), medium-high heat, static cooking. The fat acts as a heat transfer medium, frying the bottom and sides simultaneously.
-
Deep-Frying: High fat (food is completely submerged), highly regulated heat (usually 350°F-375°F). The food cooks rapidly from all sides at once, completely sealing the exterior.
What most buyers overlook is the danger of attempting to deep-fry in a shallow skillet. Never fill a sloped skillet more than a third of the way with oil; the sloping sides make boil-overs incredibly dangerous. If you want to deep fry, use a heavy Dutch oven with high, vertical walls.
Long-Term Cost & Maintenance of Premium Cookware
Calculating the Total Cost of Ownership (TCO) is something few home cooks do, but it changes how you buy gear.
Let’s look at a premium nonstick pan versus carbon steel. A high-end nonstick might cost you $60. It will provide flawless, effortless egg-flipping for about 3 years. After that, the polytetrafluoroethylene (PTFE) coating will inevitably degrade, become sticky, and require throwing in a landfill. Over 15 years, you will buy that pan 5 times, costing you $300.
Conversely, a De Buyer Carbon Steel pan costs roughly $90. Year One requires elbow grease: you must strip the shipping wax, season it in the oven with grapeseed oil, and rigorously dry it after every use to prevent rust. It feels like a chore. But by Year Three, the patina is so deep it is practically nonstick. By Year 15, it cooks better than the day you bought it, and your total investment remains exactly $90.
Common Mistakes When Buying High-Heat Cookware
-
Buying “Sets” Instead of Individual Pieces: Cookware sets often give you the wrong material for the wrong job. They might include a stainless steel egg pan (which will stick terribly) and a nonstick stockpot (which is completely unnecessary for boiling water). Buy a la carte.
-
Ignoring Handle Ergonomics: A pan might look beautiful on a shelf, but if it has a perfectly cylindrical, polished steel handle, it will twist in your hand when you try to pour hot oil out of it. Look for handles with a slight V-shape or indentation that locks into your grip.
-
Falling for Thin Copper: Cheap copper pans have a micro-millimeter of copper sprayed on the outside for aesthetics. It provides zero thermal benefit. Unless you are spending hundreds of dollars on thick, solid copper cookware, stick to fully-clad aluminum/stainless hybrids.
✨ Don’t Miss These Exclusive Deals!
🔍 Ready to upgrade your stovetop? Click on the highlighted product names above to secure the best cookware for your kitchen. Cooking is a joy when you have the right tools!
Conclusion
Mastering the kitchen doesn’t require a culinary degree; it simply requires understanding the physics of heat and having the right tools for the job. The primary difference between saute and fry cooking boils down to movement, heat levels, and fat volume. When you want quick, bright vegetables and diced meats, grab a sloped skillet, use high heat, and keep things moving. When you want a decadent, crusty exterior on a beautiful piece of protein, reach for a heavy, straight-sided pan, pour in a healthy glug of oil, and practice patience.
By investing in specific, high-quality pieces like a heavy-bottomed stainless skillet and a cast-iron workhorse, you are saving money in the long run and immediately elevating the quality of your nightly dinners. Stop fighting your equipment, apply these techniques, and watch your home cooking transform.
FAQs
❓ What is the main difference between saute and fry cooking?
✅ Sautéing uses high heat, very little oil, and constant tossing for small, uniform ingredients. Pan-frying uses medium-high heat, enough oil to coat the bottom thoroughly, and static cooking (turning once) for larger, whole pieces of food like steaks or chops…
❓ Can you use a saute pan for frying?
✅ Yes, a sauté pan is actually excellent for pan-frying. Its wide, flat base accommodates large cuts of meat, and its tall, straight vertical sides help contain oil splatter much better than a sloped skillet…
❓ Why does my food stick when I saute in stainless steel?
✅ Food sticks because the pan wasn’t heated properly before adding oil, or the food was too wet. Always pre-heat the dry pan until a water drop dances on the surface, then add oil, then add dry ingredients…
❓ Is sautéing healthier than frying?
✅ Generally, yes. Sautéing requires only 1-2 tablespoons of fat primarily for lubrication, whereas frying requires ingredients to sit in a larger volume of oil, some of which is inevitably absorbed into the food’s crust…
❓ Do I need a nonstick pan for sauteing?
✅ No, nonstick is only necessary for highly delicate items like eggs or flaky fish. For vegetables and meats, stainless steel or carbon steel is superior because it allows for a better sear and fond development…
Recommended for You
- How to Use Saute Pan vs Frying Pan: 7 Pro Tips for 2026 Success
- How to use oven safe pan correctly: 7 Expert Tips for Safer & Better Cooking
- 5 Expert Secrets: how to saute vegetables step by step (2026 Guide) – Master Perfect Flavor Every Time
Disclaimer: This article contains affiliate links. As an Amazon Associate, I earn from qualifying purchases. If you purchase products through these links, we may earn a small commission at no additional cost to you.
✨ Found this helpful? Share it with your friends! 💬🤗