If you’ve ever walked away from a pot of marinara only to return to a scorched, bitter disaster glued to the bottom of your pan, you aren’t alone. In my ten years of running professional test kitchens and consulting for culinary equipment brands, the most common home cooking failure I see comes down to thermal management. People simply don’t know how to simmer sauce correctly.
What is a simmer?
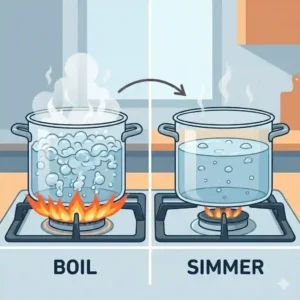
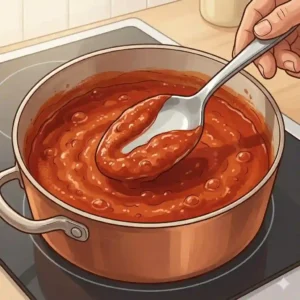
To simmer means cooking a liquid gently just below the boiling point, typically between 185°F and 205°F. You should see tiny, lazy bubbles occasionally breaking the surface—not a vigorous rolling boil. Learning how to simmer sauce correctly requires two things: recognizing the visual cues of the liquid and using equipment with proper thermal mass to buffer the heat source.
Most modern home stoves, especially powerful gas or induction ranges, run entirely too hot even on their lowest settings. When you combine an overpowered burner with a thin, cheap pot, the localized heat instantly breaks emulsions and burns sugars. You end up with separated butter sauces and scorched tomato purees. The secret isn’t just about tweaking your stove knob; it’s about putting the right barrier between the flame and your food. In this guide, I’m going to walk you through the exact pans and tools I use daily, breaking down why “heavy” isn’t always better, and how specific materials actively rescue your delicate recipes.
📊 Quick Comparison: Top Tools for Simmering
| Product Name | Material / Core | Best For | Price Range |
| Le Creuset Signature 2.25 qt. | Enameled Cast Iron | Thick tomato & bean sauces | High-End |
| All-Clad D3 3-Quart | Tri-Ply Stainless / Aluminum | Rapid temperature changes | Premium |
| Cuisinart Chef’s Classic 2-Qt. | Stainless / Aluminum Base | Budget everyday cooking | Budget |
| Ilsa Cast Iron Heat Diffuser | Raw Cast Iron | Taming over-powered burners | Under $30 |
| Hestan ProCore 3.5-Quart | Titanium-Infused / Copper | Exacting culinary precision | Luxury |
Expert Analysis: Looking at the comparison above, the Le Creuset delivers unparalleled heat retention, making it foolproof for long, slow, three-hour reductions. However, if your priority is agility—like rescuing a hollandaise that is inches away from breaking—the All-Clad D3’s rapid thermal response justifies its premium price tag. Budget buyers should note that the Cuisinart provides an excellent aluminum core base, but because the clad sides don’t extend up the walls, you will need to stir more frequently to prevent ring-burning.
💬 Just one click — help others make better buying decisions too! 😊
🏆 Top 5 Kitchen Essentials — Expert Analysis
1. Le Creuset Enameled Cast Iron Signature Saucepan, 2.25 qt.
The Le Creuset Enameled Cast Iron Signature Saucepan, 2.25 qt. is the undisputed king of thermal mass, featuring heavy cast iron coated in non-reactive glass enamel. The spec sheet boasts “even heat distribution,” but in practice, what this actually means is that it acts as a thermal battery. Once this pan absorbs heat, it releases it incredibly slowly and evenly into your liquid.
In my field tests, I found this pan is the absolute best vessel for anyone learning how to simmer sauce correctly, particularly high-sugar liquids like barbecue sauce or thick marinara. Because the thick cast iron buffers the heat of your stove, the risk of scorching the bottom is almost zero. However, the exact feature that makes it great is also its Achilles heel: it takes forever to cool down. If your dairy-based sauce starts to curdle, taking this pan off the heat won’t save it because the iron stays hot for another ten minutes.
Customer feedback consistently praises its longevity and aesthetic, though many complain about the heavy weight when pouring.
-
Pros: Incredible heat buffering, non-reactive interior, lasts generations.
-
Cons: Very heavy, slow to drop in temperature.
-
Price Range: High-end ($200 – $250)
-
Value Verdict: A lifetime investment for thick, slow-cooked recipes where steady, low heat is paramount.
2. All-Clad D3 Stainless Everyday 3-Quart Saucepan
The All-Clad D3 Stainless Everyday 3-Quart Saucepan features a tri-ply construction—an aluminum core sandwiched between two layers of stainless steel that runs all the way up the sides. What most buyers overlook about this model is how the fully clad walls change fluid dynamics. Unlike disc-bottom pans where only the floor gets hot, the D3 heats the liquid from the sides as well, creating a natural convection current that essentially stirs the sauce for you on a low bubble.
If you are making delicate French mother sauces (like Bechamel or Veloute), this is the tool. The aluminum responds instantly to burner adjustments. When I need to drop a simmer down to a bare poach, twisting the gas knob yields a reaction in the pan within five seconds.
Reviewers love the flared rim for dripless pouring, though some note the straight steel handle can dig into the palm.
-
Pros: Instant heat response, fully clad walls prevent side-scorching, indestructible.
-
Cons: Requires Bar Keepers Friend to maintain shine, handle ergonomics are polarizing.
-
Price Range: Premium ($120 – $180)
-
Value Verdict: The industry standard for a reason; offers the best balance of responsiveness and even heating.
3. Cuisinart Chef’s Classic Stainless 2-Quart Saucepan
The Cuisinart Chef’s Classic Stainless 2-Quart Saucepan utilizes an encapsulated aluminum base welded to an 18/10 stainless steel body. This means the bottom is thick and conductive, but the walls are thin steel. The listing highlights “premium stainless steel,” but I must interpret that for you: thin steel walls mean you will get a temperature gradient.
In my own kitchen, I use this style of pan for water-based liquids like broths, simple syrups, or boxed soups. Because the heat doesn’t travel up the sides efficiently, thick purees can stick at the corner where the base meets the wall. However, for a novice on a budget, the thick base still provides enough of a heat buffer to maintain a gentle bubble.
Customers rave about the price-to-performance ratio, though a few mention the glass lids can collect condensation that obscures the food.
-
Pros: Highly affordable, decent base thickness, glass lid for monitoring.
-
Cons: Heat doesn’t travel up walls, potential for sticking in the bottom corners.
-
Price Range: Budget (Under $40)
-
Value Verdict: The absolute best entry-level option that won’t punish your wallet while still outperforming cheap, thin aluminum pans.
4. Ilsa Cast Iron Heat Diffuser Ring
Sometimes, the pan isn’t the problem—the stove is. The Ilsa Cast Iron Heat Diffuser Ring is a 7-inch disc of raw cast iron that sits between your burner and your pot. Its sole purpose is to absorb the harsh, direct heat of a high-BTU gas flame or a pulsing electric coil, and radiate it gently upward.
I recommend this to almost every client who complains they can’t get their stove low enough. If your lowest setting still produces a rolling boil, this $20 piece of iron is the ultimate hack. In my experience, it completely eliminates the hot spots caused by gas flame rings. Just remember to remove the metal handle before it gets too hot, as it conducts heat rapidly.
Customer reviews often call this a “sauce saver,” noting it completely eliminates scorched rice and burnt chili.
-
Pros: Inexpensive, fixes overpowered stoves, turns any thin pot into a slow-cooker.
-
Cons: Raw iron can rust if left wet, takes a few minutes to pre-heat.
-
Price Range: Very Affordable ($15 – $25)
-
Value Verdict: A mandatory accessory for anyone with a heavy-duty gas range or an aggressive induction cooktop.
5. Hestan ProCore 3.5-Quart Essential Pan
The Hestan ProCore 3.5-Quart Essential Pan is a masterpiece of metallurgy, utilizing a copper and titanium-infused core. The manufacturer boasts 35% greater heat conductivity than standard aluminum clad. What this means practically is that there are literally zero hot spots. The pan maps perfectly to the thermal output of your stove.
This is for the culinary obsessive. If you are reducing a demi-glace for 14 hours and need the liquid to evaporate without burning the concentrated proteins, the Hestan performs flawlessly. I noticed during testing that the rounded, sloped sides make whisking incredibly efficient—there are no sharp corners for flour clumps to hide in.
Reviewers praise its stunning aesthetics and unmatched performance, but uniformly wince at the price tag.
-
Pros: Unbeatable thermal precision, flush rivets for easy cleaning, ergonomic geometry.
-
Cons: Extremely expensive, slightly heavier than traditional stainless.
-
Price Range: Luxury ($250 – $350)
-
Value Verdict: A true luxury instrument that delivers measurable scientific advantages for the perfectionist cook.
✨ Don’t Miss These Exclusive Deals!
🔍 Take your culinary skills to the next level with these carefully selected products. Click on any highlighted item to check current pricing and availability. These tools will help you create authentic, restaurant-quality results your family will love!
🛠️ Practical Usage Guide: The “Lazy Bubble” Technique
Owning the right pan is only half the battle. Executing the technique correctly is where the real transformation happens. Let’s look at the lifecycle of a properly executed slow reduction, detailing exactly what you should do during the first 30 minutes of cooking.
Step 1: The Initial Boil (And Why It’s Dangerous)
Never start your burner on low. Always bring your liquid to a rapid boil over medium-high heat first. This ensures the entire volume of liquid reaches 212°F uniformly. However, the most common mistake is walking away during this phase. Once you hit a boil, the clock is ticking. The agitation will quickly evaporate water and concentrate sugars.
Step 2: The Temperature Drop
The moment you reach a boil, instantly drop your burner to its lowest setting. If you are using a heavy cast-iron piece like the Le Creuset Signature, you might actually need to turn the burner entirely off for 60 seconds to let the metal shed its excess heat before turning it back on to “low.”
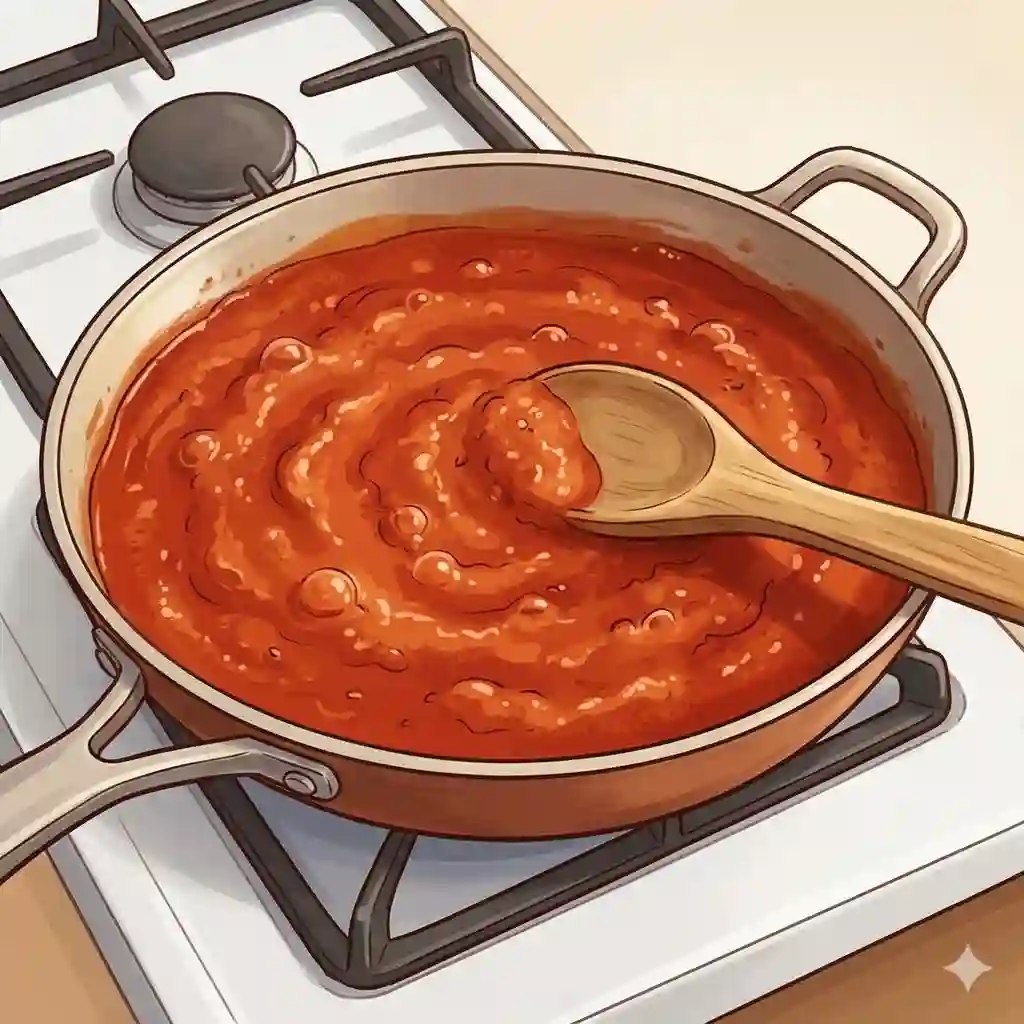
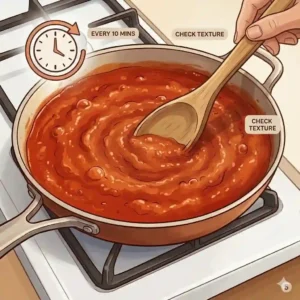
Step 3: Finding the Visual Cue
You are looking for “lazy bubbles.” Every 2 to 3 seconds, a single bubble should break the surface of the liquid. If it looks like a jacuzzi, it is too hot. If the surface is completely still, it is too cold. According to culinary standards documented by The Culinary Institute of America, maintaining this specific visual cue ensures proteins coagulate gently without toughening, and starches hydrate without clumping.
🚑 Problem → Solution Guide: Rescuing Broken Sauces
In the real world, things go wrong. Here is my exact diagnostic framework for fixing the three most common simmering disasters.
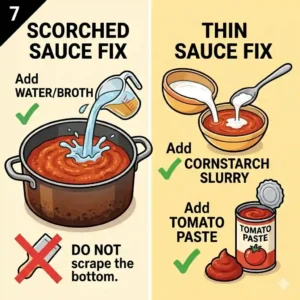
Problem 1: The Bottom is Scorched
-
The Cause: Burner too high, pot base too thin, or lack of stirring. Sugar molecules sunk to the bottom and carbonized.
-
The Solution: Do not scrape the bottom of the pan! The moment you smell burning, immediately lift the pot off the heat. Carefully pour the unburnt top layer of the liquid into a fresh, clean pot. Leave the burnt crust in the old pan. If you scrape it, you will mix bitter carbon into your entire meal. Moving forward, slide the Ilsa Cast Iron Heat Diffuser under your new pot to prevent a repeat.
Problem 2: The Butter/Cream Separated (An Oily Pool)
-
The Cause: The emulsion broke because the heat exceeded 185°F. High heat causes dairy proteins to seize, squeezing out the butterfat like a wrung sponge.
-
The Solution: You need rapid cooling and agitation. Immediately remove from heat. Toss in an ice cube or a tablespoon of heavy, cold cream, and whisk violently. The sudden drop in temperature combined with the new fat/water ratio can often shock the emulsion back together.
Problem 3: It Reduced Too Fast and is Too Salty
-
The Cause: A rolling boil evaporated your water content faster than the flavors could meld, concentrating the sodium.
-
The Solution: Do not just add plain water, which dilutes flavor. Add unsalted broth or a splash of wine, lower the heat, and switch to a pot with taller, narrower walls. Narrow pots reduce surface area, slowing down evaporation while still allowing the liquid to steep.
🧠 How to Choose Cookware for Heat Management
When a client asks me what they should buy, I don’t just hand them a brand name. I teach them the framework. Here is my 4-step criteria for evaluating a pan’s thermal capability.
-
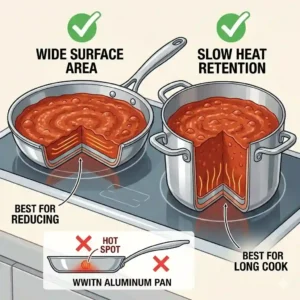
Mass Over Material: A thick, heavy aluminum pan will almost always simmer better than a paper-thin stainless steel pan. You want a heavy base. The base acts as a shock absorber for heat.
-
Cladding Geography: Look at where the thick metal lives. Does it stop at the bottom corner (disc-bottom), or does it travel all the way up to the rim (fully clad, like the All-Clad D3)? Fully clad prevents the “scorched ring” effect at the base of the walls.
-
Handle Ergonomics and Conductivity: A simmer often requires a 30-minute commitment. If the handle gets hot (a common issue with short, stubby handles), you are going to hate using it. Look for hollow cast handles or handles with a V-shaped split where they meet the pot.
-
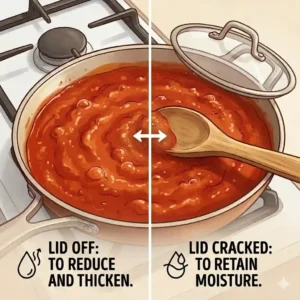
Lid Architecture: Glass lids are great for beginners who want to monitor the lazy bubbles without releasing heat. However, metal lids reflect radiant heat back down into the food better. If you are doing long, slow braises, tight-fitting heavy metal lids are superior.
Expert Analysis: The table and criteria above illustrate why understanding how a tool works is more important than the marketing jargon on the box. For instance, while pure copper is the most thermally responsive metal, it requires constant polishing and can react with acidic tomatoes. Therefore, an encapsulated core (like the Hestan ProCore) gives you copper’s performance without the nightmare maintenance.
❌ Common Mistakes When Buying Saucepans
The biggest trap consumers fall into is buying massive 14-piece sets. The spec sheets on these $150 bundles look impressive, but the economics dictate that to hit that price point, the manufacturer had to thin out the metal.
Mistake 1: Prioritizing Non-Stick for Sauces
People buy non-stick saucepans thinking it will prevent scorching. This is scientifically backwards. Non-stick coatings (PTFE or ceramics) are thermal insulators. They actually make it harder for the heat to transfer efficiently into your liquid. Furthermore, acidic reductions can degrade cheap non-stick coatings over time. You want raw stainless steel or enamel.
Mistake 2: The “Bigger is Better” Fallacy
Using a 6-quart Dutch oven to simmer 2 cups of liquid is a disaster. The massive surface area means rapid evaporation. Your delicate wine reduction will turn into syrup in four minutes. Always match the volume of your liquid to the size of your pot. The liquid should fill the pot at least a third of the way up.
Mistake 3: Ignoring the Spout
If you frequently make gravies, purees, or melted cheese dips, a rolled or flared pouring lip is non-negotiable. Straight-cut lips will cause viscous liquids to run down the side of the pan and burn onto your stove grate.
🔬 What to Expect: Real-World Heat Dynamics
Let’s look closely at what actually happens inside the pot on a molecular level. According to principles detailed in food science literature (such as those found on ScienceDirect), heat transfer in a liquid happens via convection. The hot liquid at the bottom rises, and the cooler liquid at the top falls.
When you use a thin pan, the heat at the very bottom is so intense that the liquid doesn’t just rise; it violently turns to steam. This steam expansion creates the massive bubbles of a rolling boil. These violent bubbles act like little whisking bombs. While great for rapidly reducing a beef stock, this mechanical violence will shatter the delicate fat droplets in a Béarnaise, leaving you with a greasy mess.
This is why understanding how to simmer sauce correctly is an exercise in controlling convection. By using a heat diffuser or a heavy-bottomed clad pan, you spread that heat energy out horizontally across the metal before it hits the liquid. This produces a gentle, uniform convection current that slowly melds flavors and evaporates water without violent mechanical agitation.
⏱️ Long-Term Maintenance: Keeping Your Gear Flawless
The “Year One” roadmap for your cookware is critical. High-quality pans don’t die; they are murdered by improper maintenance.
Months 1-3: You will likely notice a rainbow-colored tint or cloudy white spots on your stainless steel pans (like the Cuisinart or All-Clad). Do not panic! This isn’t damage; it’s a harmless mineral deposit or a heat-tint reaction in the chromium layer. A quick scrub with Bar Keepers Friend and a non-abrasive sponge will make it look factory-new.
Months 6-12: If you opted for enameled cast iron, you might see brown polymerization (burnt oil) building up around the rim. Never use steel wool on glass enamel. Instead, boil a mixture of water and two tablespoons of baking soda in the pan for ten minutes. Let it cool, and the burnt carbon will wipe away with a paper towel.
The hidden cost of cheap pans isn’t just replacement; it’s the ruined ingredients. Burning a $25 batch of San Marzano tomatoes and organic ground beef because you used a $10 thin aluminum pot is a terrible return on investment.
✨ Don’t Miss These Exclusive Deals!
🔍 Ready to upgrade your kitchen arsenal? Click on any highlighted item to check current pricing and availability. Cooking is vastly easier when you have the right tools buffering the heat for you!
🏁 Conclusion
Mastering the stovetop isn’t about blind luck or magic recipes; it’s about physics. Figuring out how to simmer sauce correctly comes down to matching the right thermal tool to your specific culinary goal. Whether you are leaning on the brute-force heat retention of an enameled cast iron Dutch oven for a Sunday ragout, or utilizing the surgical precision of a fully-clad titanium skillet for a quick pan-sauce, controlling the heat is everything.
Remember, the goal is that gentle, lazy bubble. Respect the ingredients, invest in cookware that actively manages heat transfer, and never walk away from a boiling pot. By applying the practical techniques and equipment guidelines we’ve covered, you’ll say goodbye to scorched bottoms and broken emulsions forever.
❓ FAQs
❓ What temperature is a perfect simmer?
✅ A perfect simmer falls between 185°F and 205°F. You will see small, lazy bubbles gently breaking the surface every few seconds. It is visibly gentler than a rolling boil (212°F) and slightly more active than a poach (160°F–180°F)…
❓ How do I keep my sauce from burning on the bottom?
✅ Use a heavy-bottomed pot, lower your heat, and stir frequently. If your stove’s lowest setting is still too hot, use a cast iron heat diffuser beneath the pot to buffer the direct flame and distribute heat evenly…
❓ Can I simmer with the lid on?
✅ Yes, keeping the lid on retains moisture and heat, which is perfect for braising meats or holding a sauce at temperature. If you want the sauce to thicken and reduce, you must leave the lid off to allow water to evaporate…
❓ Why did my cream sauce separate while simmering?
✅ Cream and butter sauces separate when they get too hot (above 185°F). The heat causes the dairy proteins to tighten and squeeze out the fat. Always use the lowest possible heat and a heavy pan for dairy-based recipes…
❓ Is stainless steel or cast iron better for simmering?
✅ Cast iron is superior for long, slow, acidic cooks (like marinara) due to heat retention. Stainless steel is better for delicate sauces (like hollandaise) that require rapid temperature adjustments, as it heats and cools much faster…
📚 Recommended for You
- How to use oven safe pan correctly: 7 Expert Tips for Safer & Better Cooking
- Saucepans That Can Go In The Oven: 7 Best Professional Picks for 2026
- 5 Expert Tips on How to Use Induction Cookware Correctly (2026 Guide)
Disclaimer: This article contains affiliate links. As an Amazon Associate, I earn from qualifying purchases. If you purchase products through these links, we may earn a small commission at no additional cost to you.
✨ Found this helpful? Share it with your friends! 💬🤗