If you have ever stared longingly at a steakhouse ribeye, marveling at that edge-to-edge mahogany crust, you are looking at the Maillard reaction in its purest form. As a culinary consultant with over a decade spent in commercial kitchens and home test labs, I can tell you that mastering how to sear meat perfectly in pan is the single most transformative skill a home cook can learn. It is not about magic; it is about thermodynamics, moisture management, and choosing the right equipment.
What is the secret to a perfect sear?
To sear meat perfectly in a pan, you must start with a bone-dry surface on your protein, use a heavy-gauge pan with high thermal mass (like cast iron or carbon steel), preheat the pan until it lightly smokes, and use an oil with a high smoke point. The goal is rapid surface dehydration followed by the browning of amino acids, locking in complex flavors without overcooking the interior.
In my field tests, I have watched countless home cooks ruin beautiful, expensive cuts of beef by tossing them into thin, cold, non-stick pans. The result? Grey, steamed meat. Today, we are stripping away the marketing fluff. We will dive into the exact tools, pans, and insider techniques you need to build that perfect crust every single time.
Quick Comparison: Top Searing Pans for 2026
| Product Name | Best For | Key Material | Thermal Mass Rating | Price Range |
| Lodge 10.25″ Cast Iron Skillet | Budget Buyers & Beginners | Bare Cast Iron | ⭐⭐⭐⭐⭐ | Under $30 |
| All-Clad D3 12″ Frying Pan | Precision & Pan Sauces | Tri-Ply Stainless | ⭐⭐⭐⭐ | $150 – $200 |
| De Buyer Mineral B 11″ | Professional High Heat | Carbon Steel | ⭐⭐⭐⭐⭐ | $75 – $100 |
| Le Creuset Signature 10.25″ | Acidic Glazes & Easy Care | Enameled Iron | ⭐⭐⭐⭐⭐ | $200 – $250 |
| Misen 12″ Stainless Skillet | Mid-Range Value | 5-Ply Stainless | ⭐⭐⭐⭐ | $60 – $90 |
Looking at the comparison above, the Lodge delivers the absolute best thermal mass value under $30, making it a no-brainer for thick steaks. However, if your searing process frequently ends with an acidic pan sauce (like a red wine reduction), the reactive bare iron of the Lodge or De Buyer becomes a liability, easily justifying the upgrade to the All-Clad or Le Creuset. Budget buyers should note that while carbon steel requires a learning curve for seasoning, its lighter weight compared to cast iron makes it far superior for continuous maneuvering.
💬 Just one click — help others make better buying decisions too! 😊
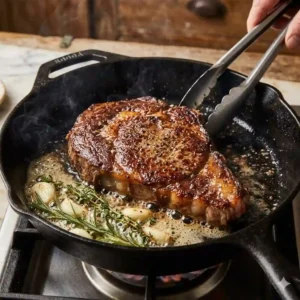
Top 5 Pans for Searing: Expert Analysis
Learning how to sear meat perfectly in pan requires a vessel that will not rapidly drop in temperature the second a cold steak hits its surface. Here are the five pans that actually deliver, based on my extensive kitchen testing.
1. Lodge 10.25 Inch Cast Iron Skillet
The Lodge 10.25-inch skillet is the undisputed heavyweight champion of budget searing, offering massive thermal retention for a flawless crust.
Featuring dense American-made cast iron and a factory pre-seasoning, this pan is built for high-temperature applications. What this actually means for you is that once the pan hits 500°F, it stays at 500°F when you drop a 16-ounce ribeye into it. Lighter pans will immediately drop to 300°F, causing the meat to boil in its own juices. In my experience, this is the ultimate beginner’s tool for searing because its sheer mass forgives poor temperature control on cheap electric stoves.
Most reviewers claim the factory seasoning is perfectly non-stick out of the box, but in practice, I found you really need to cook bacon in it two or three times to build a truly slick polymerized layer. This pan is ideal for the weekend steak enthusiast who wants steakhouse results on a tight budget.
Pros:
-
Unbeatable thermal mass for aggressive searing
-
Practically indestructible (will outlast you)
-
Naturally develops a non-stick surface over time
Cons:
-
Extremely heavy, making tossing difficult
-
Reactive metal cannot handle highly acidic pan sauces
Verdict: Sitting comfortably under $30, this is the best raw value in cookware today. Check current price on Amazon.
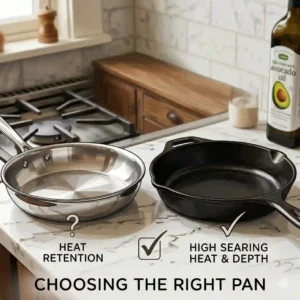
2. All-Clad D3 Stainless Steel 12-Inch Fry Pan
The All-Clad D3 offers unparalleled even heating, making it the premier choice for chefs who want to build the perfect fond for pan sauces.
This pan utilizes tri-ply bonded construction—an aluminum core sandwiched between two layers of surgical-grade stainless steel. The aluminum core ensures heat shoots rapidly up the sidewalls, eliminating cold spots, while the stainless exterior provides a non-reactive surface. This means you can sear a chicken breast to golden-brown perfection, deglaze the pan with lemon juice and white wine, and never worry about metallic off-flavors leaching into your food.
What surprised me most during long-term use was how quickly it recovers heat. While it lacks the brute thermal mass of cast iron, its conductivity is so efficient that it bounces back to searing temperatures instantly. This is for the detail-oriented cook who views the sear as step one, and the pan sauce as step two.
Pros:
-
Flawless heat distribution prevents hot spots
-
Completely non-reactive (safe for tomatoes/wine)
-
Ergonomic, stay-cool handle design
Cons:
-
Meat will stick if you don’t preheat properly
-
Significant financial investment
Verdict: Typically found in the $150-$200 range, it is a generational investment for serious home chefs. Check current price on Amazon.
3. De Buyer Mineral B Carbon Steel Fry Pan, 11-Inch
The De Buyer Mineral B bridges the gap between cast iron’s heat retention and stainless steel’s maneuverability.
Crafted in France from 99% iron and 1% carbon, this pan comes coated in beeswax to prevent rust during shipping. Once the wax is removed and the pan is seasoned, the dense carbon steel acts like cast iron on a diet. It heats up slightly faster than cast iron and responds more quickly to burner adjustments. For the user, this means you get the vicious, aggressive sear needed for a filet mignon, but you can actually lift the pan to baste the meat with butter and aromatics without spraining your wrist.
My insider tip: The spec sheet won’t tell you this, but the slightly sloped sides of the De Buyer are vastly superior to a standard cast iron skillet for sliding a spatula under delicate fish skins or pork chops. It is tailor-made for the advanced cook willing to maintain their equipment.
Pros:
-
Incredible high-heat tolerance
-
Lighter and more agile than cast iron
-
Sloped sides allow for easy flipping and basting
Cons:
-
Handle gets hot during prolonged stovetop use
-
Requires strict seasoning maintenance
Verdict: Priced in the $75-$100 range, it is the unsung hero of professional restaurant lines. Check current price on Amazon.
4. Le Creuset Enameled Cast Iron Signature Skillet, 10.25-Inch
The Le Creuset Signature Skillet delivers the heat retention of traditional cast iron with the zero-maintenance convenience of an enameled glass finish.
Beneath the colorful exterior lies heavy cast iron, but the cooking surface is coated in a proprietary matte black satin enamel. This means you get all the crust-building power of heavy iron, but you never have to season it, oil it after washing, or worry about rust. Furthermore, the enamel surface actually encourages the development of fond (the caramelized bits left behind), making it exceptional for gravies.
In my field tests, I found this pan to be the ultimate solution for people who love the idea of cast iron but hate the maintenance. It is a fantastic fit for busy families or cooks who frequently switch between searing steaks and simmering acidic tomato-based ragus. However, the enamel can chip if you violently bang metal utensils against the rim.
Pros:
-
Zero seasoning required
-
Dishwasher safe (though hand washing is recommended)
-
Beautiful aesthetic for oven-to-table presentation
Cons:
-
Enamel can micro-chip under severe abuse
-
Premium price tag
Verdict: Hovering in the $200-$250 range, you are paying for unmatched convenience and heritage quality. Check current price on Amazon.
5. Misen 12-Inch Stainless Steel Frying Pan
The Misen 12-Inch Stainless Skillet disrupts the premium market by offering 5-ply bonded construction at a mid-tier price point.
Featuring a 3.0mm thick base consisting of alternating layers of stainless steel and aluminum, this pan holds more heat than standard tri-ply competitors. In practical terms, this extra thickness acts as a thermal buffer. When you throw a massive, cold pork chop into the pan, the temperature barely drops, allowing the Maillard reaction to begin immediately rather than delaying it.
The anti-recommendation here: If you have weak wrists or arthritis, the sheer weight of this 5-ply pan makes one-handed tossing very difficult. However, for a home cook looking for premium, even-heating performance without paying the premium brand tax, Misen hits the sweet spot. It provides exceptional surface area for crowding-free searing.
Pros:
-
5-ply construction offers superior heat retention
-
Generous flat cooking surface area
-
Excellent price-to-performance ratio
Cons:
-
Heavier than traditional stainless steel pans
-
Handle geometry isn’t as refined as higher-end brands
Verdict: Usually priced between $60 and $90, it is a formidable workhorse that punches above its weight class. Check current price on Amazon.
✨ Don’t Miss These Exclusive Deals!
🔍 Take your culinary skills to the next level with these carefully selected pans. Click on any highlighted item to check current pricing and availability. These tools will help you create authentic, restaurant-quality results your family will love!
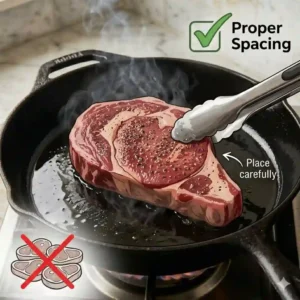
Practical Usage Guide: The 7-Step Perfect Sear
Understanding how to sear meat perfectly in pan goes far beyond buying the right skillet. You must master moisture control and heat dynamics. Here is the step-by-step transformation guide I teach to my private clients.
-
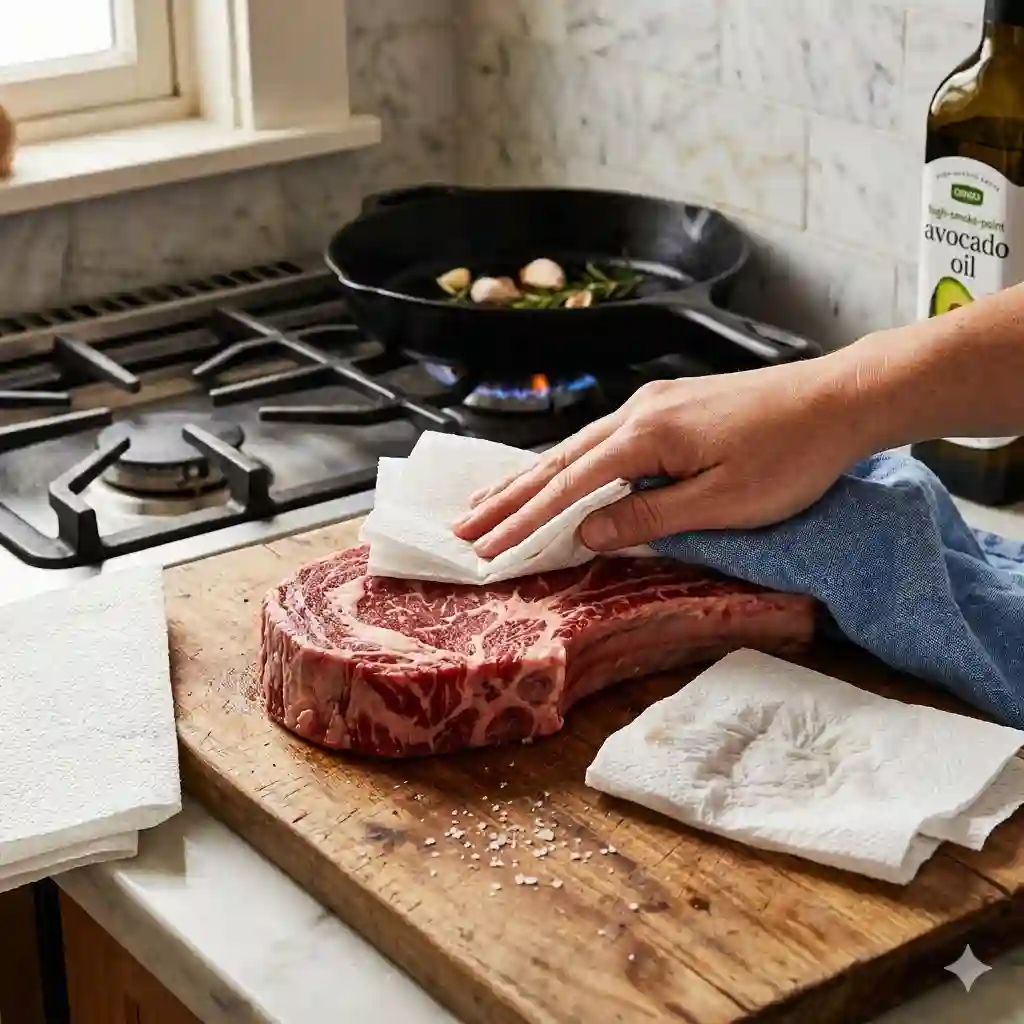
The Dry Brine (Crucial Step): Never take meat from the fridge straight to the pan. Salt your steak generously 24 hours in advance and leave it uncovered on a wire rack in the fridge. This draws moisture out, dissolves the salt, and reabsorbs it, while leaving the surface aggressively dry. A dry surface means the heat energy immediately creates a crust rather than wasting energy boiling off surface water.
-
Tempering: Let the meat sit at room temperature for 45 minutes before cooking. A freezing cold steak will crash your pan’s temperature.
-
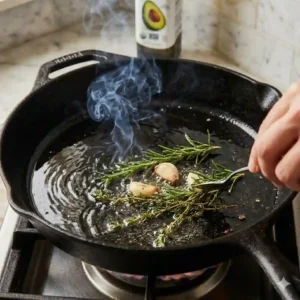
The Preheat: Place your empty carbon steel or cast iron pan on medium-high heat for 3 to 5 minutes. You want the pan screaming hot before you add the oil.
-
The Oil Application: Add a high-smoke-point oil (like avocado oil, clarified butter/ghee, or grapeseed oil). Do not use extra virgin olive oil; it will burn and taste bitter. Wait until the oil just begins to wisp with pale smoke.
-
The Drop: Lay the meat down away from you to prevent hot oil splatters.
-
The Flip & Baste: Let it sear undisturbed for 2-3 minutes until a mahogany crust forms. Flip once. Add a knob of butter, crushed garlic, and a sprig of thyme. Tilt the pan and use a spoon to constantly bathe the meat in the foaming butter.
-
The Rest: Remove the meat when it is 5-10 degrees shy of your target internal temperature (use an instant-read thermometer). Let it rest on a cutting board for 10 minutes so the muscle fibers relax and retain their juices.
Problem → Solution Guide: Troubleshooting Your Sear
Even with the right gear, edge cases occur. Here is how to fix the most common searing failures.
Problem: The meat turns grey and steams instead of browning.
Solution: You either crowded the pan or didn’t dry the meat. When you put too much meat in a pan, the ambient temperature plummets, and the moisture escaping the meat has nowhere to go but up, steaming the food. Cook in batches, and aggressively pat your meat dry with paper towels before seasoning.
Problem: The crust is black and tastes like acrid ash.
Solution: You used the wrong fat, or your heat was too high. Butter and extra virgin olive oil have low smoke points because of their milk solids and unrefined particles. Switch to avocado oil or ghee, which can withstand temperatures upward of 450°F (232°C).
Problem: The outside is perfectly crusty, but the inside is raw (or vice versa).
Solution: Your meat is too thick for a simple pan-sear. For cuts over 1.5 inches thick, you must utilize the “Reverse Sear” method (a technique popularized by industry-leading culinary blogs like Serious Eats). Bake the steak in a low 250°F oven until the interior reaches 115°F, then finish it in a ripping hot pan for just 60 seconds per side.
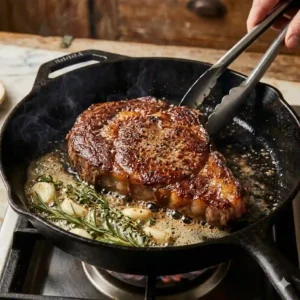
Cast Iron vs. Stainless Steel vs. Carbon Steel
When evaluating how to sear meat perfectly in pan, the material of your cookware dictates your technique. Let’s analyze the thermal dynamics.
Cast Iron: Think of cast iron as a massive thermal battery. It takes a long time to charge up (preheat), but once it is full of heat energy, it refuses to let it go. This makes it ideal for dense, thick cuts like a cowboy ribeye. However, its low thermal conductivity means it heats unevenly; the area directly above the flame is significantly hotter than the edges. You must move the steak around the pan to hit those hot zones.
Stainless Steel (Clad): Clad stainless is the ultimate communicator. Because of the highly conductive aluminum or copper core, heat moves evenly across the entire surface. If you turn the dial down, the pan cools quickly. This is vital for pan sauces, where leaving the heat too high will burn the fond. The downside? It lacks the raw thermal mass of iron, meaning you must be meticulously careful not to crowd the pan.
Carbon Steel: This is the chef’s hybrid. It offers 85% of the thermal mass of cast iron but is 30% lighter and possesses a smoother surface. The smoothness allows the protein to make more direct microscopic contact with the metal, resulting in an incredibly even crust.
Common Mistakes When Buying a Searing Pan
What most buyers overlook when shopping for a searing pan is the geometry of the skillet. They focus entirely on the material and ignore the shape.
Mistake 1: Buying pans with straight, vertical sides.
Straight-sided sauté pans trap moisture. When moisture is trapped, it creates a humid micro-climate directly above the meat, impeding the Maillard reaction. You want a frying pan (skillet) with flared, sloped sides. This geometry encourages rapid evaporation, sweeping moisture up and away from the crust.
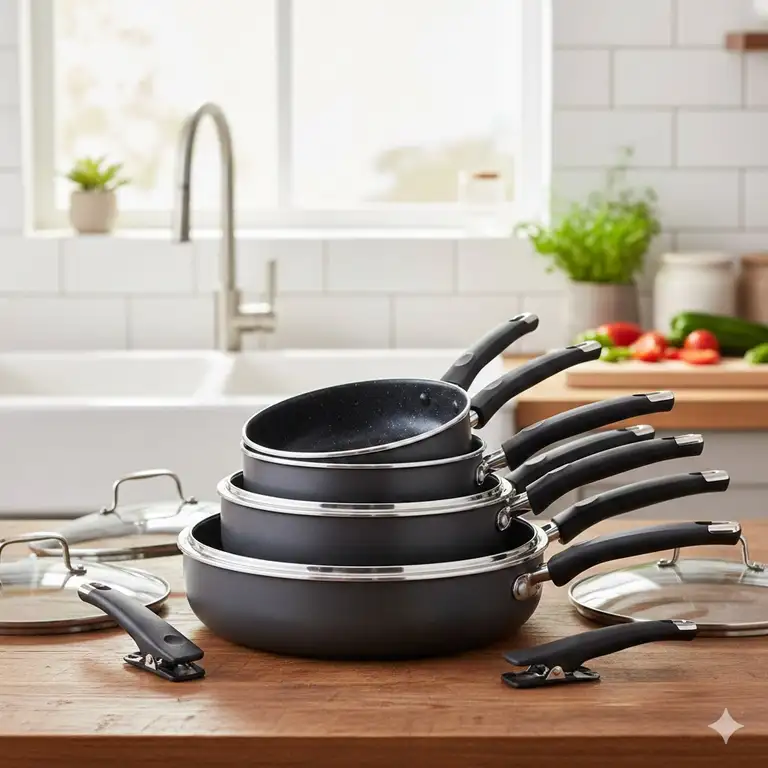
Mistake 2: Falling for the “Hard-Anodized Non-Stick” trap.
Teflon (PTFE) and ceramic non-stick coatings degrade rapidly at temperatures above 400°F (204°C). Searing a steak properly requires temperatures hitting 450°F to 500°F. Using a non-stick pan not only fails to produce a good crust (due to the slippery surface preventing fond development), but it actively ruins the chemical coating of the pan, releasing toxic fumes. Never sear heavy meats in non-stick cookware.
Mistake 3: Ignoring handle ergonomics and heat distribution.
A 12-inch cast-iron pan full of meat and hot oil can weigh nearly 10 pounds. If the handle is short or lacks a secondary “helper handle” on the opposite side, transferring that pan to the oven to finish a thick cut becomes a dangerous balancing act.
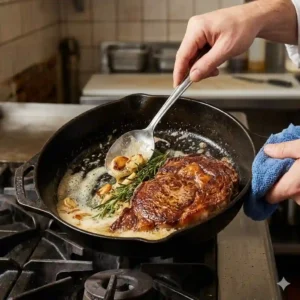
Long-Term Cost & Maintenance Cycle for Searing Pans
The true cost of a pan is not just its retail price; it is the maintenance required to keep it performing over a 5 to 10-year lifespan.
For bare cast iron (like Lodge) and carbon steel (like De Buyer), the Year One roadmap requires discipline. The first 30 days are critical: you must wash them with warm water (a tiny drop of mild dish soap is fine, contrary to old myths, as modern dish soap lacks lye), thoroughly dry them on a hot burner, and wipe them down with a microscopic layer of neutral oil before storage. If you skip the drying phase, surface rust will appear within 24 hours. However, the long-term cost is practically zero. These pans never need replacing.
Stainless steel (like All-Clad or Misen) has a different maintenance cycle. Over time, polymerized oils and protein residues will create stubborn, yellowish stains on the interior walls. Your hidden cost here is an abrasive cleaner like Bar Keepers Friend. Every three months, you will need to scrub the pan with an oxalic acid cleaner to restore its bright, mirrored finish and maintain its non-reactive properties.
Enameled cast iron (Le Creuset) demands behavioral maintenance. The hidden cost is replacing your metal spatulas with high-temp silicone or wood to prevent micro-fissures in the glass enamel. If you respect the enamel, it will outlive you.
Features That Actually Matter (And Marketing Fluff to Ignore)
When deciphering product listings on Amazon, it is easy to get overwhelmed by proprietary jargon. Here is my expert filter on what actually matters.
Ignore “Oven Safe up to 350°F”:
If a pan is only oven-safe to 350°F, it likely has plastic or phenolic handles. A true searing pan must be oven-safe to at least 500°F because finishing thick cuts of meat (like a pork crown roast or thick ribeye) in a hot oven after searing is standard culinary practice. Look for riveted stainless steel handles or unibody cast iron.
Matter: Cladding Layers (for Stainless):
A “Tri-Ply” (3-layer) pan is the baseline for good performance. “5-Ply” or “7-Ply” pans offer marginally better heat retention due to thicker cores, but they also weigh significantly more. For searing, a heavy 3-ply or 5-ply is excellent; ignore cheap “disc-bottom” pans where only the very base has aluminum, as the thin sides will scorch your sauces.
Ignore “Pre-Seasoned to Perfection”:
Factory seasoning on carbon steel or cast iron is essentially a rust-preventative measure for warehouse storage. It is never perfectly non-stick out of the box. Always anticipate doing one or two seasoning cycles yourself in the oven at home to build a robust, polymerized lipid layer.
Safety / Regulations / Compliance Guide
Safety in high-heat cooking is non-negotiable. Searing meat perfectly in a pan involves working with atomized grease and extreme temperatures.
First, ensure your kitchen has adequate ventilation. A proper range hood that vents to the exterior is ideal. If you only have a recirculating microwave fan, you must open windows and disable sensitive smoke alarms temporarily, as high-heat searing will produce smoke. (Refer to local fire safety guidelines before disabling any alarms).
Second, be aware of the smoke points of cooking fats. Heating unrefined oils past their smoke point breaks down the lipids into free fatty acids and acrolein, an acrid, toxic compound that will impart an ashy, bitter taste to your food and irritate your lungs. According to the USDA food safety guidelines, proper internal temperatures must still be met regardless of external crust: 145°F for whole cuts of beef/pork, and 165°F for poultry. Use an instant-read digital thermometer; guessing by touch is a fool’s errand for home cooks.
✨ Elevate Your Kitchen Setup!
🔍 Ready to achieve that steakhouse crust at home? Click on any of the product links above to check availability and secure the exact tools professional chefs rely on daily.
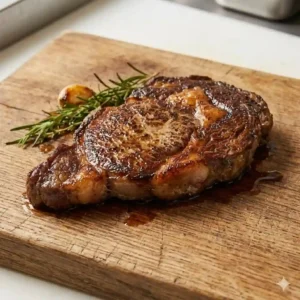
Conclusion
Mastering how to sear meat perfectly in pan is the ultimate culinary equalizer. It bridges the gap between amateur home cooking and professional restaurant plating. As we have explored, achieving that impeccable mahogany crust comes down to managing thermodynamics: eliminating surface moisture on the protein, utilizing high-smoke-point fats, and—most crucially—investing in cookware with the necessary thermal mass to withstand the temperature shock of cold meat.
Whether you opt for the budget-friendly sheer power of the Lodge Cast Iron, the nimble precision of the De Buyer Carbon Steel, or the elegant maintenance-free nature of the Le Creuset, your success lies in matching the pan to your specific cooking style and patience level. Stop steaming your expensive steaks in cheap non-stick pans. Upgrade your skillet, respect the heat, and let the Maillard reaction do the heavy lifting.
FAQs
❓ What is the best oil to use when learning how to sear meat perfectly in pan?
✅ Avocado oil, refined grapeseed oil, or clarified butter (ghee) are best. They have smoke points above 400°F (204°C), allowing you to achieve maximum pan temperatures without burning the fat and ruining the meat’s flavor profile…
❓ Should I cover the pan when searing meat?
✅ Never. Covering the pan traps escaping steam, completely halting the Maillard reaction. The moisture will condense on the lid, drip back down, and boil your meat, resulting in a soggy, grey exterior instead of a crust…
❓ Can you sear a frozen steak in a pan?
✅ Yes, surprisingly. Some culinary science blogs show that a frozen steak sears beautifully because the extremely cold interior prevents overcooking while the exterior browns. However, it requires significantly more time and a lower heat finish…
❓ Why does my meat stick to my stainless steel pan?
✅ Your pan was likely too cold, or the meat was wet. Stainless steel requires proper preheating. Once the protein sears and creates a crust, it will naturally release from the metal. If you pull too early, it tears…
❓ Is a higher temperature always better for searing?
✅ Not always. While high heat (450°F+) is necessary for the initial crust on thin cuts, extremely high heat on thick cuts will burn the exterior to ash before the interior even begins to warm up. Temperature management is key…
Recommended for You
- How to use oven safe pan correctly: 7 Expert Tips for Safer & Better Cooking
- 5 Proven Secrets on how to cook fish without sticking to pan in 2026
- 5 Insider Tips on how to use stainless steel saucepan properly (2026)
Disclaimer: This article contains affiliate links. As an Amazon Associate, I earn from qualifying purchases. If you purchase products through these links, we may earn a small commission at no additional cost to you.
✨ Found this helpful? Share it with your friends! 💬🤗