I know the feeling. You just bought a beautiful, shiny new skillet, and you’re ready to sear a steak like a Michelin-star chef. But then, disaster strikes. Your beautiful ribeye or those morning eggs stick to the surface like they’ve been superglued. You might think you need a Teflon pan, but I’m here to tell you that you just need to learn how to season a stainless steel pan properly. It sounds like something only meant for cast iron, but trust me, seasoning your stainless steel is the secret hack that will change your kitchen game forever. 🍳
✨Was this helpful? Spread the word! 🚀
When I first started cooking, I hated stainless steel. I thought it was just too high-maintenance. But once I realized that creating a natural, slick coating was possible, I never looked back. Stainless steel is durable, doesn’t leach chemicals, and gives you a sear that non-stick pans simply can’t touch. In this guide, I will walk you through the science, the steps, and the best tools to help you master the art of the kitchen.
Quick Comparison: Cooking Surfaces at a Glance
Before we dive into the “how-to,” let’s look at how seasoned stainless steel stacks up against other popular choices.
| Feature | Seasoned Stainless Steel | Traditional Non-Stick | Cast Iron |
| Durability | Extremely High | Low (coatings peel) | High (can rust) |
| Searing Ability | Superior | Poor | Excellent |
| Chemical-Free | Yes | Often No (PTFE/PFOA) | Yes |
| Ease of Cleaning | Moderate | Very Easy | Moderate |
| Weight | Medium | Light | Heavy |
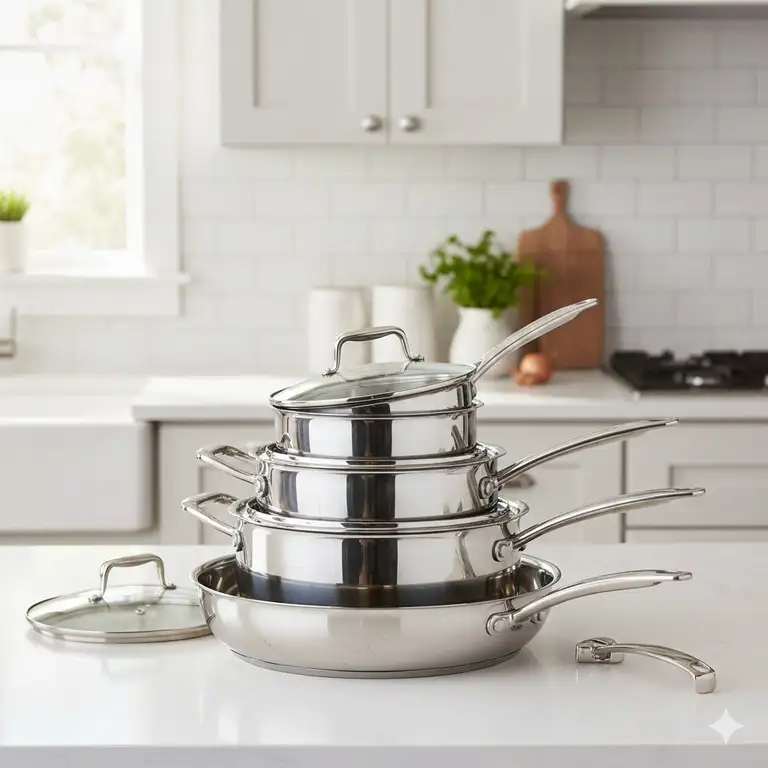
Top 7 Stainless Steel Pans: Expert Analysis
To learn how to season a stainless steel pan properly, you need a high-quality foundation. Here are the top performers currently available on Amazon that respond beautifully to seasoning.
1. All-Clad D3 3-Ply Stainless Steel Fry Pan (12-inch) (Model: 4112)
This is the gold standard in kitchens across the USA. It features a classic tri-ply construction with an aluminum core bonded between two layers of heavy-gauge stainless steel.
-
Technical Specifications: 12-inch diameter, 18/10 stainless steel interior, induction compatible, oven/broiler safe up to 600°F.
-
Customer Review Analysis: Users rave about its “even heating” and “lifetime durability.” Some beginners find it heavy, but most agree the heat retention is worth it.
-
Warranty: Limited Lifetime Warranty.
-
Professional Application: Ideal for high-heat searing and pan sauces.
-
Pros: Incredible heat distribution, made in the USA, very responsive.
-
Cons: Premium price point, handle can be uncomfortable for some.
2. Hestan ProBond Professional Clad Stainless Steel Skillet (Model: 31587)
The Hestan ProBond Professional Clad Stainless Steel Skillet is a luxury choice that offers 20% more cooking surface than traditional skillets due to its unique shape.
-
Technical Specifications: Triple-bonded clad construction, cold-forged stainless steel, sealed rims to prevent delamination.
-
Customer Review Analysis: Reviewers love the “flush rivets” which make cleaning a breeze. It’s noted for its high-end aesthetic and professional-grade performance.
-
Warranty: Lifetime Warranty.
-
Professional Application: Best for chefs who want a sleek look and maximized surface area.
-
Pros: Flush rivets, scratch-resistant, beautiful design.
-
Cons: Very expensive, might be overkill for casual home cooks.
3. Tramontina 12-inch Gourmet Tri-Ply Clad Fry Pan (Model: 80116/007DS)
If you want the performance of high-end brands without the massive bill, this is your best bet. It is frequently cited as the best value pan on the market.
-
Technical Specifications: Tri-ply clad construction, 18/10 stainless steel, NSF-certified.
-
Customer Review Analysis: Customers call it the “All-Clad killer.” It performs nearly identically in tests but costs significantly less.
-
Warranty: Lifetime Warranty.
-
Professional Application: Great for heavy-duty daily use in home kitchens.
-
Pros: Outstanding value, ergonomic handle, very durable.
-
Cons: Not as “prestigious” as higher-end brands, slightly slower to heat up.
4. Made In Cookware 12-inch Stainless Clad Frying Pan
The Made In Cookware 12-inch Stainless Clad Frying Pan has gained a cult following online for its 5-ply construction and chef-inspired design.
-
Technical Specifications: 5-ply construction (3 layers of aluminum, 2 layers of steel), stays cool handle, 360-degree clad.
-
Customer Review Analysis: Users love how “slippery” the surface becomes once they learn how to season a stainless steel pan properly. It is praised for its weight balance.
-
Warranty: Lifetime Warranty.
-
Professional Application: Excellent for restaurant environments where speed is key.
-
Pros: 5-ply heating, great weight balance, modern brand.
-
Cons: Direct-to-consumer focus makes it harder to find in local shops.
5. Cuisinart MultiClad Pro Triple Ply Stainless 12-Inch Skillet (Model: MCP22-30HN)
A staple in many American homes, the Cuisinart MultiClad Pro Triple Ply Stainless 12-Inch Skillet offers a brushed exterior that looks great even after years of use.
-
Technical Specifications: Heat Surround technology, Cool Grip handle, tapered rim for drip-free pouring.
-
Customer Review Analysis: Highly rated for its “bang for the buck.” Many users transitioned from non-stick to this pan successfully.
-
Warranty: Limited Lifetime Warranty.
-
Professional Application: Best for residential cooking and basic meal prep.
-
Pros: Affordable, drip-free pouring, very easy to find.
-
Cons: Some reports of the handle feeling a bit thin.
6. Mauviel M’Cook 5 Ply Stainless Steel Fry Pan (Model: 5213.30)
Hailing from France, the Mauviel M’Cook 5 Ply Stainless Steel Fry Pan is a masterpiece of European engineering.
-
Technical Specifications: 2.6mm thickness, 5-ply construction, cast stainless steel handle with iron electroplated finish.
-
Customer Review Analysis: Users appreciate the “artistry” and the incredibly fast heat response. It’s often described as a “workhorse that looks like a showpiece.”
-
Warranty: Lifetime Warranty.
-
Professional Application: Ideal for delicate tasks like making omelets or searing fish.
-
Pros: Exceptional heat control, beautiful French design.
-
Cons: Expensive, requires careful heat management because it heats so fast.
7. Heritage Steel 12-inch Core Skillet (Model: HSC-11512)
The Heritage Steel 12-inch Core Skillet uses a specialized “316Ti” stainless steel, which is infused with titanium for extra corrosion resistance.
-
Technical Specifications: 5-ply construction, 316Ti titanium-strengthened surface, made in Clarksville, TN.
-
Customer Review Analysis: Reviewers mention that food releases much easier on this surface compared to standard 18/10 steel.
-
Warranty: Lifetime Warranty.
-
Professional Application: Best for acidic cooking (like tomato sauces) that can sometimes pit regular steel.
-
Pros: Titanium-reinforced, very corrosion-resistant, American made.
-
Cons: Harder to find, slightly more expensive than standard 3-ply.
Detailed Technical Specifications Matrix
| Product Name | Material | Layers | Handle Type | Max Temp |
| All-Clad D3 | 18/10 Steel/Alum | 3-Ply | Riveted U-Shape | 600°F |
| Hestan ProBond | Cold-Forged Steel | 3-Ply | Flush Rivets | 600°F |
| Tramontina Gourmet | 18/10 Steel/Alum | 3-Ply | Riveted Ergonomic | 500°F |
| Made In Skillet | Stainless Clad | 5-Ply | Stay-Cool Riveted | 800°F |
| Cuisinart MultiClad | 18/10 Steel | 3-Ply | Cool Grip | 550°F |
| Mauviel M’Cook | 18/10 Steel | 5-Ply | Cast Stainless | 600°F |
| Heritage Steel | 316Ti Titanium/Steel | 5-Ply | Stay-Cool Hollow | 800°F |
✨ Don’t Miss These Exclusive Deals!
🔍 Take your kitchen to the next level with these carefully selected products. Click on any highlighted item to check current pricing and availability. These tools will help you achieve that perfect, non-stick surface you’ve always dreamed of! ✨
💬 Just one click – help others make better buying decisions too!😊
The Science Behind Seasoning Stainless Steel
Before we get our hands oily, I want to explain why we do this. Stainless steel isn’t actually “smooth” at a microscopic level. It has tiny pores and crevices. When you heat the pan, the metal expands and these pores open up. If you put food into a cold pan, the proteins get trapped in those pores as the pan heats up. That is why your chicken breast feels like it’s been welded to the metal. 🔬
When you learn how to season a stainless steel pan properly, you are essentially using oil to fill those microscopic pores. The oil undergoes a process called polymerization. Under heat, the oil molecules bond together to create a plastic-like, slick coating. This is the exact same principle used for cast iron, but because stainless steel is less porous, the seasoning is more of a temporary “layer” rather than a permanent build-up.
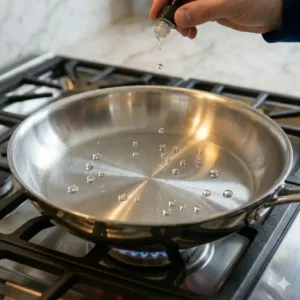
The Leidenfrost Effect
Have you ever seen water droplets dance on a pan like they’re on a hovercraft? That’s the Leidenfrost effect. This happens when the pan is hot enough that the bottom of the water droplet evaporates instantly, creating a cushion of steam that lifts the rest of the droplet. When you combine a well-seasoned pan with the Leidenfrost effect, you get a surface that is virtually as slick as Teflon.
Step-by-Step: How to Season a Stainless Steel Pan Properly
I’ve tried a dozen ways to do this, and this method is the most reliable. You don’t need fancy equipment—just oil, heat, and a bit of patience.
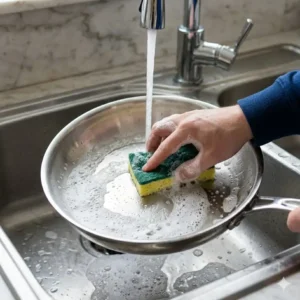
Step 1: Deep Clean the Pan
If your pan is brand new, it might have factory oils or residues. If it’s used, it might have old food particles. Scrub it thoroughly with warm soapy water and a sponge. Dry it completely. Any moisture left on the pan will interfere with the oil bonding.
Step 2: Choose the Right Oil
Not all oils are created equal. You need an oil with a high smoke point. If the oil burns (smokes) before it polymerizes, you’ll end up with a sticky, gummy mess instead of a slick surface.
Recommended Oils:
-
Grapeseed Oil (High smoke point, neutral)
-
Canola Oil (Affordable, high smoke point)
-
Vegetable Oil (Standard choice)
-
Avocado Oil (Very high smoke point)
Avoid: Extra Virgin Olive Oil or Butter (they burn too quickly).
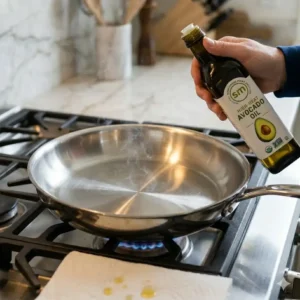
Step 3: Heat the Pan
Place your clean, dry pan over medium-high heat. Let it get hot for about 2-3 minutes. You can test the heat by flicking a few drops of water onto it. If the water sizzles and evaporates, it’s not ready. If the water beads up and rolls around (the Leidenfrost effect!), you are at the “Sweet Spot.”
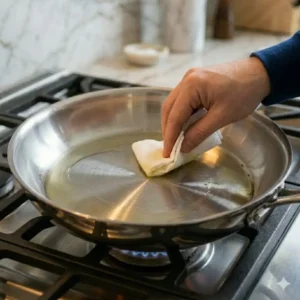
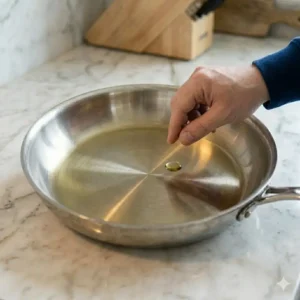
Step 4: Apply the Oil
Pour about 1-2 tablespoons of your chosen oil into the pan. Swirl it around so the entire bottom and the sides are coated.
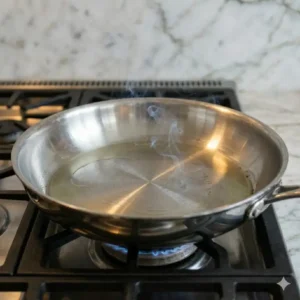
Step 5: Heat until Smoking
Watch the oil closely. You want to wait until you see a thin, wispy trail of smoke. This indicates that the oil is reaching the temperature where polymerization begins. Once it starts smoking, let it go for about 30-60 seconds, then remove the pan from the heat.
Step 6: Cool Down
This is the part most people skip! Let the pan cool down completely. This allows the oil to “set” into those microscopic pores we talked about earlier. I usually leave it for about 10-15 minutes.
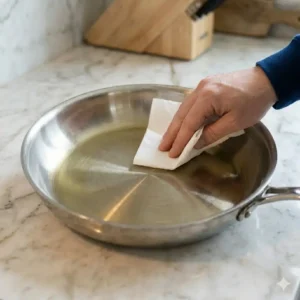
Step 7: Wipe Away Excess
Once the pan is cool, take a clean paper towel and wipe out the excess oil. The pan should look shiny and feel slightly slick, but it shouldn’t be greasy or sticky. You have now mastered how to season a stainless steel pan properly!
Budget vs. Premium: Value Comparison
| Category | Budget (e.g., Cuisinart) | Premium (e.g., Hestan) |
| Material Quality | Standard 18/10 Steel | Cold-Forged / Titanium-Infused |
| Heating Speed | Average | Rapid & Uniform |
| Build Origin | Often Imported | Often USA/Europe |
| Ergonomics | Functional | Luxury/High-Comfort |
| Seasoning Longevity | Moderate | High (due to better finish) |
Maintenance: Keeping the Slick Surface Alive
Now that you know how to season a stainless steel pan properly, how do you keep it that way? Unlike cast iron, this seasoning isn’t meant to last forever. Every time you use soap or cook something highly acidic (like tomato sauce), you’ll likely strip that thin layer of oil.
The Golden Rules of Maintenance:
-
Don’t Scrub Too Hard: After cooking, if there’s no stuck food, just wipe the pan with a paper towel.
-
Avoid the Dishwasher: The high heat and harsh detergents in a dishwasher will destroy your seasoning instantly. Always hand wash. 🧼
-
Re-season Frequently: I usually re-season my pan once every 3-4 uses, or whenever I notice food starting to stick again.
-
The “Salt Scrub” Trick: If you have stuck-on food, don’t use a metal scourer. Use a tablespoon of Kosher salt and a tiny bit of oil to scrub the residue away. This preserves the seasoning while cleaning the pan.
Performance Metrics Comparison
| Metric | Non-Seasoned Stainless | Well-Seasoned Stainless |
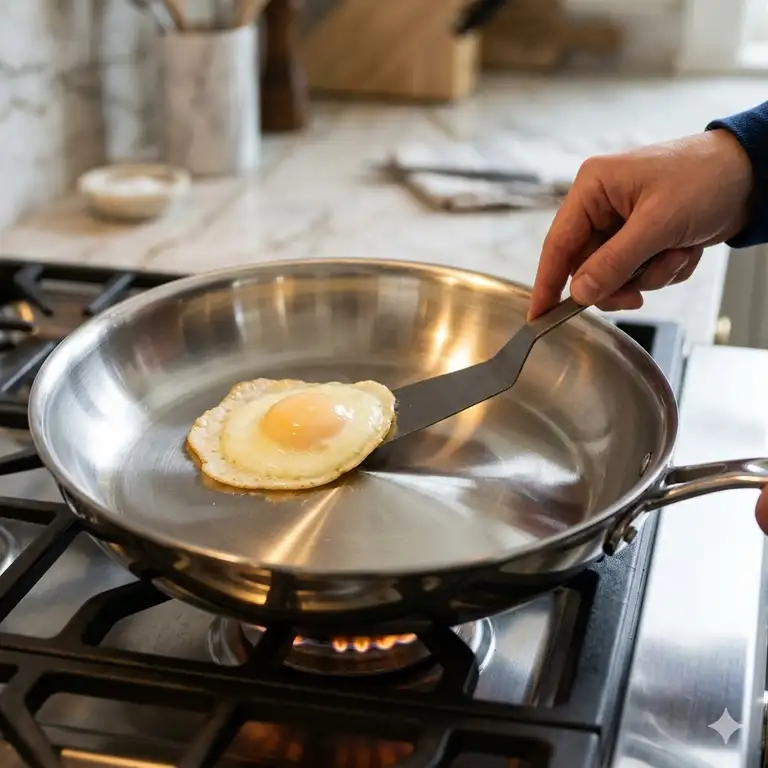
| Egg Release Test | 2/10 (High sticking) | 9/10 (Slides easily) |
| Searing Crust | 10/10 | 10/10 |
| Heat Recovery | 8/10 | 8/10 |
| Chemical Safety | 10/10 | 10/10 |
Why Seasoning stainless steel pans is a Game Changer
When you focus on seasoning stainless steel pans, you unlock a level of versatility that other pans can’t match. For example, a cast iron skillet is great, but it’s heavy and reacts poorly to wine-based sauces. A non-stick pan is convenient, but you can’t put it under a broiler to finish a frittata.
A seasoned stainless skillet is the “middle ground” of the culinary world. You get the non-stick properties of Teflon, the searing power of iron, and the lightweight maneuverability of professional gear. I find that when I season stainless steel pan properly, I end up using less butter and oil during the actual cooking process because the surface is already primed.
Benefits vs. Traditional Alternatives
| Benefit | Seasoned Stainless | Teflon/Non-Stick | Ceramic |
| Longevity | Decades | 1-3 Years | 1-2 Years |
| High Heat Safe | Yes (up to 600°F+) | No (Toxic fumes above 500°F) | Mixed |
| Metal Utensil Safe | Yes | No | No |
| Flavor Development | Excellent (fond) | Poor | Moderate |
Troubleshooting Common Issues
Sometimes, even when you think you’ve learned how to season a stainless steel pan properly, things go wrong. Here’s how to fix common hiccups:
The Pan is Sticky
If the pan feels gummy or sticky after seasoning, you either used too much oil or didn’t heat it enough. To fix this, scrub the pan back down to the bare metal with some Bar Keepers Friend and start over. Remember: Thin layers are the key.
Food Still Sticks
This usually happens because the pan wasn’t hot enough before you added the food. Even a seasoned pan needs to be preheated. Always use the “water drop test” before adding your ingredients.
Discoloration (Rainbow Stains)
You might notice a rainbow-like tint on your pan after heating. This is called “heat tint” and is perfectly normal. It’s just a thin layer of oxidized chromium. If it bothers you, a splash of vinegar or a rub with lemon juice will take it right off.
Requirement Analysis for Different Users
| User Type | Recommended Pan | Key Requirement |
| Home Hobbyist | All-Clad D3 | Reliability and Brand Trust |
| Budget Cook | Tramontina Gourmet | High Performance at Low Cost |
| Professional Chef | Hestan ProBond | Speed, Surface Area, Durability |
| Health Conscious | Heritage Steel | Non-Reactive Surface (316Ti) |
| Aesthetic Seeker | Mauviel M’Cook | Style and French Heritage |
Expert Tips for the Perfect Sear
Now that your pan is seasoned, let’s talk about the actual cooking. Learning how to season a stainless steel pan properly is only half the battle. The other half is technique.
-
Dry Your Food: Moisture is the enemy of a sear. If your steak is wet, it will steam instead of searing. Pat everything dry with paper towels before it hits the pan.
-
Don’t Crowd the Pan: If you put too much food in at once, the temperature of the pan will drop, the seasoning won’t be able to do its job, and the food will release juices that cause sticking.
-
Wait for the Release: This is the most important tip! When you put a piece of protein down, it will initially “grab” the pan. Do not move it. As the sugars caramelize (the Maillard reaction), the food will naturally “release” from the seasoned surface. If it’s sticking, it’s usually not done searing yet.
Cleaning Methods Comparison
| Method | Best For | Effectiveness | Preserves Seasoning? |
| Paper Towel Wipe | Light grease | 5/10 | Yes |
| Salt & Oil Scrub | Stuck bits | 8/10 | Yes |
| Baking Soda Paste | Mild stains | 7/10 | Partially |
| Bar Keepers Friend | Burnt-on mess | 10/10 | No |
✨ Upgrade Your Culinary Skills!
🔍 Ready to put these tips into practice? Make sure you have the right tools for the job. Click on any of the product names in our Top 7 list to see the best deals on Amazon. Investing in a high-quality pan is the first step toward cooking like a pro! 🍳
Conclusion: Your Path to Kitchen Mastery
Learning how to season a stainless steel pan properly is like a rite of passage for any serious home cook. It moves you away from the “disposable” culture of cheap non-stick pans and into the world of professional-grade tools that last a lifetime. By following these 7 steps—cleaning, choosing the right oil, heating, and cooling—you transform a simple piece of metal into a high-performance cooking machine.
Remember, the key is patience. Don’t rush the preheating, and don’t be afraid to re-season if things get a bit sticky. With a little practice, you’ll be sliding eggs across your All-Clad or Tramontina just like the pros. You’ll get better flavor, better sears, and a pan that you can pass down to your kids.
FAQs
✅ It's not recommended. Extra virgin olive oil has a low smoke point (around 325-375°F), meaning it will burn and become bitter before it can properly polymerize and create a slick coating on your skillet...
✅ Unlike cast iron, stainless steel seasoning is temporary. You should ideally re-season it whenever you notice food sticking or after using heavy soap. Most regular users find re-seasoning every 3-5 uses keeps the surface perfect...
✅ While not 100% identical, a properly seasoned stainless pan can handle eggs and fish with ease. The advantage is that it lacks the toxic coatings of traditional non-stick pans and lasts for decades rather than years...
✅ Grapeseed oil and avocado oil are the top choices due to their high smoke points and neutral flavors. They allow the pan to reach the necessary temperatures for polymerization without creating acrid smoke or off-flavors in your food...
✅ Not directly. Rainbow stains are a result of overheating the chromium in the steel. However, the thin layer of oil from seasoning can help mask these spots and prevent further mineral buildup from hard water... ❓ Can I season a stainless steel pan with olive oil?
❓ How often should I season my stainless steel pan?
❓ Is a seasoned stainless steel pan as good as a non-stick pan?
❓ What is the best oil for seasoning stainless steel?
❓ Does seasoning help with the rainbow stains on stainless steel?
Recommended for You:
- 7 Best stainless steel sauce pan with lids for 2026 Professional Chefs
- Wolfgang Puck Cookware Review: 7 Best Sets and Pans Tested for 2026
- Saucepans That Can Go In The Oven: 7 Best Professional Picks for 2026
Disclaimer: This article contains affiliate links. If you purchase products through these links, we may earn a small commission at no additional cost to you.
✨ Found this helpful? Share it with your friends! 💬🤗