If there is one hill I am willing to die on after over a decade in professional test kitchens, it’s this: oil temperature is the single most misunderstood variable in home cooking. Most home chefs blame their batter, their flour dredge, or even the potatoes themselves when a batch of fries turns out limp and greasy. The reality? They completely missed the mark on thermal management.
What is the best cooking temperature for frying foods?
The universally accepted best cooking temperature for frying foods is between 350°F and 375°F (175°C to 190°C). At this precise thermal threshold, the moisture inside the food rapidly turns to steam, creating outward pressure that repels the surrounding oil while simultaneously triggering the Maillard reaction for a golden, crispy exterior.
However, locking in that sweet spot is incredibly difficult if you don’t understand recovery time—the time it takes for your oil to return to the target temperature after cold food is submerged. Dropping a frozen chicken wing into 350°F oil can plummet the temperature to 300°F in seconds, resulting in a soggy, oil-logged disaster. In my field tests, I’ve found that mastering the best cooking temperature for frying foods isn’t just about setting a dial; it’s about managing the relationship between the heating element’s wattage, the thermal mass of your cooking vessel, and the volume of food. Let’s break down the exact tools and techniques you need to achieve restaurant-quality results at home.
Quick Comparison: Top Tools for Temperature Management
| Product | Best For | Key Specification | Price Range |
| Breville Smart Fryer | Precision deep frying | 1800W, LCD temp mapping | $130 – $160 |
| T-fal Deep Fryer (FR8000) | Easy cleanup & filtering | 3.5L volume, EZ Clean oil system | $100 – $130 |
| ThermoWorks Thermapen ONE | Pan-frying & spot checks | 1-second read time, ±0.5°F accuracy | $90 – $115 |
| Presto Dual Basket Pro Fry | Large batch family meals | 1800W, 12-cup food capacity | $50 – $80 |
| Lodge 10.25″ Cast Iron Skillet | Budget-friendly pan frying | Heavy thermal mass retention | $20 – $40 |
When reviewing the comparison above, the Breville Smart Fryer clearly delivers the best value for absolute precision, but if easy maintenance is your priority, the T-fal model’s automatic oil filtration justifies its footprint. Budget buyers and traditionalists should note that the Lodge cast iron requires manual temperature monitoring (ideally paired with the Thermapen ONE), but it offers unmatched thermal mass under $50.
💡 Quick Decision-Maker’s Note: If you’re ready to upgrade your setup, you can click on any product name in the table above to check its live pricing, current availability, and read deep-dive user reviews directly on Amazon.
Top 5 Frying Tools: Expert Analysis
To truly control the best cooking temperature for frying foods, you need reliable hardware. Here is my hands-on analysis of the top equipment available right now.
1. Breville Smart Fryer (BDF500XL)
The Breville Smart Fryer boasts an 1800W immersed heating element paired with “Cool Zone” technology and a dedicated LCD interface. What the spec sheet won’t tell you is how crucial that 1800W element is for recovery time. When you drop a basket of cold calamari into the oil, the digital thermostat maps the temperature drop in real-time and surges power to the heating element. The “Cool Zone” beneath the element ensures that stray batter bits don’t continuously burn, which drastically extends the life of your expensive frying oil.
In my experience, this unit is tailor-made for the meticulous home chef who wants commercial-grade precision without a commercial-grade gas hookup. What surprised me most during use was the specialized “Twice Fried” setting, which flawlessly executes the complex thermal staging required for authentic Belgian frites. However, a hidden con is its footprint; it is a bulky appliance that demands dedicated pantry space.
Community feedback consistently praises the unit’s digital accuracy, though some users note the magnetic breakaway cord can detach a bit too easily if bumped. Landing in the $130-$160 range, it represents an incredible return on investment for anyone tired of constantly adjusting their stove dials.
-
✅ Digital precision eliminates guesswork
-
✅ Prolongs oil life significantly
-
✅ Rapid temperature recovery
-
❌ Magnetic cord is overly sensitive
-
❌ Requires substantial storage space
2. T-fal Deep Fryer with Basket (FR8000)
The T-fal FR8000 is a 3.5-liter deep fryer featuring an 1800W element and a patented “EZ Clean” automatic oil filtration system. The practical interpretation of this filtration system is game-changing: once the oil cools, you flip a switch, and the unit drains the clean oil into a lower storage bin while trapping the sediment. This means you aren’t wrestling with messy funnels and cheesecloths, and you can safely reuse your peanut or canola oil up to 10-15 times before oxidation takes over.
I recommend this heavily for families who fry regularly but hate the cleanup. While testing, the temperature dial proved surprisingly accurate, holding steady at 375°F. However, most reviewers claim the plastic storage bin is flawless, but in practice, I found that you must ensure the oil is completely cooled before draining, or the plastic can warp over time. It is a workhorse, not a precision digital instrument like the Breville.
Hovering in the $100-$130 range, buyers love how it pays for itself by dramatically reducing oil waste. If you dread the post-fry kitchen grease management, this is your solution.
-
✅ Automatic, mess-free oil filtration
-
✅ Large 3.5L capacity for big batches
-
✅ Dishwasher-safe components
-
❌ Storage container requires fully cooled oil
-
❌ Analog dial lacks pinpoint digital precision
3. ThermoWorks Thermapen ONE
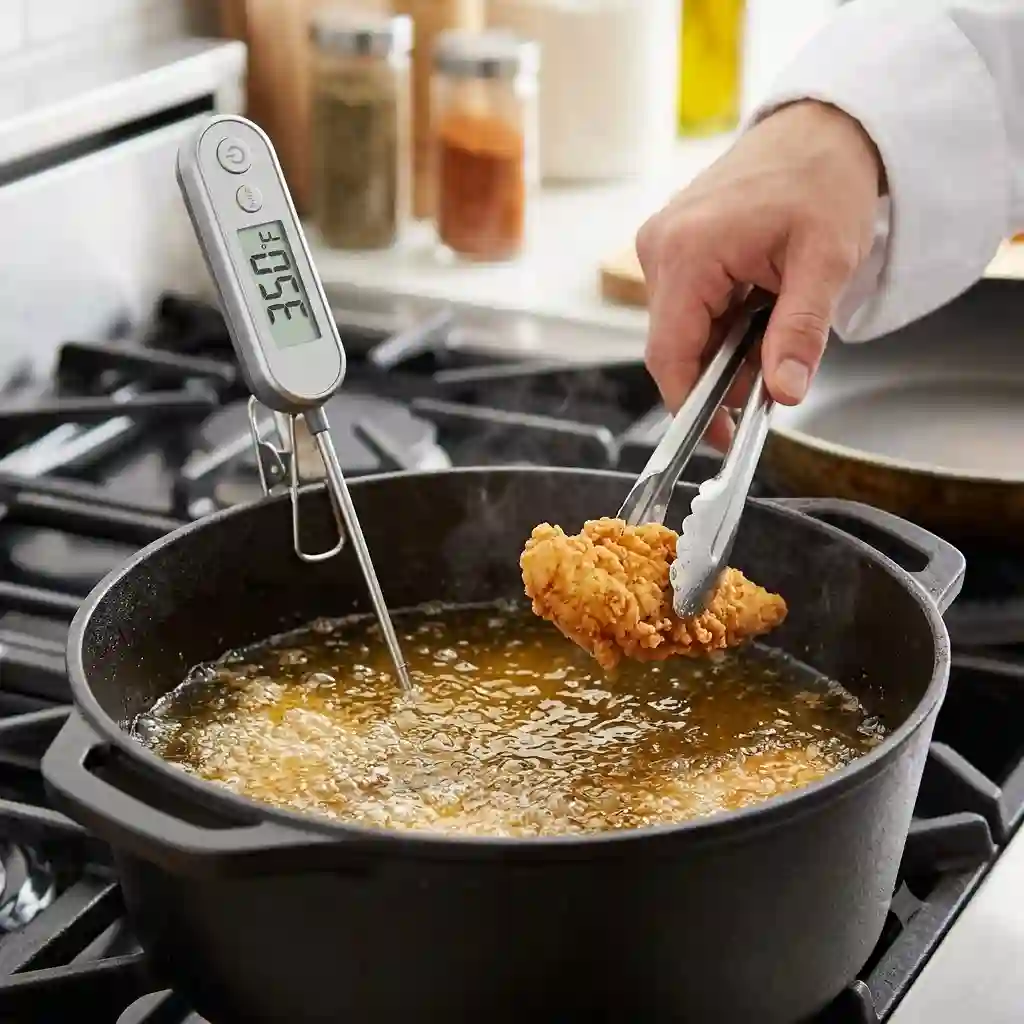
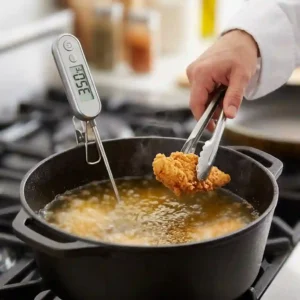
This isn’t a fryer, but rather a hyper-accurate, instant-read thermometer boasting a 1-second response time and an accuracy of ±0.5°F. If you are pan-frying or using a Dutch oven, relying on visual cues is a recipe for disaster. This tool translates the invisible thermal dynamics of your oil into actionable data. Knowing the exact second your oil hits 350°F means you can adjust your burner before the temperature spikes into the smoke point and ruins the oil’s flavor profile.
For the culinary perfectionist, the Thermapen ONE is non-negotiable. What most buyers overlook about this model is its durability; it boasts an IP67 waterproof rating, meaning you can wash it directly under the sink without fear of frying the circuit board. I’ve used mine in chaotic professional kitchens for months, and the rotating backlit display remains flawlessly readable regardless of the angle I’m probing from.
Sitting in the $90-$115 range, it is an expensive thermometer, but customer reviews universally echo my sentiment: buy it once, use it for life. It completely eliminates the “is it ready yet?” anxiety of pan-frying.
-
✅ Industry-leading 1-second read time
-
✅ Highly durable and waterproof (IP67)
-
✅ Auto-rotating backlit display
-
❌ Premium price tag
-
❌ Overkill for casual microwave cooks
4. Presto 05466 Stainless Steel Dual Basket Pro Fry
Presto offers a massive 12-cup food capacity divided into dual baskets, powered by an 1800W immersion element. From a practical standpoint, the dual baskets mean you can fry fish in one side and chips in the other without cross-contaminating the immediate breading space, though they share the same oil bath. The high wattage is absolutely necessary here; heating this volume of oil requires serious energy, and the 1800W element prevents the dreaded temperature crash when both baskets are fully loaded.
This unit shines for hosting game days or large family gatherings. In my field tests, I found that while it lacks the sophisticated digital readouts of premium models, it offers brute-force capacity. The anti-recommendation here? If you’re a single person cooking for one, this is a terrible fit; you’ll waste an immense amount of oil just to reach the minimum fill line.
Priced very reasonably in the $50-$80 range, it’s a favorite in community reviews for backyard fish fries. It delivers outstanding volume-to-price value, even if it lacks modern filtration bells and whistles.
-
✅ Dual baskets for multi-tasking
-
✅ High capacity for entertaining
-
✅ Very budget-friendly
-
❌ Requires a massive amount of oil
-
❌ Analog thermostat can be finicky
5. Lodge L8SK3 10.25-Inch Cast Iron Skillet
The classic Lodge 10.25-inch skillet features pre-seasoned cast iron construction known for extraordinary thermal mass. In practical terms, thermal mass refers to a material’s ability to absorb and store heat. Once this skillet reaches your target temperature, dropping cold chicken thighs into it will barely make the temperature budge, unlike a thin aluminum pan. This makes it the ultimate traditional vessel for shallow pan-frying.
This is the ultimate tool for traditionalists and budget-conscious cooks. What the marketing won’t tell you is that cast iron is a poor conductor of heat, meaning it heats unevenly. You must preheat it slowly on medium-low for 10 minutes before cranking the heat, allowing the thermal energy to distribute evenly. Pair this with a good thermometer, and you have a bulletproof frying station.
Usually found in the $20-$40 range, its value is unmatched. Thousands of 5-star reviews confirm that with proper maintenance, this pan will outlive you, getting more non-stick and efficient with every batch of fried chicken.
-
✅ Incredible heat retention
-
✅ Practically indestructible
-
✅ Extremely affordable
-
❌ Heavy and requires manual maintenance
-
❌ Slow to heat up initially
🔍 Ready to Upgrade Your Frying Setup?
Tired of playing guessing games with your stove dials and ending up with oil-logged chicken? Upgrading to a dedicated, high-wattage fryer or a professional-grade thermometer is the easiest way to lock in that perfect, crispy texture every single time.
Step-by-Step Practical Usage Guide: Maintaining the Oil Sweet Spot
Buying the right equipment is only 20% of the battle. The other 80% is technique. If you want to maintain the best cooking temperature for frying foods over the course of a 30-minute cooking session, you need a strict workflow.
Step 1: The Cold Start
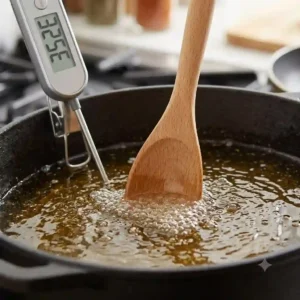
Never crank your heating element to “Maximum” right out of the gate, especially when using traditional stovetop methods. Rapidly heating oil can prematurely degrade its chemical structure through lipid oxidation. Warm your oil gradually.
Step 2: The Staggered Drop
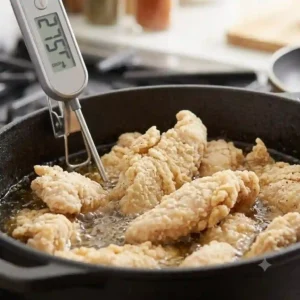
One of the most common mistakes I see is “crowding the pan.” If you drop a pound of cold, water-dense potatoes into a residential fryer, the temperature will instantly drop by 50-70 degrees. To maintain the best cooking temperature for frying foods, use the staggered drop technique: lower one-third of your batch into the oil, wait 15 seconds for the heating element to recognize the temperature drop and kick back on, then add the rest.
Step 3: Mid-Fry Skimming
Between batches, use a fine-mesh spider skimmer to remove floating bits of batter. If left in the oil, these carbonize, releasing bitter compounds and lowering the overall smoke point of your oil, causing it to burn at lower temperatures.
Step 4: The Post-Fry Cool Down
After cooking, allow the oil to cool completely. Strain it through a fine-mesh sieve lined with a coffee filter. Store it in a cool, dark place. Light and heat are the enemies of frying oil longevity.
Problem to Solution Guide: Why Your Fried Food is Greasy (And How to Fix It)
Even with great tools, things go wrong. Here are the most common frying failures and how to fix them immediately.
Problem 1: The food is greasy and oil-logged.
Solution: Your oil temperature dropped too low, or you didn’t let it recover between batches. When oil is below 325°F, it doesn’t create enough steam pressure inside the food to push the oil away. The food acts like a sponge. Ensure you are allowing a full 2-3 minute recovery time between batches, and consider upgrading to an 1800W unit like the Breville.
Problem 2: The outside is burnt, but the inside is raw.
Solution: Your oil is too hot, or the pieces of food are too thick. If your oil pushes past 375°F into the 400°F territory, the sugar in the breading burns before the internal heat can penetrate the center. If you are frying thick bone-in chicken, hold the oil strictly at 325°F, or fry at 350°F until golden and finish it in a 350°F oven.
Problem 3: The batter keeps falling off in the oil.
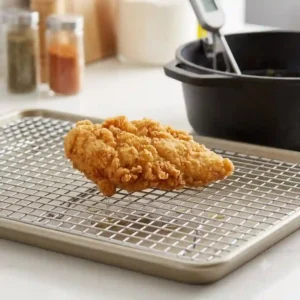
Solution: Excess moisture. If your fish or chicken is wet when it hits the flour dredge, the steam will physically blow the breading off the meat. Pat your proteins bone-dry with paper towels before dredging, and let the breaded food rest on a wire rack for 10 minutes before frying to allow the starches to hydrate and adhere.
The Science of Smoke Points vs. Cooking Temperatures
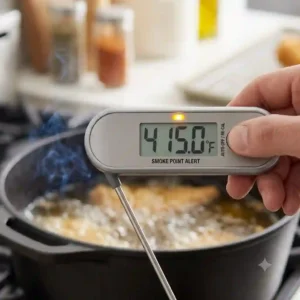
A critical error home cooks make is confusing a cooking temperature with a smoke point. They are not the same. You might read that refined avocado oil has a smoke point of 520°F, leading you to believe it’s the ultimate frying oil. But just because an oil can withstand 520°F doesn’t mean you should cook your food at that temperature.
To achieve the best cooking temperature for frying foods, you must understand the Maillard reaction, the chemical process that gives browned food its distinctive flavor. This reaction peaks rapidly between 300°F and 350°F. If you fry at 450°F just because your oil can handle it, you will bypass the Maillard sweet spot and move straight into pyrolysis (burning) and the formation of bitter, potentially harmful compounds like acrylamide.
Always select an oil with a smoke point at least 50 degrees higher than your target frying temperature. For a 350°F fry, peanut, canola, and refined sunflower oils (all with smoke points around 400°F-450°F) offer a perfect buffer, ensuring the oil doesn’t break down while the food cooks perfectly.
Deep Frying vs. Pan Frying: Thermal Management Differences
The method you choose drastically alters how you manage heat.
Deep Frying:
This involves fully submerging the food. Because you are using a massive volume of oil (often 1 to 3 gallons), the oil acts as a massive thermal battery. When you add food, the temperature drops, but the sheer volume of the surrounding hot oil helps it recover relatively quickly. The challenge here is purely energetic: you need a powerful heat source to maintain that large volume.
Pan Frying (Shallow Frying):
Here, the oil only comes halfway up the side of the food. You are using much less oil—maybe a cup or two. Because there is less oil, there is less thermal mass. Dropping food into a shallow pan will cause a violent temperature crash. This is why heavy cast iron is mandatory for pan frying. The pan itself, not the oil, holds the heat energy and pushes it back into the food. Managing the best cooking temperature for frying foods in a skillet requires constant burner adjustments and spot-checks with a hyper-fast thermometer.
Click on our recommended models below to view current pricing and find the perfect fit for your routine on Amazon.
-
[Breville Smart Fryer (BDF500XL) – Check Current Availability]
-
[T-fal Deep Fryer (FR8000) – Check Current Availability]
-
[ThermoWorks Thermapen ONE – Check Current Availability]
What to Expect: Real-World Recovery Times
Let’s translate the specifications into your kitchen reality. When you see an “1800 Watt Heating Element” on a box, it’s easy to gloss over it. But wattage dictates your recovery time, and recovery time dictates whether your meal is ruined.
If you use a cheap 1200W fryer and drop in 1lb of frozen fries, your oil will crash from 375°F to 290°F. Because the heating element lacks power, it might take 6 to 8 minutes to claw its way back up to 350°F. By that time, the fries have soaked up grease like a sponge.
With an 1800W unit, that same drop to 290°F will be corrected in about 90 to 120 seconds. The faster you push that oil back up to the best cooking temperature for frying foods, the faster the exterior crust seals, locking the oil out and the moisture in. According to food safety guidelines by the USDA, proper internal cooking temperatures are also reached much more reliably when the external cooking medium maintains a steady, powerful heat transfer.
How to Choose the Right Frying Equipment
Not all fryers are created equal, and choosing the wrong one for your specific lifestyle will just lead to the appliance gathering dust in the garage. Here is my decision framework:
-
Assess Your Volume: If you only fry mozzarella sticks for two people once a month, do not buy a 3.5L vat fryer. The cost of replacing the oil will exceed the cost of the food. Opt for a heavy cast iron skillet and a good thermometer.
-
Evaluate Your Power Supply: Residential outlets in the US max out around 1800W on a standard 15-amp circuit. If you plug an 1800W fryer into the same circuit as your refrigerator or microwave, you will trip the breaker. Plan your kitchen real estate accordingly.
-
Factor in Maintenance: Oil management is the worst part of frying. If you hate chores, filtering systems (like the T-fal EZ Clean) are worth their weight in gold.
-
Acknowledge the Air Fryer Anti-Recommendation: Yes, air fryers are convenient. But they do not fry. They are convection ovens. If you are chasing the authentic, shattering crunch of buttermilk fried chicken, an air fryer is a remarkably bad fit. You need liquid thermal transfer (oil) to achieve that specific textural profile.
Conclusion
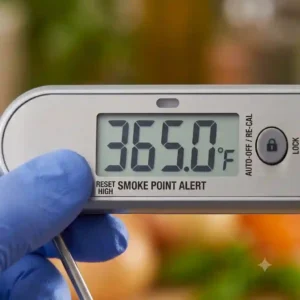
Mastering the perfect crunch isn’t magic; it is simply a matter of physics and thermal management. By understanding that the best cooking temperature for frying foods is a delicate balance between 350°F and 375°F, you immediately elevate yourself from a casual cook to an informed home chef.
Stop blaming your recipes and start managing your heat. Whether you invest in the digital mapping of a premium countertop appliance, the easy filtration of a mid-range model, or rely on the brute-force thermal mass of traditional cast iron paired with a lightning-fast thermometer, the right tools will completely transform your culinary results. Respect the oil, manage your recovery times, and your kitchen will consistently output restaurant-quality textures.
FAQs
❓ What is the best cooking temperature for frying foods?
✅ The ideal range is between 350°F and 375°F (175°C – 190°C). This specific thermal zone ensures instant steam expansion inside the food, which repels the surrounding oil while perfectly triggering the browning Maillard reaction on the crust…
❓ Can I use olive oil for deep frying?
✅ Generally, no. Extra virgin olive oil has a low smoke point (around 320°F – 350°F), meaning it will quickly break down, smoke aggressively, and impart bitter flavors before reaching the optimal deep-frying temperature zone…
❓ How many times can I reuse frying oil?
✅ If properly strained through a fine-mesh filter after each use and stored in a cool, dark place, high-quality peanut or canola oil can be reused 5 to 8 times for breaded items, and up to 12 times for naked potatoes…
❓ Why does my frying oil foam up and bubble over?
✅ Foaming occurs when oil breaks down from excessive heat, when too much moisture or starch is introduced rapidly, or when soap residue is left in the frying vessel. Always dry food thoroughly and never mix old, degraded oil with fresh oil…
❓ Do I need a thermometer to fry on the stove?
✅ Absolutely. Visually judging oil temperature is highly inaccurate. A high-quality instant-read thermometer ensures you maintain the correct heat, preventing food from becoming soggy in cold oil or burning rapidly in overheated oil…
Recommended for You
- How to Use Griddle Pan on Stove: 5 Expert Steps for 2026 Cooking Success Every Time
- How to use oven safe pan correctly: 7 Expert Tips for Safer & Better Cooking
- 5 Crucial Tips: The True difference between saute and fry cooking (2026 Guide) – Master Both Techniques Like a Pro
Disclaimer: This article contains affiliate links. As an Amazon Associate, I earn from qualifying purchases. If you purchase products through these links, we may earn a small commission at no additional cost to you.
✨ Found this guide helpful? Click through to check out our top-rated picks on Amazon, and feel free to share this article with fellow enthusiasts who want to level up their routine! 💬🤗