Have you ever wondered why your steak looks gray and sad instead of having that beautiful, crusty brown exterior you see on TV? Or maybe you’ve struggled with eggs that seem to fuse to the bottom of your pan like superglue? Honestly, I used to think my stove was just “weak” or my pans were “bad.” But then I learned the secret that every professional chef knows: it is all about how to preheat pan correctly for cooking.
✨Was this helpful? Spread the word! 🚀
When I first started cooking, I’d just turn the burner on, throw the butter in immediately, and wait for it to melt. That is a recipe for disaster. Most of us are too impatient. We want to hear that sizzle right away, but if the pan isn’t ready, the physics of cooking just won’t work in your favor. Knowing how to preheat pan correctly for cooking is basically the difference between a meal that tastes like a restaurant dish and one that tastes like a soggy mess. In this massive guide, I am going to walk you through everything I have learned about pan temperatures, the science of heat, and the best tools to help you get there.
Preheating Comparison: Method vs. Results
| Preheating Method | Best For | Typical Time | Stick Risk | Resulting Texture |
| Cold Start | Bacon, Duck Breast | 0 Minutes | High for Lean Protein | Rendered fat, soft |
| Low & Slow | Non-stick, Delicate Fish | 3-5 Minutes | Low | Gentle, even |
| High Heat Searing | Steak, Stainless Steel | 5-7 Minutes | Medium | Crispy, brown crust |
| Induction Boost | Rapid Boiling, Water | 1-2 Minutes | High (if unmonitored) | Immediate heat |
The Science of Sizzle: Why Preheating Matters
When we talk about how to preheat pan correctly for cooking, we are actually talking about thermodynamics. Most pans, especially stainless steel, have microscopic pores. When the pan is cold, those pores are open. When you put cold protein like chicken or eggs into a cold or lukewarm pan, the proteins seep into those pores and “grab” the metal. As the pan heats up, it literally locks the food in place.
However, when you follow the steps for how to preheat pan correctly for cooking, the metal expands and those pores close up. This creates a smoother surface. Additionally, you trigger the Leidenfrost Effect. This is when a liquid (like the moisture in your food) creates a tiny layer of steam that actually lifts the food off the surface of the pan. It is like your steak is riding on a tiny hovercraft of steam. Cool, right?
Benefits Comparison: Proper Preheating vs. Traditional Cold-Start
| Feature | Properly Preheated Pan | Cold-Start Pan |
| Maillard Reaction | High (Beautiful browning) | Low (Gray, steamed look) |
| Food Release | Easy (Non-stick effect) | Difficult (Sticking/Tearing) |
| Oil Distribution | Even and thin | Pools and gets absorbed |
| Cooking Time | Efficient and predictable | Long and uneven |
| Texture | Crispy exterior, juicy interior | Rubbery or dry |
Top 7 Pans for Perfect Preheating: Expert Analysis
Choosing the right tool is half the battle when learning how to preheat pan correctly for cooking. I have spent hours researching the best pans on the market in 2026 to see which ones handle heat the best. Here are my top picks from Amazon.
1. Lodge 10.25 Inch Cast Iron Skillet
The Lodge 10.25 Inch Cast Iron Skillet (Model L8SK3) is the absolute king of heat retention. Because it is so heavy, it takes a while to get hot, but once it is there, it doesn’t cool down when you drop a cold steak on it.
-
Technical Specifications: Pre-seasoned with 100% natural vegetable oil, 10.25-inch diameter, 2-inch depth, weight 5.35 lbs.
-
Customer Review Analysis: Users love that it lasts forever. Many mention that once you master how to preheat pan correctly for cooking with cast iron, it becomes virtually non-stick. Some complaints focus on the weight being a bit much for some users.
-
Warranty: Limited Lifetime Warranty.
-
Pros: Incredible heat retention, affordable, works on induction.
-
Cons: Heavy, requires special cleaning (no soap usually), takes long to preheat.
2. All-Clad D3 Stainless Steel Fry Pan, 12-Inch
If you want to cook like a pro, the All-Clad D3 Stainless Steel Fry Pan, 12-Inch (Model 4112) is the industry standard. Its tri-ply construction means it has an aluminum core sandwiched between stainless steel for even heating.
-
Technical Specifications: 3-ply bonded construction, stainless steel exterior, aluminum core, riveted handles, oven safe up to 600°F.
-
Customer Review Analysis: Reviewers rave about the “water drop test” performance on this pan. It responds quickly to temperature changes. A few people find the handle shape a bit uncomfortable.
-
Warranty: Limited Lifetime Warranty.
-
Pros: Even heating, very durable, dishwasher safe.
-
Cons: Expensive, requires learning the “mercury ball” test to avoid sticking.
3. Made In Cookware 10 Inch Blue Carbon Steel Frying Pan
The Made In Cookware 10 Inch Blue Carbon Steel Frying Pan is a hybrid between cast iron and stainless steel. It is lighter than cast iron but holds heat just as well.
-
Technical Specifications: 2mm thick carbon steel, blue-annealed finish, rated up to 1200°F.
-
Customer Review Analysis: Professional chefs love this pan. Customers say it seasons faster than cast iron. Some mention that the surface can be finicky if not dried properly (it can rust).
-
Warranty: Lifetime Warranty.
-
Pros: Lightweight, high heat tolerance, develops a natural non-stick patina.
-
Cons: Needs seasoning maintenance, can rust if neglected.
4. T-fal Professional Nonstick Fry Pan with Thermo-Spot
For those who want a visual aid, the T-fal Professional Nonstick Fry Pan with Thermo-Spot (Model E93808) actually tells you when it is ready. The red circle in the middle turns solid when it’s preheated.
-
Technical Specifications: Titanium-reinforced non-stick, Thermo-Spot heat indicator, induction compatible base.
-
Customer Review Analysis: Highly rated for beginners. People love the “dummy-proof” preheating indicator. Some reviews note the non-stick coating wears off after 2-3 years.
-
Warranty: Limited Lifetime Warranty.
-
Pros: Built-in preheat indicator, very affordable, easy cleanup.
-
Cons: Not meant for extremely high-heat searing, coating has a lifespan.
5. HexClad Hybrid Nonstick 12-Inch Fry Pan
The HexClad Hybrid Nonstick 12-Inch Fry Pan is the trendy “Gordon Ramsay” pan. It uses a laser-etched hexagonal pattern to combine the searing power of stainless steel with the ease of non-stick.
-
Technical Specifications: Tri-ply construction, PFOA-free non-stick, metal utensil safe, oven safe to 500°F.
-
Customer Review Analysis: Users are split but mostly positive. Many say it is the best of both worlds for preheating. Some argue it is not as non-stick as a pure Teflon pan.
-
Warranty: Lifetime Warranty.
-
Pros: Metal utensil safe, stays clean easily, great for searing.
-
Cons: Very expensive, has a slight learning curve for oil usage.
6. Mauviel M’Heritage M200B 10.2-Inch Copper Skillet
The Mauviel M’Heritage M200B 10.2-Inch Copper Skillet (Model 6504.26) is for the serious enthusiast. Copper is the most conductive metal, meaning it preheats almost instantly.
-
Technical Specifications: 2.0mm thick copper, 10% 18/10 stainless steel lining, bronze handles.
-
Customer Review Analysis: Reviewers call this “functional art.” It heats up so fast you have to be careful. The main complaint is the high maintenance to keep the copper shiny.
-
Warranty: Lifetime Warranty (manufacturing defects).
-
Pros: Unmatched temperature control, beautiful aesthetic.
-
Cons: Extremely expensive, heavy maintenance, not induction compatible without a plate.
7. Cuisinart Chef’s Classic Enamel Cast Iron 12-Inch Skillet
The Cuisinart Chef’s Classic Enamel Cast Iron 12-Inch Skillet (Model CI22-30CR) provides the heat retention of cast iron without the need for seasoning.
-
Technical Specifications: Porcelain enamel exterior and interior, wide cast iron handle.
-
Customer Review Analysis: Customers love the vibrant colors and the ease of washing with soap. Some mention that the enamel can chip if you’re too rough with it.
-
Warranty: Limited Lifetime Warranty.
-
Pros: Easy to clean, no seasoning required, great for acidic foods (like tomato sauce).
-
Cons: Enamel can be fragile, heavier than stainless steel.
✨ Don’t Miss These Exclusive Deals!
🔍 Take your mings kitchen to the next level with these carefully selected products. Click on any highlighted item to check current pricing and availability. These tools and ingredients will help you create authentic Chinese flavors your family will love! ✨
💬 Just one click – help others make better buying decisions too!😊
Product Specifications Matrix
| Product | Material | Weight | Max Temp | Best Use Case |
| Lodge Cast Iron | Cast Iron | 5.3 lbs | 600°F+ | Searing Steaks |
| All-Clad D3 | Stainless Steel | 2.8 lbs | 600°F | Sauces & Sautéing |
| Made In Carbon | Carbon Steel | 3.0 lbs | 1200°F | Professional Searing |
| T-fal Pro | Non-stick | 2.1 lbs | 400°F | Eggs & Pancakes |
| HexClad Hybrid | Hybrid | 3.0 lbs | 500°F | Everyday Versatility |
| Mauviel Copper | Copper | 4.5 lbs | 500°F | Precise Temperature Work |
| Cuisinart Enamel | Enamel Cast Iron | 6.5 lbs | 500°F | Braising & Frying |
Budget vs. Premium Comparison
| Category | Product Recommendation | Key Difference |
| Budget Friendly | Lodge 10.25 Inch Cast Iron Skillet | Amazing performance for under $30; requires manual care. |
| Mid-Range | T-fal Professional Nonstick Fry Pan with Thermo-Spot | Great features like preheat indicators for a moderate price. |
| Premium Choice | All-Clad D3 Stainless Steel Fry Pan, 12-Inch | High-end materials that last a lifetime and offer even heating. |
| Luxury/Pro | Mauviel M’Heritage M200B 10.2-Inch Copper Skillet | The peak of culinary engineering; highest price point. |
Detailed Steps: How to Preheat Pan Correctly for Cooking
I remember a time when I thought “preheating” just meant turning the stove to “High” and waiting 30 seconds. I ended up with a kitchen full of smoke and a burnt pan. Don’t be like younger me. Here is the actual process for different types of pans.
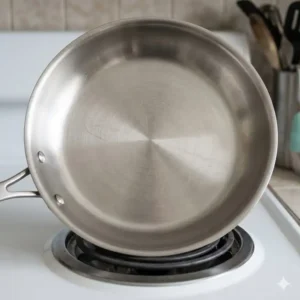
1. The Dry Pan Method
Always start with a clean, dry pan. Never put oil in a cold pan unless the recipe specifically calls for a “cold start” (like with bacon). Why? Because oil has a smoke point. If the oil sits in the pan while it heats up, it can start to break down and taste bitter before you even start cooking.
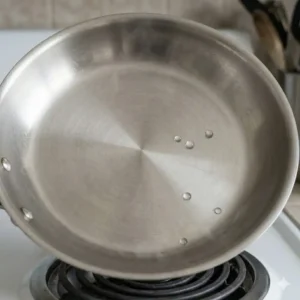
2. The Water Drop Test (The Mercury Ball)
This is the most reliable way to figure out how to preheat pan correctly for cooking on stainless steel.
-
Heat your pan on medium heat for about 2-3 minutes.
-
Flick a few drops of water onto the surface.
-
If the water sizzles and evaporates immediately, the pan is too cold.
-
If the water breaks into many tiny beads that skitter around, the pan is getting there but still a bit cool.
-
If the water stays together as one or two “mercury-like” balls that glide effortlessly across the surface without evaporating, your pan is perfectly preheated.
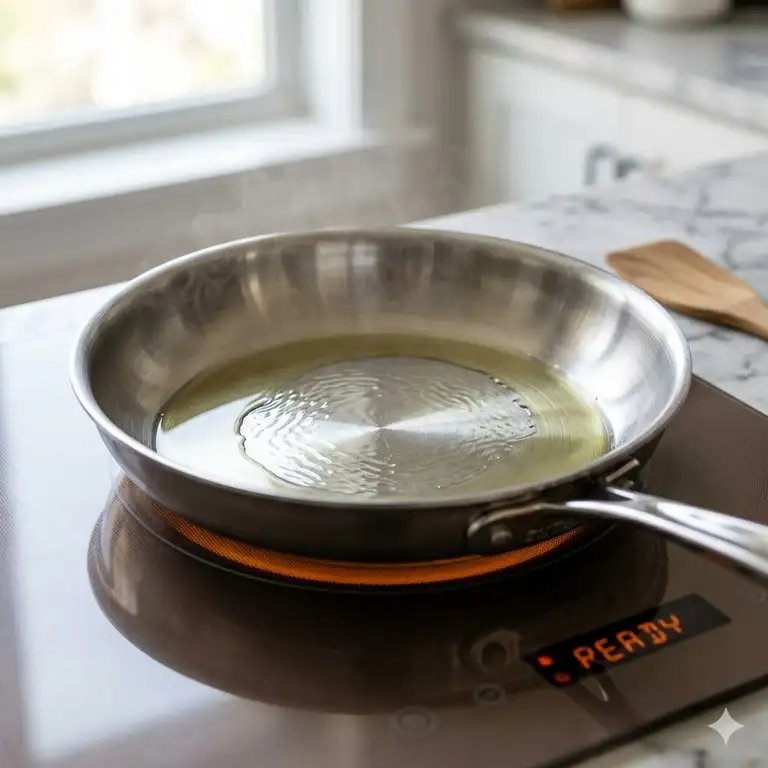
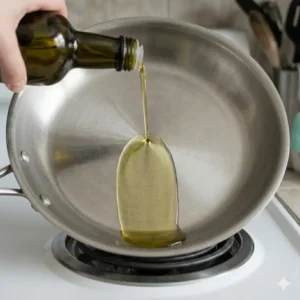
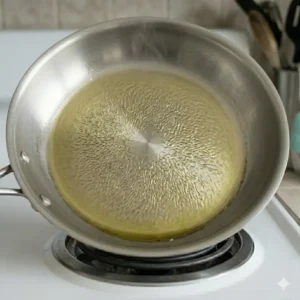
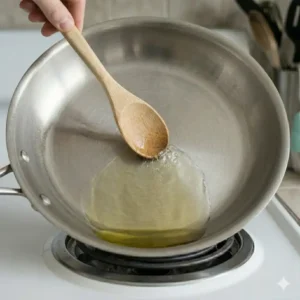
3. Adding the Oil
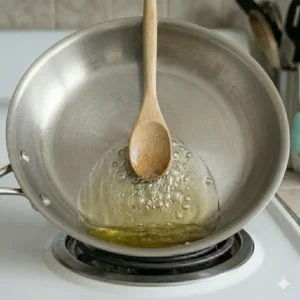
Once the pan is hot, add your oil. You should see the oil “shimmer.” It will become more fluid and look like silk moving across the pan. If the oil starts smoking heavily, you’ve gone too far. Take the pan off the heat for a minute to cool down.

Material Heat Conductivity Matrix
| Material | Heat Up Speed | Cool Down Speed | Evenness |
| Copper | Very Fast | Very Fast | Excellent |
| Aluminum | Fast | Fast | Good |
| Stainless Steel | Medium | Medium | Fair (needs core) |
| Cast Iron | Slow | Very Slow | Poor (has hot spots) |
| Carbon Steel | Medium-Fast | Medium-Slow | Good |
Mastering Variations of the Main Keyword
When people look for advice, they use different terms. Whether you are looking for a preheat pans correctly tutorial or general preheating skillet guide, the principles remain the same. Even if you type preheating pan for cooking into your search bar, you are essentially looking for the same outcome: thermal stability.
Some might search for correct way to preheat pan specifically for stainless steel, while others want pan preheating tips for non-stick. It’s important to recognize that a trampline 14 ft style typo (like “preheatng pan”) happens, but what matters is the technique.
Why Induction Changes Everything
If you are using an induction cooktop, the rules for how to preheat pan correctly for cooking change slightly. Induction is incredibly fast. If you put a dry stainless steel pan on “Boost” or “High,” you can actually warp the metal in seconds. According to the Department of Energy, induction is about 5-10% more efficient than conventional electric, but that speed means you should always preheat on medium-low first.
Performance Metrics by Stove Type
| Stove Type | Recommended Starting Heat | Avg. Preheat Time | Risk Factor |
| Gas | Medium | 3-4 Mins | Open flame / uneven |
| Electric Coil | Medium | 5-6 Mins | Very slow response |
| Glass Top Electric | Medium | 4-5 Mins | Residual heat |
| Induction | Medium-Low | 1-2 Mins | Metal warping risk |
Common Mistakes When Preheating
-
Using High Heat Only: Most people think “High” is the only way to sear. In reality, “Medium-High” on a well-preheated pan is much safer and more consistent.
-
Walking Away: Never leave a preheating pan unattended. A dry pan can reach dangerous temperatures faster than you think.
-
Ignoring the Smoke Point: Using extra virgin olive oil for high-heat searing is a mistake. Its smoke point is too low. Use avocado or grapeseed oil instead.
Oil Smoke Point Reference Table
| Oil Type | Smoke Point | Best For |
| Avocado Oil | 520°F | High-heat searing |
| Grapeseed Oil | 420°F | Sautéing / Searing |
| Butter | 350°F | Low-heat flavor |
| Extra Virgin Olive Oil | 375°F | Medium-heat / Dressing |
| Canola Oil | 400°F | General frying |
How to Preheat Different Pan Types
Preheating Stainless Steel
Stainless steel is the trickiest. You must use the water drop test. I can’t tell you how many times I’ve ruined chicken breasts because I was impatient. Wait for that “mercury ball” effect. Once you see it, wipe the water out, add the oil, and then wait 10 seconds for the oil to heat before adding food.
Preheating Cast Iron
Cast iron is like a freight train. It takes a long time to get moving, but it is hard to stop. I usually start my cast iron on low heat for 5 minutes while I prep my ingredients. Then I move it to medium for another 2-3 minutes. This ensures the entire surface is heated evenly, as cast iron is actually a poor conductor and can have cold spots if heated too quickly.
Preheating Non-Stick
BE CAREFUL HERE. You should never preheat a non-stick pan on high heat while empty. Many non-stick coatings (like PTFE) can release toxic fumes if they get above 500°F. I always put a tiny bit of fat or oil in the pan from the start so I can see when it starts to shimmer. If the oil smokes, the pan is too hot.
User Compatibility Matrix
| User Type | Recommended Pan | Why? |
| The Beginner | T-fal Pro Nonstick | Visual indicator makes it easy. |
| The Home Chef | All-Clad D3 Stainless | Reliable, professional results. |
| The Weekend Warrior | Lodge Cast Iron | Perfect for steaks and camping. |
| The Health Conscious | HexClad Hybrid | Uses less oil, easy to clean. |
| The Tech Lover | Made In Carbon Steel | Sleek, high-performance “pro” feel. |
✨ Don’t Miss These Exclusive Deals!
🔍 Take your kitchen to the next level with these carefully selected pans. Click on any highlighted item to check current pricing and availability. These tools will help you master the art of the perfect sear! ✨
Conclusion
Learning how to preheat pan correctly for cooking is the single greatest upgrade you can give your kitchen skills. It doesn’t cost a dime, yet it improves the flavor, texture, and appearance of everything you make. Whether you are using a classic Lodge Cast Iron or a high-tech HexClad Hybrid, the principle remains: patience is the secret ingredient.
By understanding the physics of the “mercury ball” and respecting the smoke points of your oils, you will stop fighting your pans and start working with them. No more stuck eggs, no more gray steaks, and no more frustration. So, the next time you stand at the stove, take a deep breath, turn that dial to medium, and give it a few minutes. Your taste buds (and your cleaning sponge) will thank you.
Frequently Asked Questions
✅ Generally, 3-5 minutes on medium heat is sufficient for most pans. Stainless steel and cast iron take longer (up to 5-8 minutes) due to their density, while copper and aluminum heat up much faster...
✅ Yes, for stainless steel and cast iron, you should preheat the pan dry to check the temperature. However, for non-stick pans, it is safer to include a small amount of oil to prevent the coating from overheating...
✅ Putting food in a cold pan usually leads to sticking and uneven cooking. The proteins bond to the metal pores before they have a chance to sear, resulting in torn food and a lack of browning...
✅ No, preheating non-stick pans on high heat can damage the coating and release harmful fumes. It is best to use medium or medium-low heat and never leave an empty non-stick pan on a hot burner...
✅ If the oil smokes immediately upon touching the pan, or if water drops dance violently and disappear instantly, the pan is too hot. Remove it from the heat source for 60 seconds before proceeding... ❓ How long should I preheat my pan before cooking?
❓ Can I preheat a pan without oil or butter?
❓ What happens if I put food in a cold pan?
❓ Is it safe to preheat non-stick pans on high heat?
❓ How do I know if my pan is too hot?
Recommended for You:
- Saucepans That Can Go In The Oven: 7 Best Professional Picks for 2026
- 7 Best Non Toxic Griddle Pan Options for a Healthier Kitchen in 2026
- 7 Best Ceramic Grill Pan Options for 2026: Expert Non-Stick Reviews
Disclaimer: This article contains affiliate links. If you purchase products through these links, we may earn a small commission at no additional cost to you.
✨ Found this helpful? Share it with your friends! 💬🤗