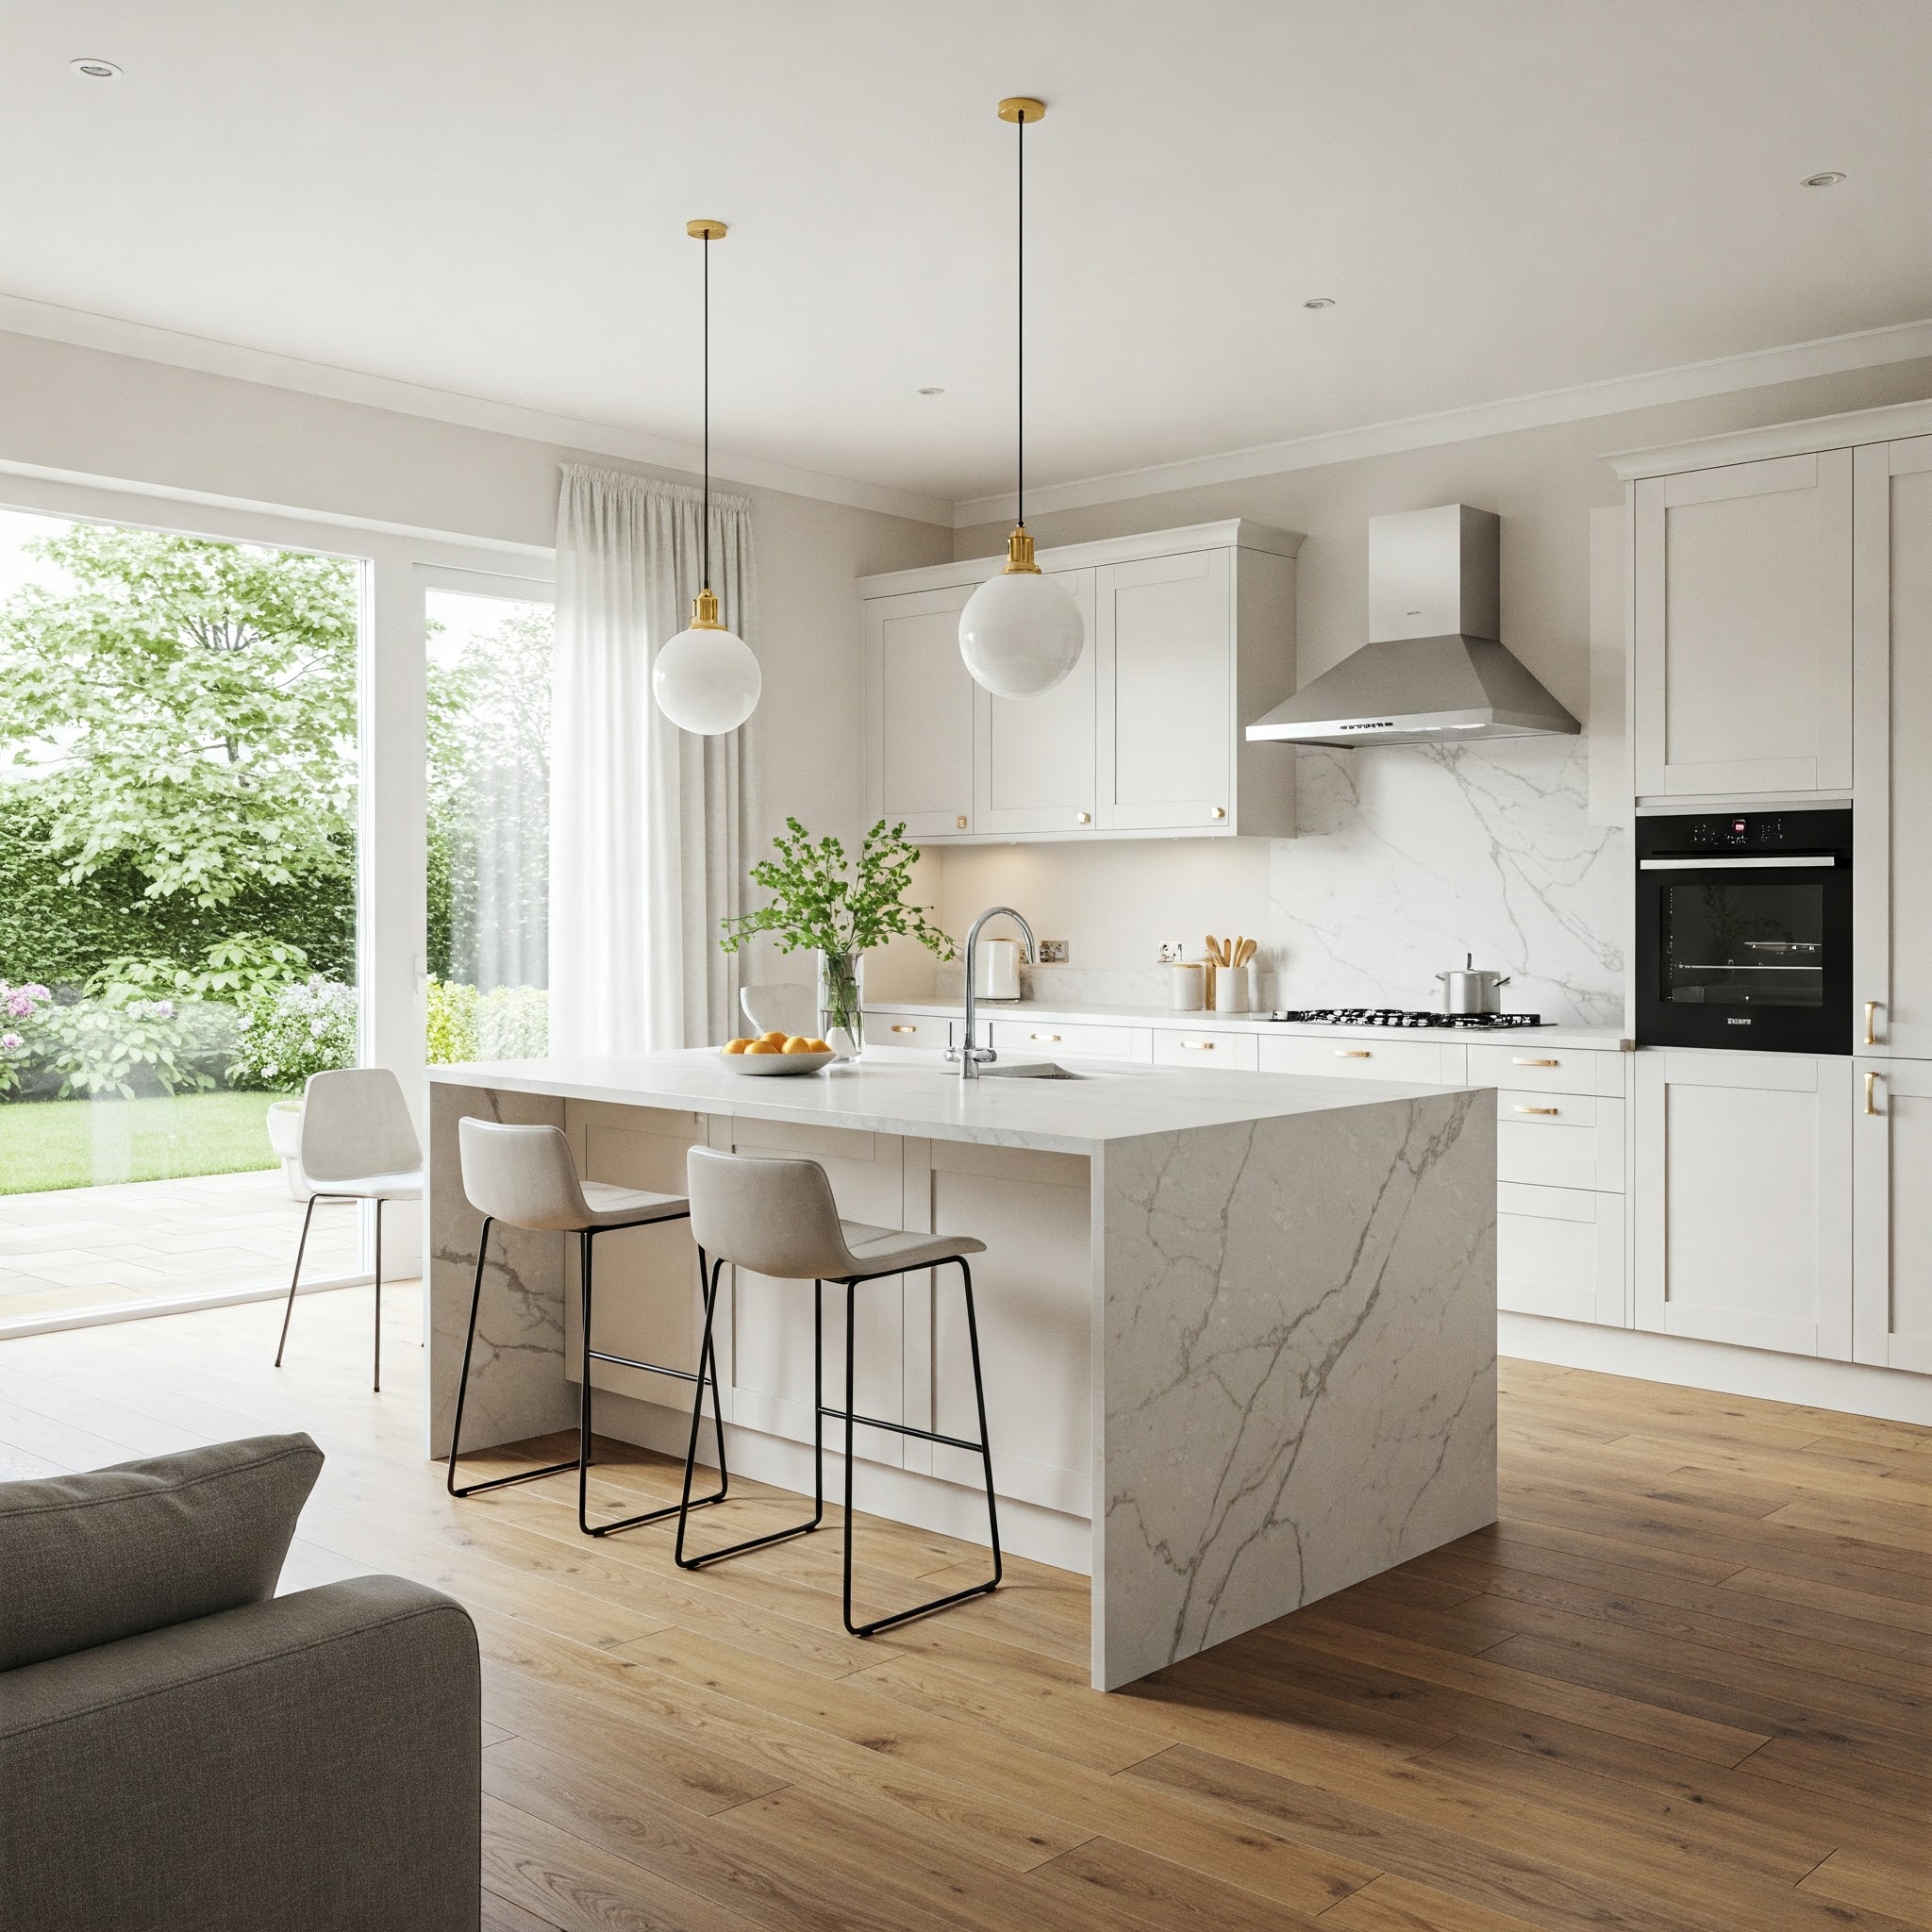
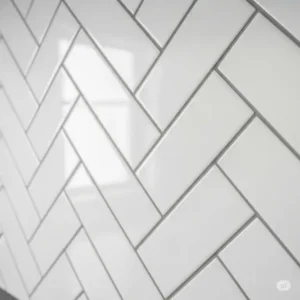
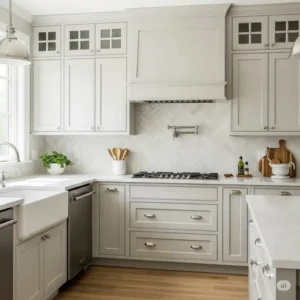
Creating a stunning kitchen requires attention to detail, and few elements can transform your space quite like a well-chosen herringbone kitchen backsplash. This timeless pattern, resembling the intricate bone structure of a herring fish, brings both sophistication and visual interest to any culinary space.
✨Was this helpful? Spread the word! 🚀
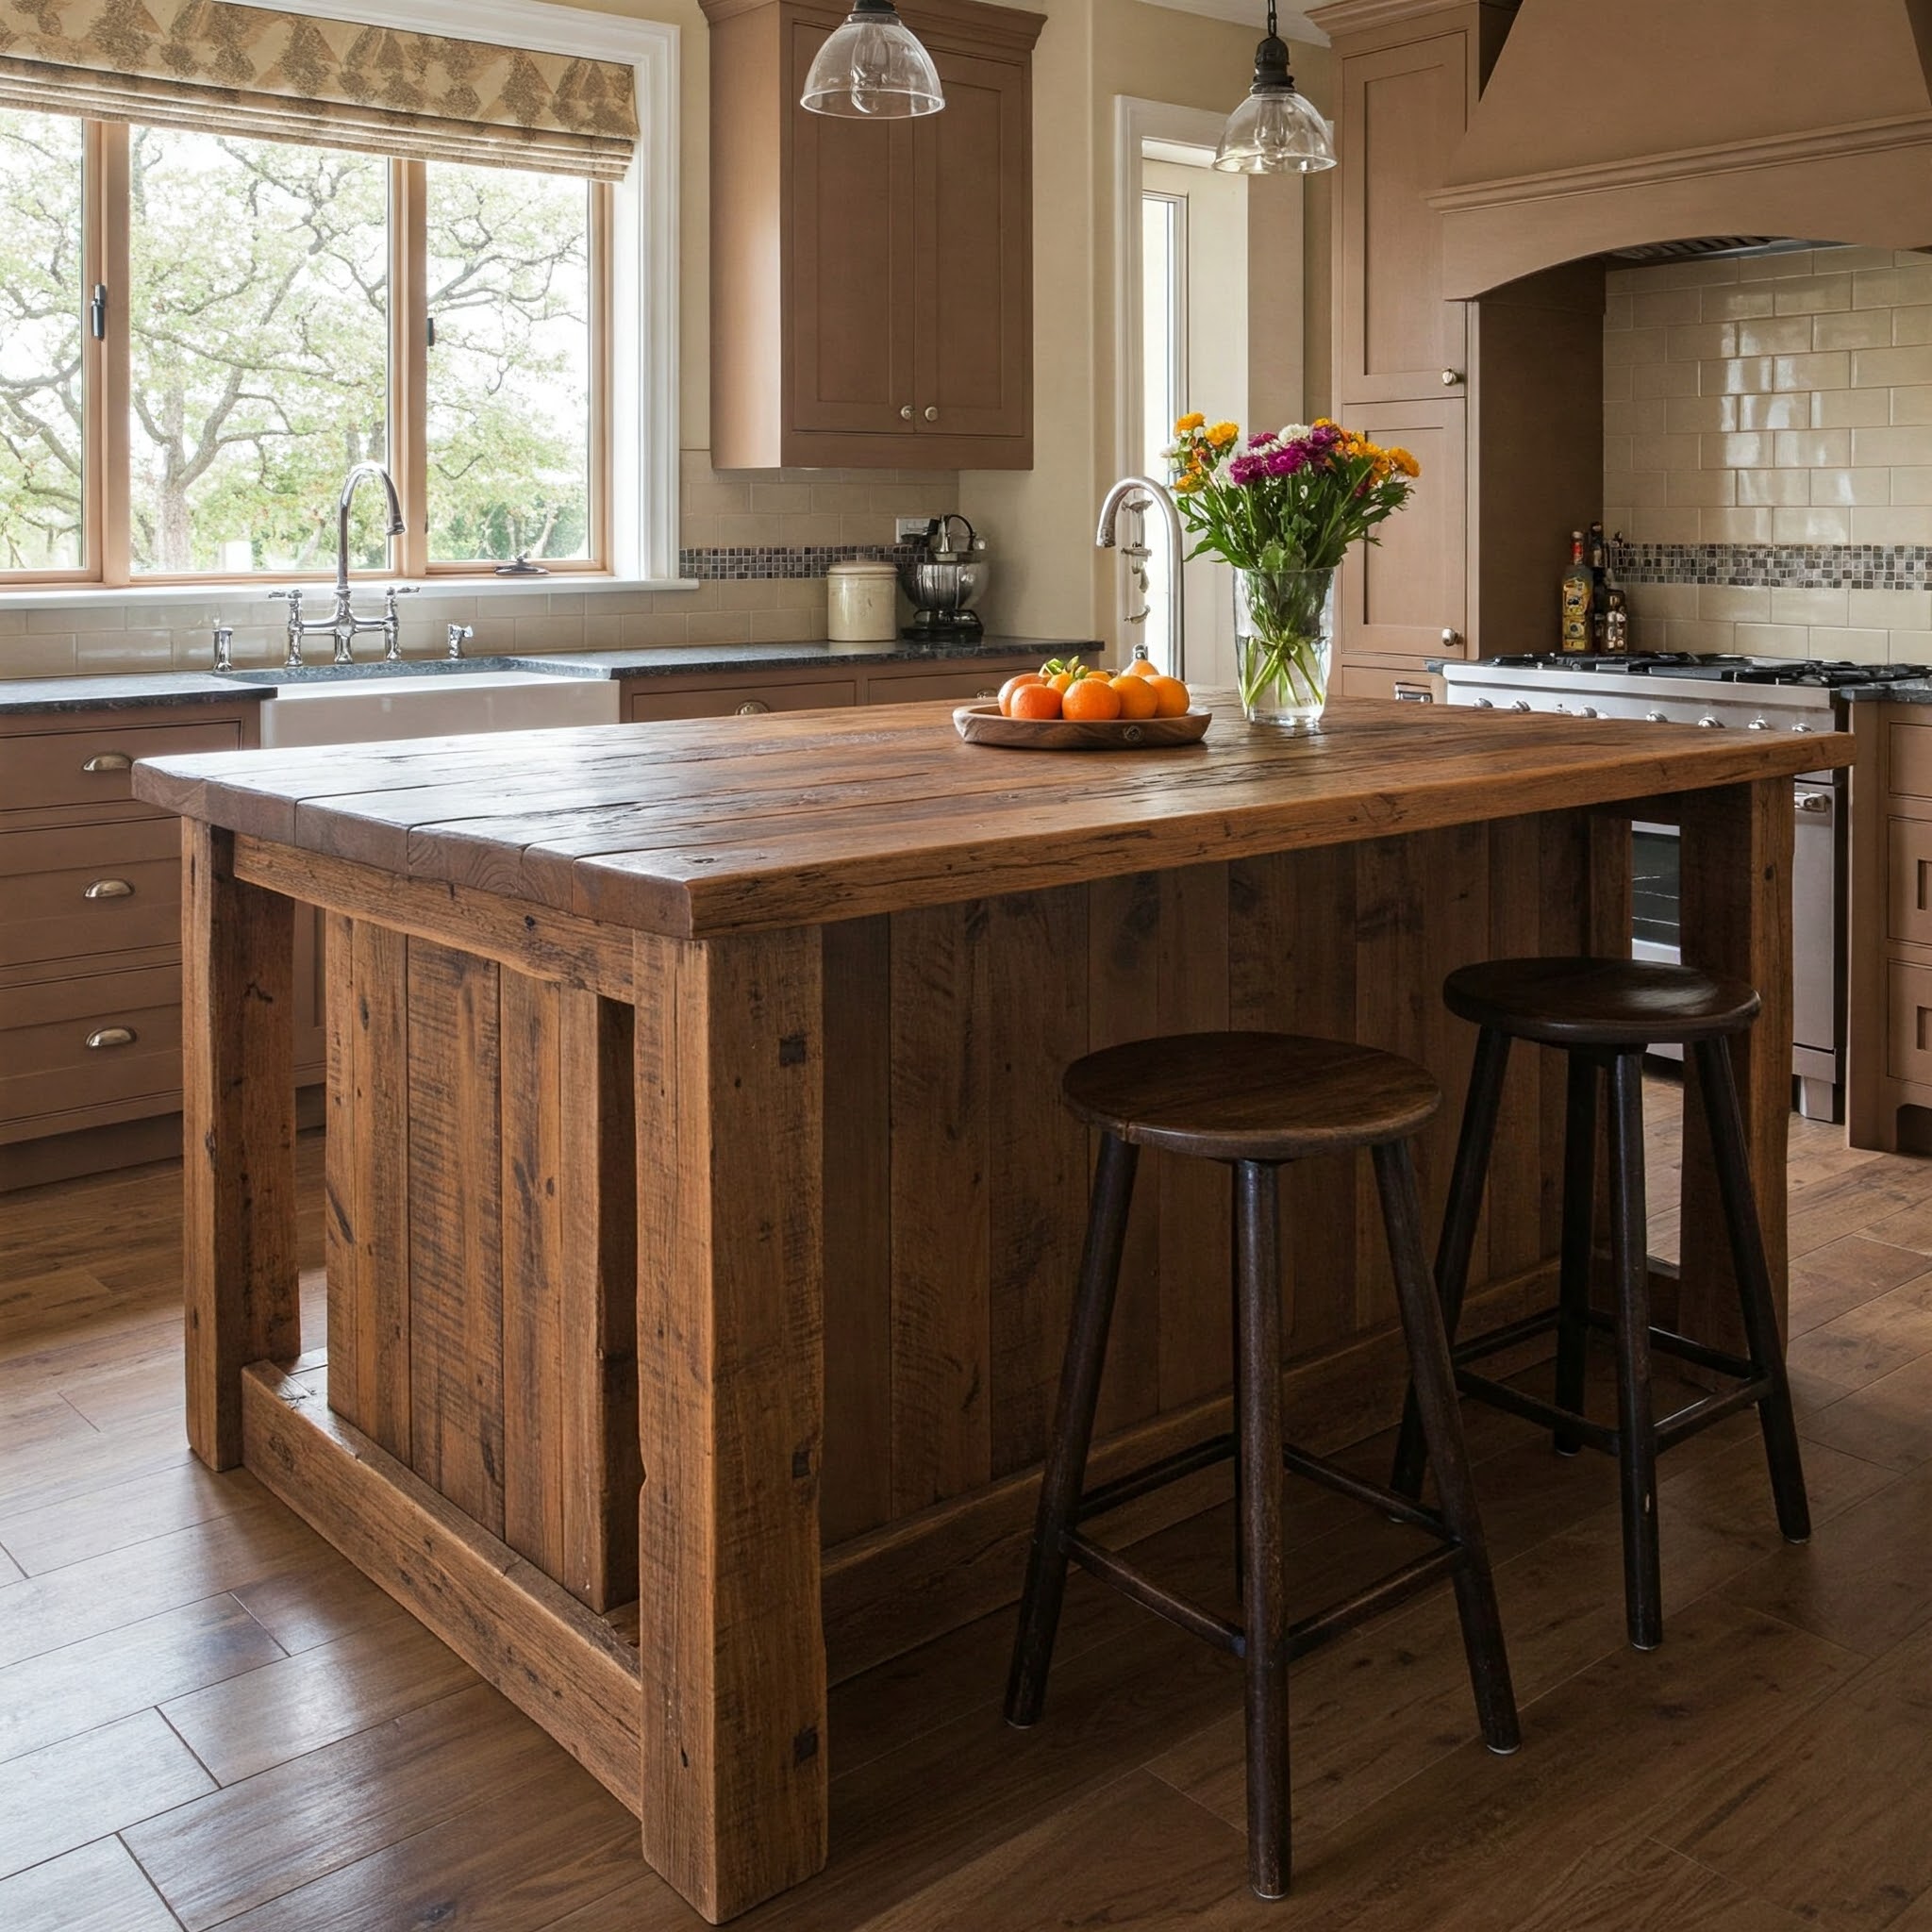
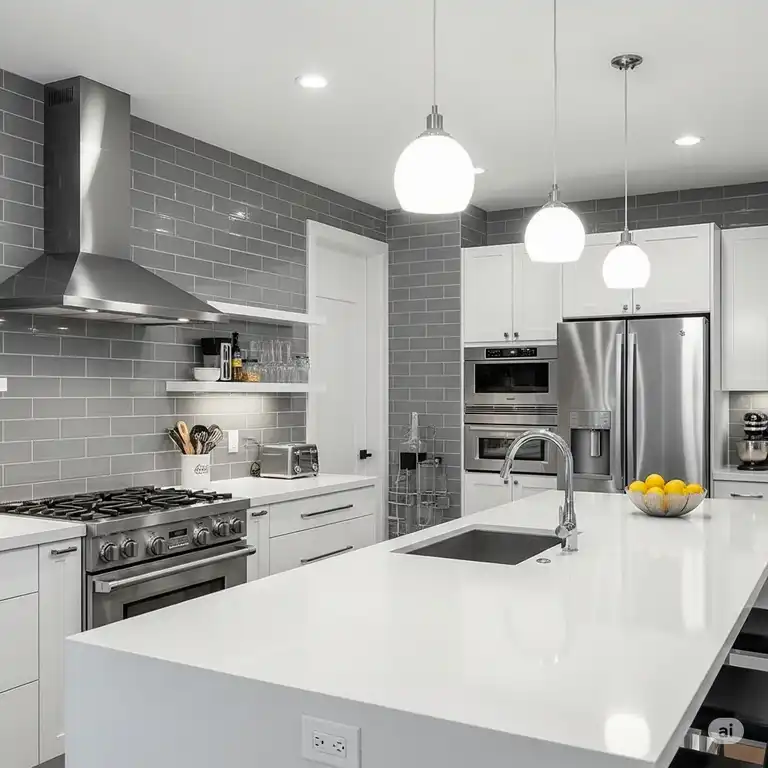
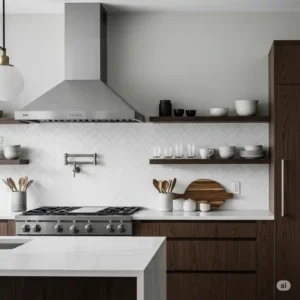
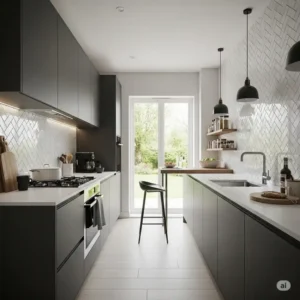
Whether you’re renovating your entire kitchen or simply updating your backsplash, the herringbone pattern offers endless possibilities. From classic white ceramics to bold colored tiles, herringbone backsplash designs can complement traditional farmhouse aesthetics or sleek modern interiors. The distinctive V-shaped pattern creates movement and depth that regular subway tiles simply cannot match.
Quick Comparison: Herringbone vs Traditional Backsplash Options
| Feature | Herringbone Pattern | Subway Tile | Standard Square Tile |
|---|---|---|---|
| Visual Impact | ⭐⭐⭐⭐⭐ High | ⭐⭐⭐ Medium | ⭐⭐ Low |
| Installation Difficulty | ⭐⭐⭐⭐ Moderate-Hard | ⭐⭐ Easy | ⭐ Very Easy |
| Design Versatility | ⭐⭐⭐⭐⭐ Excellent | ⭐⭐⭐⭐ Good | ⭐⭐⭐ Fair |
| Cost Range | $2-15/sq ft | $1-8/sq ft | $1-6/sq ft |
| Trending Factor | ⭐⭐⭐⭐⭐ Very High | ⭐⭐⭐ Stable | ⭐⭐ Declining |
Top 7 Herringbone Kitchen Backsplash Products: Expert Analysis
After extensive research and customer review analysis, I’ve identified seven exceptional herringbone kitchen backsplash options that deliver both quality and style. These products represent different price points, materials, and installation methods to suit various needs and preferences.
1. Art3d Herringbone Peel and Stick Backsplash Tiles (Model A17752P10)
This premium peel-and-stick option represents the perfect balance of affordability and quality. The Art3d Herringbone Peel and Stick Backsplash Tiles feature a thicker design (2-3 times thicker than ordinary peel-and-stick tiles) measuring 2mm-2.5mm each. The 12″x12″ tiles provide 40% more coverage than standard 10″x10″ alternatives.
Key Specifications:
- ✅ Dimensions: 12″ x 12″ x 2.5mm thick
- ✅ Coverage: 10 tiles cover 10 square feet
- ✅ Material: Enhanced PVC composite with 3X stronger adhesive
- ✅ Applications: Kitchen backsplash, bathroom walls, shower areas
- ✅ Heat resistance: Safe for stove installation
Customer Review Highlights: Customers consistently praise the realistic tile appearance and superior adhesion. One verified purchaser noted: “The thickness makes all the difference – these actually feel like real tiles, not cheap stickers.” However, some users recommend additional adhesive for heavily textured walls.
2. STICKGOO White Herringbone Peel and Stick Backsplash
The STICKGOO White Herringbone Peel and Stick Backsplash stands out for its Canadian design and thicker construction. This premium option features excellent 3D visual effects and commercial-grade adhesive backing.
Technical Features:
- ✅ Enhanced thickness: 2-3 times thicker than standard tiles
- ✅ Size: 12″ x 12″ sheets
- ✅ Pattern: Classic white herringbone with realistic grout lines
- ✅ Special feature: Grid backing for precise cutting
- ✅ Warranty: Commercial-grade adhesive guarantee
The unique grid backing system allows for perfectly straight cuts every time, addressing a common complaint with other peel-and-stick options.
3. VEELIKE 24-Sheets White Herringbone Peel and Stick Backsplash
For larger projects, the VEELIKE 24-Sheets White Herringbone Peel and Stick Backsplash offers exceptional value. This comprehensive kit covers 24 square feet, making it ideal for full kitchen backsplash installations.
Product Specifications:
- ✅ Coverage: 24 square feet (24 tiles)
- ✅ Tile size: 12″ x 12″ x 0.05″ thick
- ✅ Material: Premium vinyl with silver grout design
- ✅ Features: Waterproof, oil-proof, heat-resistant
- ✅ Removability: Renter-friendly with damage-free removal
Customer feedback emphasizes the realistic appearance and easy maintenance. The silver grout lines provide subtle contrast that enhances the herringbone pattern without overwhelming the design.
4. Art3d 10-Sheet Herringbone Peel and Stick Backsplash (White Mixed Gold Metal)
This luxury option from Art3d 10-Sheet Herringbone Peel and Stick Backsplash incorporates metallic accents for a high-end appearance. The white marble base with gold metal inlays creates a sophisticated focal point.
Premium Features:
- ✅ Mixed material design: White marble look with gold metal accents
- ✅ Dimensions: 12.4″ x 12.2″ per sheet
- ✅ Coverage: 11.04 square feet per 10-sheet pack
- ✅ Thickness: 3mm stone composite construction
- ✅ Applications: Kitchen, bathroom, and commercial spaces
The metallic elements catch light beautifully, creating dynamic visual interest throughout the day. Professional designers frequently specify this option for upscale residential projects.
5. The Tiles Plaza Herringbone Peel and Stick Backsplash
The The Tiles Plaza Herringbone Peel and Stick Backsplash features genuine stone composite construction rather than vinyl, providing authentic tile appearance and durability.
Stone Composite Advantages:
- ✅ Material: Genuine stone composite (not plastic)
- ✅ Size: 12″ x 13″ x 0.12″ thick
- ✅ Coverage: 8.93 square feet per 10-piece pack
- ✅ Finish: Matte Carrara white with realistic texture
- ✅ Durability: Fade-resistant and scratch-resistant
While slightly more challenging to cut than vinyl alternatives, the authentic stone appearance justifies the extra effort. Professional installers recommend using a tile saw for clean cuts.
6. Stone Center Online Carrara White Marble 6×12 Subway Tile
For traditional installation methods, the Stone Center Online Carrara White Marble 6×12 Subway Tile offers genuine Italian marble for custom herringbone layouts.
Authentic Marble Specifications:
- ✅ Material: Genuine Italian Bianco Carrara marble
- ✅ Dimensions: 6″ x 12″ x 3/8″ thick
- ✅ Finish: Honed (matte) surface
- ✅ Coverage: 100 square feet per box
- ✅ Applications: Kitchen, bathroom, commercial spaces
This premium option requires professional installation but delivers unmatched luxury and longevity. The natural veining patterns ensure each installation is unique.
7. MOP Mother of Pearl Shell Mosaic Herringbone Backsplash Tile
For coastal or luxury designs, the MOP Mother of Pearl Shell Mosaic Herringbone Backsplash Tile provides stunning iridescent beauty.
Unique Shell Features:
- ✅ Material: Natural mother-of-pearl shells
- ✅ Pattern: Herringbone mosaic on mesh backing
- ✅ Colors: Dark blue with natural variations
- ✅ Coverage: 10 sheets included
- ✅ Installation: Mesh-mounted for easy application
The natural shell material creates beautiful light reflection and adds organic texture. However, shells require careful grouting to avoid scratching the delicate surface.
💬 Just one click – help others make better buying decisions too! 😊
✨ Don’t Miss These Exclusive Deals! 🛍️
Transform your kitchen with these carefully selected herringbone backsplash options. Click on any highlighted product to check current pricing and availability. These premium tiles will help you create the sophisticated kitchen design you’ve always dreamed of! ⚡
Understanding the Herringbone Pattern: Design Fundamentals
The herringbone kitchen backsplash pattern derives its name from the distinctive V-shaped bone structure found in herring fish skeletons. This ancient pattern has adorned everything from Roman roads to Victorian parquet floors, proving its enduring appeal across centuries and cultures.
In kitchen applications, herringbone patterns create several visual advantages. The diagonal arrangement adds movement and energy to flat surfaces, while the interlocking design provides structural interest that draws the eye upward, making rooms appear larger and more dynamic.
Pattern Variations and Layouts
Modern herringbone kitchen backsplash designs offer numerous interpretation possibilities:
Classic 45-Degree Herringbone: Traditional V-shaped pattern with tiles meeting at 45-degree angles. This creates the most dramatic visual impact and works well with rectangular tiles of any proportion.
Vertical Herringbone: Rotating the pattern 90 degrees creates a waterfall effect that emphasizes ceiling height. This variation works particularly well in kitchens with tall cabinets or cathedral ceilings.
Double Herringbone: Using two different tile colors or materials creates striking contrast patterns. Popular combinations include white and gray, or matte and glossy finishes within the same color family.
Herringbone Borders: Incorporating herringbone patterns as accent borders around subway tile fields provides visual interest without overwhelming smaller spaces.
Industry-Specific Applications and Professional Use Cases
The versatility of herringbone kitchen backsplash designs extends far beyond residential applications. Understanding professional use cases helps homeowners appreciate the pattern’s durability and functionality.
Commercial Kitchen Applications
Restaurant designers frequently specify herringbone patterns for their durability and cleanability. The V-shaped layout naturally directs grease and moisture downward, making maintenance easier in high-traffic commercial environments. Additionally, the visual complexity helps disguise minor staining between deep cleanings.
Professional chefs appreciate herringbone backsplashes because the pattern provides visual stimulation during long cooking sessions while maintaining the practical benefits of traditional tile installations. The pattern’s ability to hide wear patterns makes it ideal for busy commercial kitchens where appearance matters.
Hospitality and Restaurant Design
Upscale restaurants and hotels frequently incorporate herringbone kitchen backsplash patterns in open kitchen designs. The sophisticated appearance conveys craftsmanship and attention to detail, while the practical benefits ensure longevity in demanding commercial environments.
Residential Custom Home Applications
Luxury home builders increasingly specify herringbone patterns for their visual impact and timeless appeal. The pattern photographs beautifully for real estate marketing while appealing to discriminating buyers who appreciate classic design elements.
Custom home designers often incorporate multiple herringbone applications throughout kitchen spaces, including backsplashes, island sides, and even flooring transitions. This creates cohesive design flow while maintaining visual interest.
Advanced Technical Analysis and Installation Science
Understanding the engineering principles behind successful herringbone kitchen backsplash installations ensures long-term satisfaction and performance.
Structural Considerations and Load Distribution
Herringbone patterns distribute weight differently than standard grid layouts. The interlocking V-shape creates natural stress distribution that can actually strengthen installations when properly executed. However, this same characteristic requires careful planning at borders and transitions.
The diagonal orientation means cut tiles at edges experience different stress loads than interior tiles. Professional installers address this by incorporating appropriate expansion joints and using compatible adhesives that accommodate thermal movement.
Material Science and Thermal Expansion
Different materials expand and contract at varying rates with temperature changes. This becomes particularly important behind stoves where heat exposure is highest. Understanding these principles helps select appropriate materials and installation methods.
Ceramic and Porcelain Tiles: Low thermal expansion rates make these ideal for kitchen applications. The material stability ensures pattern integrity over years of temperature cycling.
Natural Stone: Higher expansion rates require careful attention to grout joint sizing and adhesive selection. However, the natural variations help disguise minor movement.
Glass Tiles: Excellent thermal stability but requiring specialized installation techniques to prevent cracking at cut edges.
Adhesive Technology and Bond Strength
Modern peel-and-stick options incorporate advanced adhesive chemistry that provides excellent initial bond strength while allowing for removal without surface damage. Understanding these technologies helps select appropriate products for different substrates.
Three-component adhesive systems in premium peel-and-stick tiles provide:
- Initial Tack: Allows positioning adjustments during installation
- Primary Bond: Develops full strength within 24 hours
- Long-term Adhesion: Maintains bond strength over years of service
Comprehensive Setup and Installation Guide
Successful herringbone kitchen backsplash installation requires careful planning and systematic execution. Whether using peel-and-stick tiles or traditional methods, following proper procedures ensures professional results.
Pre-Installation Planning and Layout
Surface Preparation Requirements:
- Clean walls with TSP (Tri-Sodium Phosphate) to remove grease and residue
- Sand lightly textured surfaces to improve adhesion
- Prime bare drywall with appropriate primer-sealer
- Check walls for plumb and level, correcting major irregularities
Layout Planning: Begin with accurate measurements and create a detailed installation plan. Identify the visual center point of the backsplash area, typically behind the cooktop or sink. This becomes your starting reference point for pattern layout.
Create horizontal and vertical guidelines using a level and chalk line. These references ensure straight installation even as the pattern develops. Remember that herringbone patterns can amplify small errors, making precise layout critical.
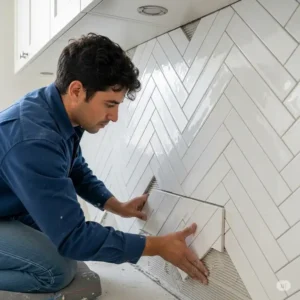
Step-by-Step Installation Process
Phase 1: Pattern Establishment (Days 1-2) Start at the visual center and work outward. Install complete herringbone units before cutting edge pieces. This approach ensures pattern symmetry and minimizes waste.
Use spacers consistently to maintain grout line width. Even peel-and-stick installations benefit from temporary spacers to ensure consistent gaps between tiles.
Phase 2: Edge Cutting and Trimming (Days 2-3) Measure each edge piece individually rather than assuming uniformity. Use sharp utility knives for vinyl tiles or tile saws for ceramic and stone materials. Score-and-snap techniques work well for thinner materials but may cause chipping with thicker tiles.
Phase 3: Final Installation and Cleanup (Day 3) Complete installation by filling all edge areas and checking for loose tiles. Remove any adhesive residue immediately, as it becomes much more difficult to clean once cured.
Safety Considerations and Best Practices
Always wear appropriate safety equipment including eye protection and dust masks when cutting tiles. Ensure adequate ventilation when using adhesives or sealers.
Test peel-and-stick adhesion on a small, inconspicuous area before full installation. Some wall textures or paint types may require additional preparation or alternative installation methods.
Plan electrical outlet and switch accommodations carefully. Herringbone patterns require precise cutting around obstacles, and mistakes are difficult to hide.
Maintenance and Longevity Optimization
Proper maintenance ensures your herringbone kitchen backsplash maintains its beauty and functionality for decades. Understanding material-specific requirements prevents damage and extends service life.
Daily Maintenance Protocols
Routine Cleaning (Daily): Wipe surfaces with damp microfiber cloth to remove cooking residue before it sets. Pay special attention to areas behind the stove where grease accumulation is highest.
Avoid abrasive cleaners that can scratch tile surfaces or damage grout lines. pH-neutral cleaners work best for most materials and won’t cause color fading over time.
Weekly Deep Cleaning: Use appropriate cleaners for your specific tile material. Ceramic and porcelain tiles tolerate stronger cleaners, while natural stone requires pH-neutral products to prevent etching.
Clean grout lines with soft brushes to prevent staining accumulation. Address spills immediately to prevent permanent staining, especially on porous materials.
Quarterly Maintenance Tasks
Grout Inspection and Maintenance: Check grout lines for cracks, staining, or loosening. Small repairs are much easier than complete re-grouting projects. Touch up damaged areas promptly to prevent water infiltration.
Seal Inspection (Natural Stone Only): Natural stone tiles require periodic sealing to maintain stain resistance. Test water absorption by placing small drops on the surface. If water absorbs quickly, resealing is needed.
Hardware and Trim Inspection: Check edge trim, outlet covers, and other hardware for loosening or damage. Address issues promptly to prevent water infiltration behind tiles.
Annual Professional Maintenance
Consider professional cleaning and inspection annually, especially for high-use kitchens. Professional services can identify potential problems before they become expensive repairs.
Professional cleaning removes accumulated residue that household cleaners cannot address. This is particularly important for textured tiles where residue can accumulate in surface irregularities.
Troubleshooting Common Issues
Tile Loosening: Usually caused by substrate movement or inadequate adhesion. Address immediately to prevent further damage. Small areas can often be re-adhered, while larger areas may require professional attention.
Grout Discoloration: Normal wear in high-use areas. Consider grout colorant products for minor discoloration or professional re-grouting for severe cases.
Edge Lifting (Peel-and-Stick): Common in high-humidity areas or where edge sealing is inadequate. Use manufacturer-approved edge sealants to prevent moisture infiltration.
Comparative Analysis with Alternative Backsplash Solutions
Understanding how herringbone kitchen backsplash options compare with alternatives helps make informed decisions based on specific needs and preferences.
Design Comparison Matrix
| Pattern Type | Visual Impact | Installation Time | Maintenance Level | Cost Factor |
|---|---|---|---|---|
| Herringbone | ⭐⭐⭐⭐⭐ | ⭐⭐ | ⭐⭐⭐ | ⭐⭐⭐⭐ |
| Subway (Running Bond) | ⭐⭐⭐ | ⭐⭐⭐⭐⭐ | ⭐⭐⭐⭐ | ⭐⭐⭐ |
| Hexagon | ⭐⭐⭐⭐ | ⭐⭐ | ⭐⭐ | ⭐⭐⭐⭐ |
| Large Format | ⭐⭐⭐⭐ | ⭐⭐⭐⭐ | ⭐⭐⭐⭐⭐ | ⭐⭐⭐ |
| Mosaic | ⭐⭐⭐⭐⭐ | ⭐ | ⭐⭐ | ⭐⭐⭐⭐⭐ |
Traditional vs Modern Installation Methods
Traditional Tile Installation:
- Higher initial cost but superior longevity
- Professional installation typically required
- Unlimited design possibilities with custom cutting
- Best for permanent installations and high-end projects
Peel-and-Stick Installation:
- Lower initial cost and DIY-friendly
- Easier to change or update in future
- Limited to available pre-made patterns
- Ideal for rental properties or temporary updates
Long-Term Value Propositions
Herringbone patterns typically add more resale value than standard subway tiles due to their sophisticated appearance. However, overly bold color choices may limit appeal to future buyers.
Classic white or neutral herringbone patterns provide the best long-term value retention while allowing personal expression through accessories and hardware choices.

Case Studies and Real-World Success Stories
Examining successful herringbone kitchen backsplash installations provides valuable insights into design decisions and implementation strategies.
Case Study 1: Farmhouse Kitchen Renovation
Project Overview: A 1920s farmhouse kitchen renovation incorporated white ceramic herringbone backsplash with gray grout to maintain period authenticity while adding contemporary sophistication.
Design Challenges:
- Uneven walls from settling required careful substrate preparation
- Existing electrical outlets needed repositioning for pattern alignment
- Budget constraints necessitated DIY installation
Solutions Implemented:
- Used peel-and-stick herringbone tiles for budget control
- Created detailed layout plan to minimize cutting around outlets
- Applied primer-sealer to improve adhesion on textured plaster walls
Results and Lessons Learned: The installation took three weekends but saved over $2,000 compared to professional installation. The homeowner reported excellent durability after 18 months and praised the visual impact.
Key Takeaway: Careful planning and surface preparation can achieve professional results with DIY peel-and-stick installation.
Case Study 2: Modern Condo Kitchen Update
Project Specifications: A downtown condo kitchen featuring stainless steel appliances and white quartz countertops incorporated glass herringbone backsplash for contemporary appeal.
Unique Requirements:
- Open floor plan required backsplash to complement living space
- Limited ventilation necessitated easy-clean materials
- Renter restrictions prevented permanent modifications
Design Solution: Selected large-format glass herringbone tiles with metallic accents. Used temporary adhesive system allowing future removal without damage.
Performance Results: After 12 months, the installation showed excellent resistance to cooking residue and maintained original appearance with minimal maintenance.
Key Learning: Glass herringbone patterns work exceptionally well in modern spaces and offer superior cleanability for high-use kitchens.
Case Study 3: Historic Home Restoration
Project Background: A Victorian-era home kitchen restoration required period-appropriate materials and installation methods while meeting modern functionality needs.
Historical Constraints:
- Preservation guidelines limited material choices
- Original substrate required specialized preparation
- Pattern needed to complement existing architectural details
Custom Solution: Hand-cut natural stone herringbone using traditional installation methods. Pattern scale matched original floor tile proportions for design continuity.
Long-term Performance: Five years post-installation, the backsplash shows minimal wear and has received praise from local preservation societies for authentic restoration techniques.
Critical Insight: Investing in traditional materials and methods provides superior longevity and historical authenticity for period homes.
Future Trends and Market Evolution
The herringbone kitchen backsplash market continues evolving with new materials, installation methods, and design interpretations responding to changing consumer preferences and lifestyle needs.
Emerging Technologies and Materials
Smart Tile Integration: Manufacturers are developing tiles with integrated LED lighting that follows herringbone patterns. These systems provide task lighting while maintaining design aesthetic.
Antimicrobial Surface Treatments: New surface technologies incorporate antimicrobial properties directly into tile materials, providing enhanced hygiene benefits for kitchen applications.
Sustainable Material Development: Recycled glass and reclaimed materials are increasingly available in herringbone patterns, addressing environmental concerns while maintaining design appeal.

Installation Innovation Trends
Magnetic Mounting Systems: Experimental magnetic tile systems allow temporary installations that can be easily changed or updated. These systems work particularly well for rental applications.
Modular Herringbone Panels: Pre-assembled herringbone panels reduce installation time while maintaining pattern integrity. These systems particularly benefit DIY installers seeking professional results.
Digital Pattern Planning: Augmented reality applications allow virtual pattern placement before installation, reducing waste and ensuring optimal layout decisions.
Design Evolution Predictions
Color Trend Forecasting: Industry experts predict increasing demand for earth tones and warm neutrals in herringbone patterns, reflecting broader shifts toward comfort-focused home design.
Scale Variations: Larger herringbone patterns using oversized tiles are gaining popularity in contemporary designs, while mini herringbone patterns appeal to traditional aesthetics.
Mixed Material Integration: Combining different materials within single herringbone installations creates custom looks that appeal to luxury market segments.
Market Accessibility Improvements
Price Point Expansion: Competition among manufacturers is driving down prices while improving quality, making herringbone options accessible to broader market segments.
Installation Simplification: Continued improvements in peel-and-stick technology and pre-assembled systems reduce installation barriers for DIY consumers.
Design Tool Availability: Online planning tools and sample programs make it easier for consumers to visualize and plan herringbone installations.
Comparison Tables and Decision Matrices
Material Performance Comparison
| Material Type | Durability | Maintenance | Heat Resistance | Water Resistance | Cost Range |
|---|---|---|---|---|---|
| Ceramic | ⭐⭐⭐⭐⭐ | ⭐⭐⭐⭐ | ⭐⭐⭐⭐⭐ | ⭐⭐⭐⭐⭐ | $2-8/sq ft |
| Porcelain | ⭐⭐⭐⭐⭐ | ⭐⭐⭐⭐⭐ | ⭐⭐⭐⭐⭐ | ⭐⭐⭐⭐⭐ | $3-12/sq ft |
| Natural Stone | ⭐⭐⭐⭐ | ⭐⭐⭐ | ⭐⭐⭐⭐ | ⭐⭐⭐ | $5-20/sq ft |
| Glass | ⭐⭐⭐⭐ | ⭐⭐⭐⭐⭐ | ⭐⭐⭐ | ⭐⭐⭐⭐⭐ | $4-15/sq ft |
| Peel-and-Stick | ⭐⭐⭐ | ⭐⭐⭐⭐ | ⭐⭐ | ⭐⭐⭐⭐ | $1-5/sq ft |
Installation Method Comparison
| Installation Type | DIY Difficulty | Time Required | Tool Requirements | Professional Cost | Permanence |
|---|---|---|---|---|---|
| Peel-and-Stick | ⭐⭐ Easy | 1-2 days | Basic tools | N/A | Removable |
| Traditional Tile | ⭐⭐⭐⭐ Hard | 3-5 days | Specialized tools | $5-12/sq ft | Permanent |
| Mesh-Mounted | ⭐⭐⭐ Moderate | 2-3 days | Moderate tools | $3-8/sq ft | Permanent |
Design Style Compatibility Matrix
| Kitchen Style | White Herringbone | Colored Herringbone | Natural Stone | Glass Herringbone | Mixed Materials |
|---|---|---|---|---|---|
| Traditional | ⭐⭐⭐⭐⭐ | ⭐⭐⭐ | ⭐⭐⭐⭐⭐ | ⭐⭐ | ⭐⭐⭐ |
| Farmhouse | ⭐⭐⭐⭐⭐ | ⭐⭐⭐⭐ | ⭐⭐⭐⭐ | ⭐⭐ | ⭐⭐⭐⭐ |
| Modern | ⭐⭐⭐⭐ | ⭐⭐⭐⭐⭐ | ⭐⭐⭐ | ⭐⭐⭐⭐⭐ | ⭐⭐⭐⭐⭐ |
| Contemporary | ⭐⭐⭐⭐ | ⭐⭐⭐⭐⭐ | ⭐⭐⭐⭐ | ⭐⭐⭐⭐⭐ | ⭐⭐⭐⭐⭐ |
| Industrial | ⭐⭐⭐ | ⭐⭐⭐⭐ | ⭐⭐⭐ | ⭐⭐⭐⭐ | ⭐⭐⭐⭐⭐ |
✨ Transform Your Kitchen Today! 🔥
Ready to create the kitchen of your dreams? These herringbone backsplash options combine style, durability, and value to deliver stunning results. Click on any product name to explore current pricing and customer reviews! 🏠
Conclusion
Selecting the perfect herringbone kitchen backsplash involves balancing aesthetic preferences, practical requirements, and budget considerations. Whether you choose affordable peel-and-stick options like the Art3d Herringbone Peel and Stick Backsplash Tiles or premium materials like genuine Carrara marble, the timeless herringbone pattern will enhance your kitchen’s visual appeal for years to come.
The seven products featured in this guide represent the best available options across different price points and installation methods. From DIY-friendly peel-and-stick solutions to luxury natural materials, there’s a herringbone kitchen backsplash option suited to every project and budget.
Remember that proper installation and maintenance are crucial for long-term satisfaction regardless of material choice. Take time to plan your layout carefully, prepare surfaces properly, and follow manufacturer guidelines for optimal results.
The herringbone pattern’s enduring popularity stems from its perfect balance of sophistication and versatility. Whether updating a single wall or completing a full kitchen renovation, a well-executed herringbone kitchen backsplash creates a stunning focal point that enhances both functionality and resale value.
Frequently Asked Questions
❓ How much does a quality herringbone kitchen backsplash typically cost?
✅ Quality herringbone kitchen backsplash installations range from $2-20 per square foot depending on material and installation method. Peel-and-stick options start around $2-5 per square foot, while ceramic and porcelain tiles typically cost $3-12 per square foot. Natural stone and premium materials can reach $15-20 per square foot installed...
❓ Are herringbone backsplash patterns harder to install than subway tiles?
✅ Yes, herringbone kitchen backsplash patterns require more precision and cutting than standard subway tile installations. The diagonal pattern demands careful measurement and planning, with more complex cuts around outlets and edges. However, peel-and-stick herringbone options significantly reduce installation difficulty compared to traditional tile methods...
❓ What's the best material for herringbone kitchen backsplash behind the stove?
✅ Ceramic or porcelain tiles provide optimal performance for herringbone kitchen backsplash installations behind stoves. These materials offer excellent heat resistance, easy cleaning, and durability against cooking splatter. Glass tiles also work well but require professional installation to prevent thermal stress cracking...
❓ Can I install herringbone backsplash tiles over existing backsplash?
✅ You can install peel-and-stick herringbone backsplash tiles over existing smooth, clean backsplashes. The surface must be level, non-textured, and properly prepared with appropriate cleaners. Traditional tile installations typically require removing existing backsplash materials for proper adhesion and to avoid excessive thickness...
❓ How do I maintain and clean herringbone kitchen backsplash tiles?
✅ Herringbone kitchen backsplash maintenance involves daily wiping with damp microfiber cloths and weekly deep cleaning with pH-neutral cleaners. The pattern's angles can trap grease, so prompt cleaning prevents buildup. Natural stone requires periodic sealing, while ceramic and peel-and-stick options need only regular cleaning...
Recommended for You:
- 7 Best Black and White Kitchen Backsplash Ideas That Transform Your Space in 2025
- 7 Best Grey Kitchen Backsplash Tiles That Transform Spaces in 2025
- 7 Best Funny Kitchen Towels That Will Make You Laugh While You Clean in 2025
Disclaimer: This article contains affiliate links. If you purchase products through these links, we may earn a small commission at no additional cost to you.
✨ Found this helpful? Share it with your friends! 💬🤗