Understanding Kitchen Drawer Replacement
Kitchen drawers are the unsung heroes of our daily cooking routines. When these hardworking components break or become outdated, the entire functionality of your kitchen suffers. Kitchen drawer replacement is a practical home improvement project that can transform your cooking space without the expense of a complete renovation. Whether you’re dealing with broken slides, damaged drawer boxes, or simply want to upgrade the look and functionality of your kitchen storage, this comprehensive guide will walk you through everything you need to know about kitchen drawer replacement.
✨Was this helpful? Spread the word! 🚀
As someone who has replaced countless kitchen drawers across various home styles, I’ve learned that this project can range from surprisingly simple to moderately complex depending on your cabinetry type and desired outcome. The good news? With proper guidance, most homeowners can handle kitchen drawer replacement as a DIY project, saving hundreds or even thousands of dollars compared to a full cabinet replacement.
In this article, we’ll explore the various aspects of kitchen drawer replacement, including detailed step-by-step instructions, materials needed, cost considerations, and creative design ideas. We’ll also look at kitchen cabinet drawer replacement options for those situations where the drawer and cabinet system need to work together. By the end, you’ll have all the knowledge needed to successfully replace your kitchen drawers and give your kitchen a functional upgrade that you’ll appreciate every day.
Why You Might Need Kitchen Drawer Replacement
There are several telltale signs that it’s time to consider kitchen drawer replacement:
✅ Drawers that stick, bind, or don’t slide smoothly
✅ Broken drawer boxes or faces that can’t be repaired
✅ Outdated drawer slides that can’t support modern storage needs
✅ Water damage from plumbing leaks
✅ Desire to upgrade to soft-close or other premium drawer features
✅ Part of a kitchen refresh without full renovation
✅ Improving kitchen organization with better drawer configurations
According to a 2024 survey by the National Kitchen and Bath Association (NKBA), kitchen storage optimization ranks among the top three priorities for homeowners undertaking kitchen improvements. This makes sense when you consider that properly functioning drawers can increase your kitchen’s usable storage space by up to 30% compared to traditional cabinets with shelves.
“The right drawer system can completely transform how you interact with your kitchen daily,” notes Sarah Richardson, an interior designer specializing in kitchen renovations. “It’s one of those upgrades that delivers benefit far beyond its cost.”
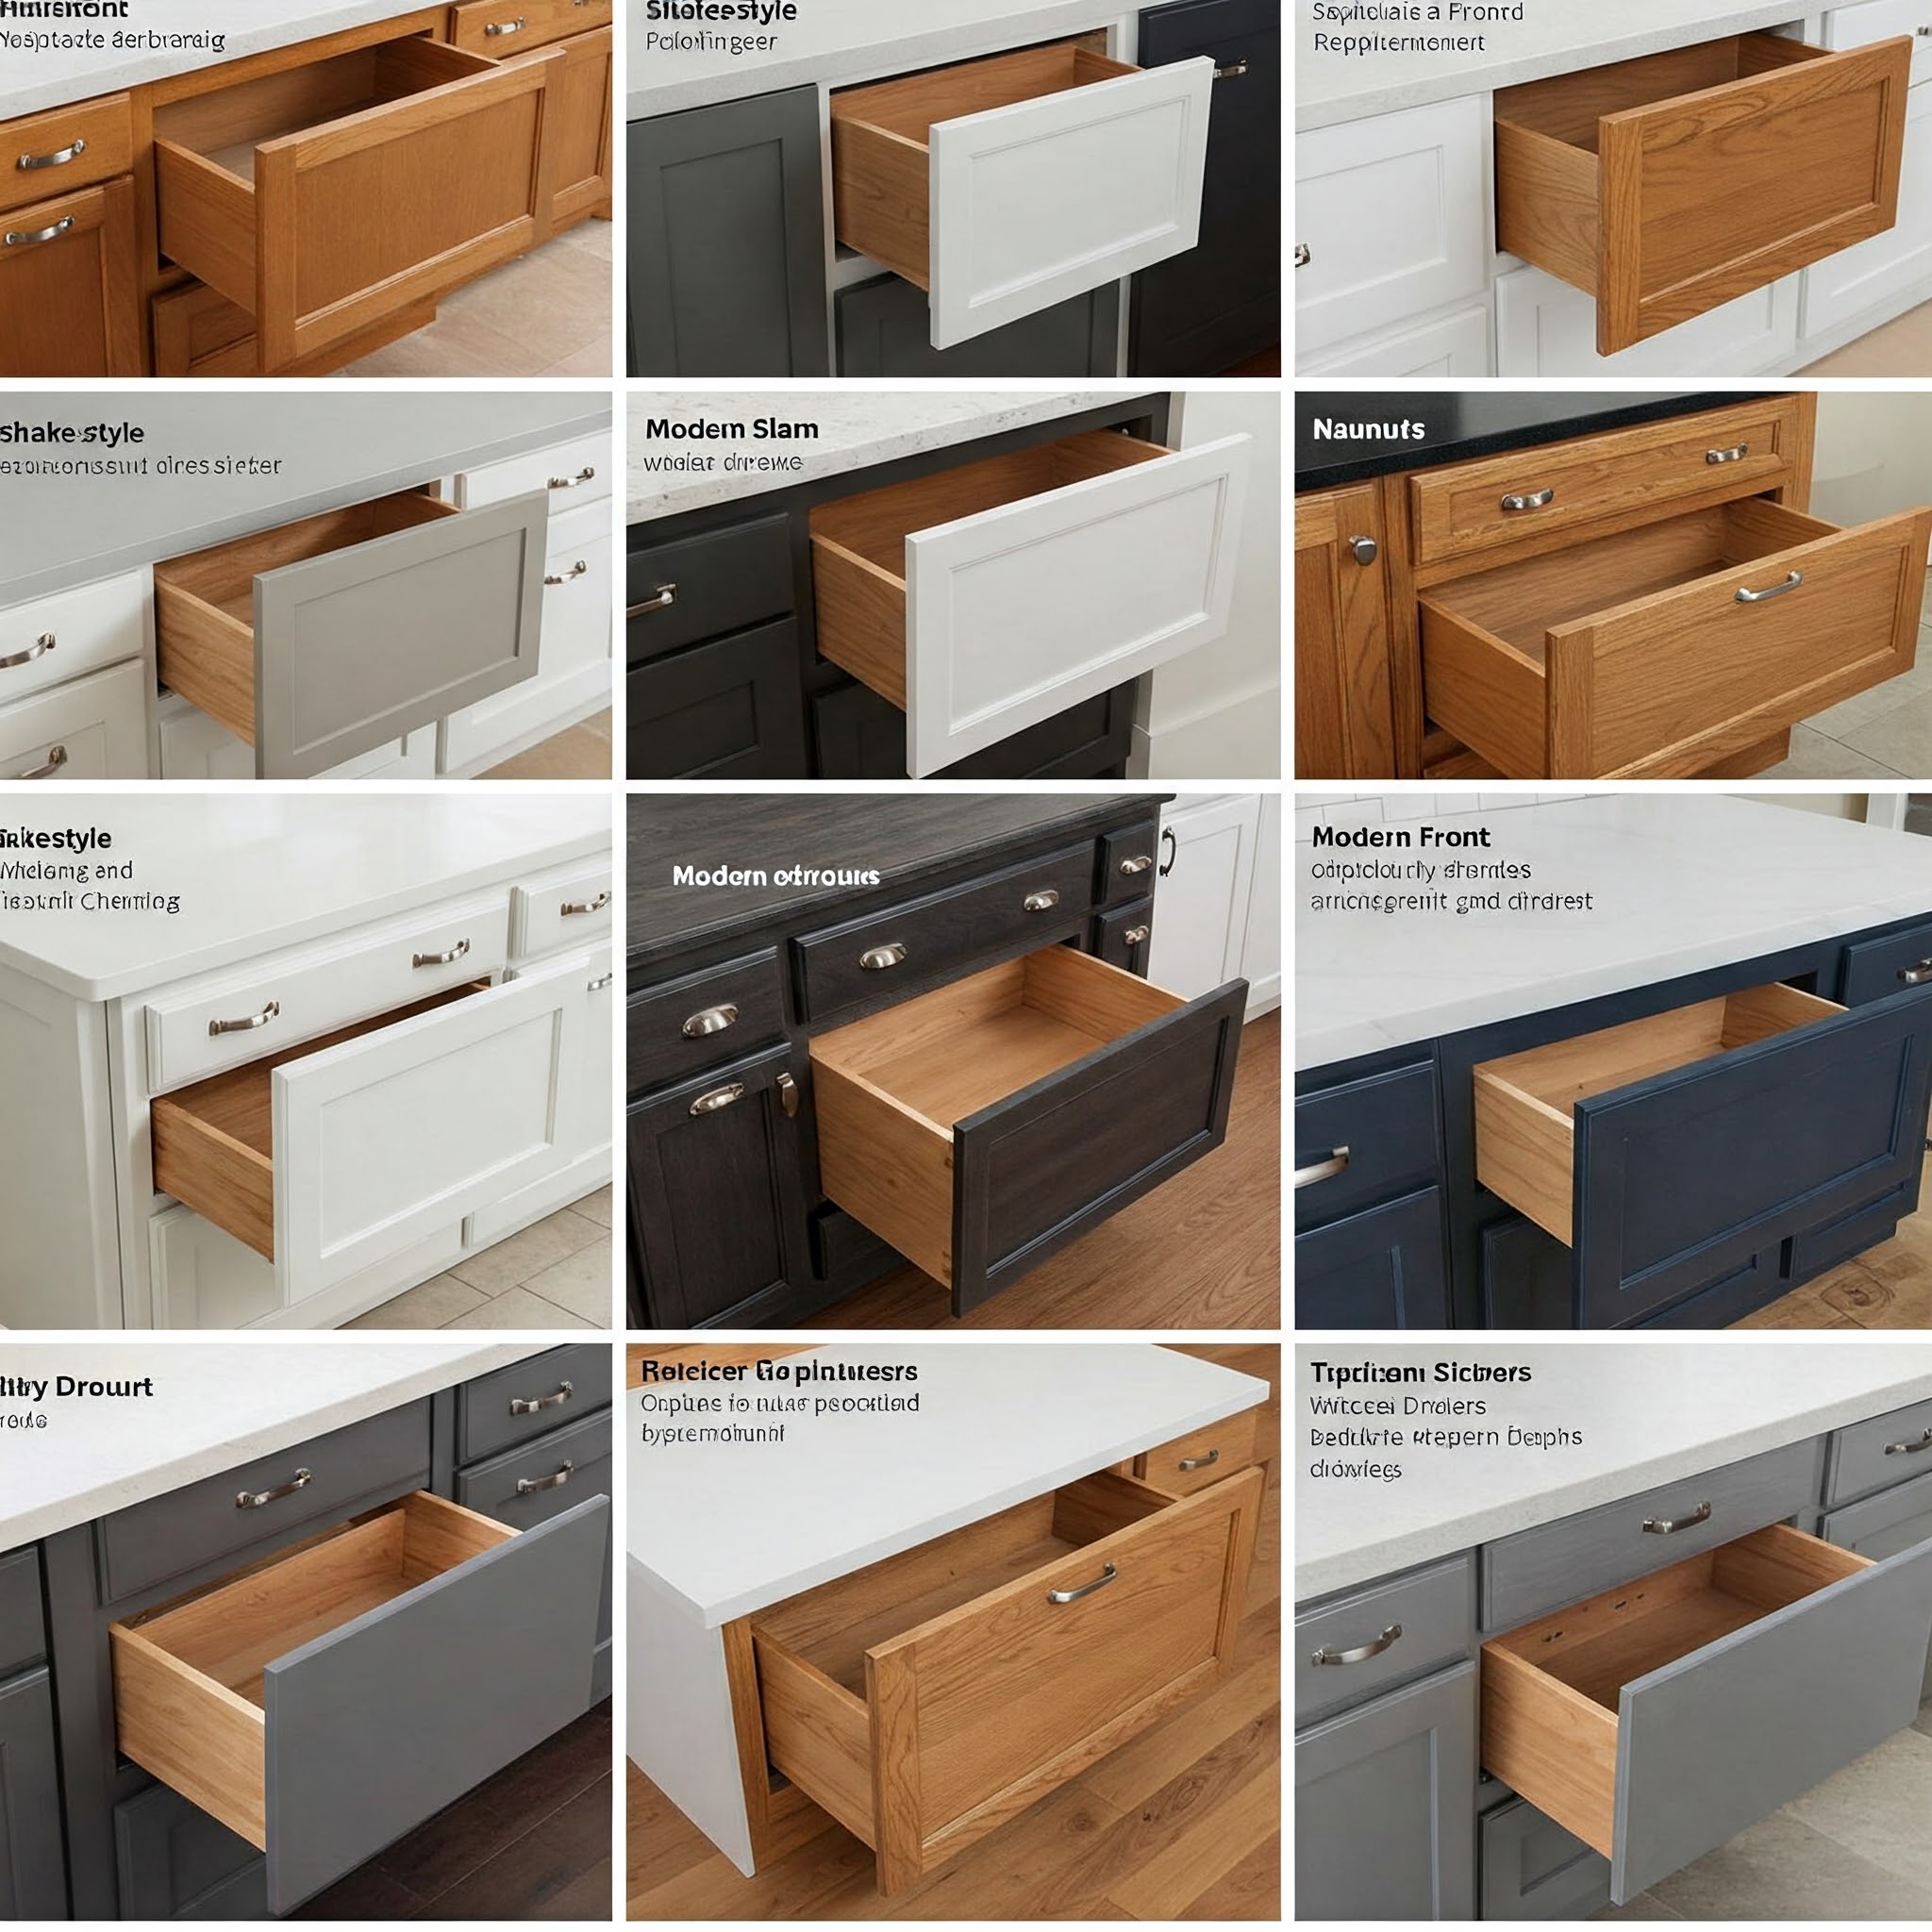
Types of Kitchen Drawer Replacement Projects
Before diving into the specifics, it’s important to understand that kitchen drawer replacement can refer to several different projects:
1. Drawer Face Replacement
In some cases, only the drawer face or front needs replacing. This is the visible part of the drawer and can be updated to change the aesthetic without modifying the drawer box or slides. This is often the simplest and most affordable kitchen drawer replacement option.
2. Drawer Box Replacement
If the drawer box itself is damaged but the slides and face are in good condition, you might only need to replace the box. Kitchen cabinet drawer replacement often involves this approach, particularly in cases of water damage or when drawer bottoms have failed.
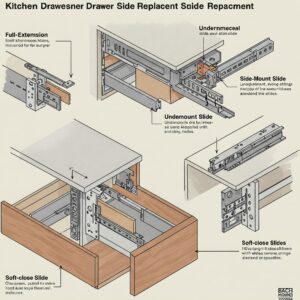
3. Drawer Slide Replacement
Sometimes the drawer box and face are fine, but the sliding mechanism has failed. Upgrading from old-style center mount slides to modern side-mount ball-bearing slides is a common kitchen drawer replacement project that can dramatically improve function.
4. Complete Drawer System Replacement
For major upgrades or when dealing with significant damage, replacing the entire drawer system—box, face, and slides—provides the most comprehensive solution and greatest improvement in functionality.
5. Cabinet Conversion to Drawers
An increasingly popular kitchen drawer replacement trend involves converting traditional cabinets with doors and shelves into drawer systems, maximizing storage efficiency and accessibility.
Tools and Materials Needed for Kitchen Drawer Replacement
Essential Tools:
- Tape measure
- Screwdriver (both Phillips and flathead)
- Drill with various bits
- Level
- Pencil for marking
- Pry bar (for removing old drawers)
- Clamps
- Wood glue (for drawer box assembly)
- Table saw or circular saw (if building custom drawer boxes)
- Kreg jig (for drawer box assembly)
- Safety equipment (goggles, gloves)
Materials Commonly Required:
- Drawer slides (appropriate length for your cabinets)
- Drawer boxes (pre-made or materials to build custom)
- Drawer fronts (if replacing)
- Screws (appropriate for your cabinet material)
- Drawer pulls or knobs (if updating hardware)
- Wood for custom drawer boxes (typically 1/2″ or 5/8″ plywood or solid wood)
- 1/4″ plywood for drawer bottoms
- Finish materials (paint, stain, clear coat) if needed
For my recent kitchen drawer replacement project, I found the Prime-Line R 7321 Drawer Slide Kit to be extraordinarily helpful. This comprehensive kit includes all the hardware needed for a standard drawer replacement, making the process much more straightforward than piecing together individual components.
Step-by-Step Guide to Kitchen Drawer Replacement
Phase 1: Assessment and Preparation
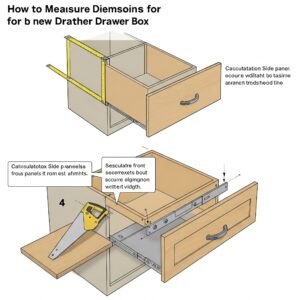
- Measure Existing Drawers: Before purchasing any materials, carefully measure your existing drawers and cabinet openings. For kitchen cabinet drawer replacement, you’ll need:
- Width, height, and depth of cabinet opening
- Width, height, and depth of existing drawer box
- Dimensions of drawer front
- Type and length of current drawer slides
- Choose Replacement Method: Based on your assessment, decide whether you’ll:
- Purchase pre-made drawer boxes
- Build custom drawer boxes
- Reuse existing components
- Completely replace all elements
- Purchase Materials: With measurements in hand, purchase appropriate drawer slides, boxes, and other materials. For kitchen drawer replacement, I recommend buying slides that are rated for at least 75 lbs if you plan to store heavy items like pots and pans.
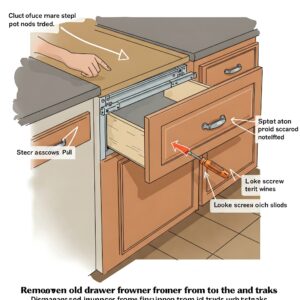
- Empty and Remove Existing Drawers: Empty all contents and remove the drawer from the cabinet. Typically, this involves pulling the drawer out completely, sometimes while lifting or pressing release levers on the slides.
- Remove Old Hardware: Detach the old drawer slides from both the cabinet and drawer box. This usually requires removing several screws on each side.
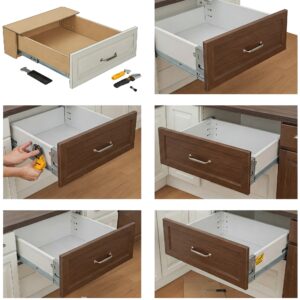
Phase 2: Installation of New Components
If Replacing Drawer Slides Only:
- Install Cabinet-Side Slides: Attach the new slides to the cabinet interior, ensuring they’re level and at the same height on both sides. Most kitchen drawer replacement slides come with detailed instructions specific to that model.
- Attach Drawer-Side Slides: Connect the corresponding drawer-side slide hardware to your existing drawer box. Ensure they’re perfectly parallel to the bottom of the drawer and the same distance from the front on both sides.
- Insert Drawer: Carefully align the drawer-side slides with the cabinet-side slides and push the drawer in until it clicks into place.
If Replacing Drawer Boxes:
- Build or Prepare New Boxes: If building custom boxes, cut materials to size and assemble using glue and screws or other joinery methods. For kitchen cabinet drawer replacement, ensure the box dimensions work with your cabinet opening and slides.
- Install Slides: Follow the slide installation process described above.
- Attach Drawer Front: If reusing the existing drawer front, attach it to the new box, ensuring it’s perfectly aligned and square.
If Doing Complete Kitchen Drawer Replacement:
- Install Cabinet-Side Hardware: Begin with the slide hardware in the cabinet.
- Prepare New Drawer Boxes: Either build or unwrap pre-purchased boxes.
- Attach Drawer-Side Slides: Connect slides to the new drawer boxes.
- Prepare and Attach Drawer Fronts: Finish new drawer fronts as needed (paint, stain, etc.) and attach them to the drawer boxes. Use spacers to ensure even gaps between all drawers and surrounding cabinets.
- Install Handles or Knobs: Add the finishing touch with new drawer pulls or knobs.
- Test and Adjust: Insert each drawer and test its operation. Make adjustments as needed to ensure smooth function and proper alignment.
Phase 3: Finishing Touches
- Fine-tune Alignment: Adjust drawer fronts if needed to ensure perfect alignment with cabinet faces and even spacing between drawers.
- Tighten All Hardware: Do a final check of all screws and connections.
- Apply Final Finishes: Touch up any scratches or chips in the finish.
- Add Drawer Liners: Consider adding quality drawer liners to protect your new drawers and keep contents from sliding.
Kitchen Cabinet Drawer Replacement: Special Considerations
When your project involves kitchen cabinet drawer replacement rather than just the drawers themselves, there are additional factors to consider:
Cabinet Condition Assessment
Before proceeding with kitchen cabinet drawer replacement, carefully examine the cabinet box itself:
✅ Check for water damage, particularly under sink cabinets
✅ Ensure cabinet sides are strong enough to support drawer slides
✅ Verify cabinet is square (measure diagonally from corner to corner)
✅ Look for any structural issues that need addressing
According to a study published in the Journal of Interior Design, kitchen cabinets that are over 20 years old often require additional reinforcement before installing modern drawer systems, especially for heavy-duty applications.
Reinforcement Options
If your cabinet needs reinforcement for proper kitchen drawer replacement:
- Add Blocking: Install solid wood blocking inside the cabinet to provide secure attachment points for drawer slides.
- Side Panel Reinforcement: Add 1/2″ or 3/4″ plywood to weak side panels.
- Use Mounting Plates: Some drawer slide systems offer mounting plates that distribute weight across a wider area of the cabinet.
For my recent kitchen cabinet drawer replacement project in an older home, I found the Blum TANDEM plus BLUMOTION Drawer Runners to be exceptional. These slides include mounting options specifically designed for older cabinets that might not be perfectly square or have other minor issues.
Comparison of Kitchen Drawer Replacement Options
| Replacement Type | Average Cost | DIY Difficulty | Durability | Best For |
|---|---|---|---|---|
| Drawer Slides Only | $15-50 per drawer | Easy | Depends on quality | Quick fixes, budget upgrades |
| Drawer Box Only | $30-100 per drawer | Moderate | 10-15 years | Damaged boxes with good slides |
| Complete Drawer | $75-200 per drawer | Moderate | 15-20+ years | Full functionality upgrade |
| Cabinet-to-Drawer Conversion | $150-350 per drawer | Difficult | 20+ years | Maximizing storage efficiency |
| Custom Drawer Systems | $200-500+ per drawer | Professional | 25+ years | High-end kitchens, specific needs |
💬 Just one click – help others make better buying decisions too!😊
💎 Don’t Miss Out on These Premium Kitchen Storage Solutions! 💯
➡ Take your kitchen organization to the next level with these carefully selected drawer replacement systems. Click on any highlighted product to check current pricing and availability. These quality components will make your kitchen drawer replacement project a lasting success that you’ll appreciate every time you cook!
Cost Factors in Kitchen Drawer Replacement
The price of kitchen drawer replacement varies widely based on several factors:
Material Quality
Drawer box materials significantly impact cost and durability:
- Particle board: Lowest cost ($15-30 per drawer box), 5-8 year lifespan
- Plywood: Mid-range ($40-80 per drawer box), 15-20 year lifespan
- Solid wood: Premium ($75-200+ per drawer box), 20+ year lifespan
Slide Quality and Features
Drawer slides range dramatically in price and functionality:
- Basic side-mount: $8-15 per pair
- Ball-bearing: $15-30 per pair
- Soft-close: $25-45 per pair
- Push-to-open: $35-60 per pair
- Full-extension, heavy-duty: $40-80 per pair
Size and Configuration
Larger drawers and special configurations increase cost:
- Standard width (12-24″): Base price
- Extra-wide (30″+): 50-100% premium
- Deep drawers: 30-75% premium
- Special configurations (curved, corner): 100-200% premium
Pre-made vs. Custom
Pre-made drawer boxes offer convenience while custom solutions provide perfect fit:
- Pre-made standard sizes: $25-75 per drawer box
- Semi-custom (limited size options): $50-120 per drawer box
- Fully custom: $100-250+ per drawer box
For my kitchen drawer replacement project, I found an excellent middle-ground solution with the Rev-A-Shelf 4WDB Series Wood Drawer Box. These come in standard sizes but offer quality construction that rivals custom-built options. I simply had to attach my existing drawer fronts to complete the project.
DIY vs. Professional Installation for Kitchen Drawer Replacement
DIY Installation:
Advantages:
- Cost savings of $50-100 per drawer in labor
- Satisfaction of completing the project yourself
- Ability to work at your own pace
- No need to schedule contractors
Disadvantages:
- Time investment (3-5 hours for first drawer, faster for subsequent drawers)
- Learning curve for first-time installers
- Risk of mistakes if measurements aren’t precise
- Tool requirements
Professional Installation:
Advantages:
- Perfect results guaranteed (usually with warranty)
- Faster completion (professionals can replace 5-10 drawers per day)
- No tool investment required
- Expert knowledge for challenging situations
Disadvantages:
- Higher cost ($50-100 per drawer plus materials)
- Need to schedule and be available during installation
- Less control over specific details
According to a 2024 HomeAdvisor report, the average cost for professional kitchen drawer replacement ranges from $80-200 per drawer installed, with most homeowners spending $500-1,200 for a typical kitchen with 6-8 drawers.
Creative Kitchen Drawer Replacement Ideas
Kitchen drawer replacement presents an opportunity to improve both functionality and aesthetics:
Organizational Innovations
- Tiered Cutlery Drawers: Replace standard drawers with tiered designs specifically for utensils and cutlery.
- Spice Drawer Inserts: Custom inserts with angled storage make spice identification easy.
- Peg Systems: Adjustable pegs in deep drawers securely hold dishes, bowls, and other kitchen items.
- Charging Drawers: Modern kitchen drawer replacement can include built-in charging ports for electronics.
- Custom Dividers: Tailored divider systems for specific kitchen tools and accessories.
The Rev-A-Shelf 4FSCO Series food storage container organizer transformed my kitchen drawer replacement project from simple functionality to incredible organization. This system perfectly corrals those annoying plastic containers that typically create chaos in kitchen drawers.
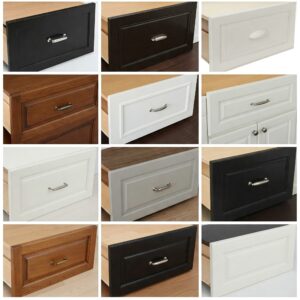
Aesthetic Upgrades
- Material Mixing: Combine different materials for drawer fronts and handles for visual interest.
- Color Blocking: Use different colors for upper and lower drawer fronts.
- Textured Fronts: Replace flat drawer fronts with textured or patterned alternatives.
- Glass or Metal Inserts: Add glass or metal panels to drawer fronts for a high-end look.
- Integrated Handles: Replace traditional pulls with integrated handle designs for a sleek, modern appearance.
💎 Don’t Miss Out on These Premium Kitchen Storage Solutions! 💯
➡ Take your kitchen organization to the next level with these carefully selected drawer replacement systems. Click on any highlighted product to check current pricing and availability. These quality components will make your kitchen drawer replacement project a lasting success that you’ll appreciate every time you cook!
Kitchen Cabinet Drawer Replacement for Special Situations
Corner Cabinet Solutions
Corner cabinets present unique challenges for kitchen drawer replacement:
- Diagonal Drawers: Custom diagonal drawers make use of otherwise wasted corner space.
- L-Shaped Drawers: These specialized drawers follow the L-shape of corner cabinets.
- Magic Corner Systems: Not technically drawers but pull-out systems that bring corner contents into accessible position.
Under-Sink Considerations
The area under sinks requires special attention during kitchen cabinet drawer replacement:
- U-Shaped Drawers: These wrap around plumbing while maximizing usable space.
- Tip-Out Trays: Small tilt-out drawers utilize the false-front space directly under the sink.
- Adjustable Systems: Modular drawer systems that can be configured around existing plumbing.
Trash and Recycling Solutions
Modern kitchen drawer replacement often incorporates waste management:
- Multi-Bin Pull-Outs: Drawer systems with separate compartments for trash, recycling, and compost.
- Bottom-Mount Systems: Space-efficient designs that mount under a standard drawer.
- Toe-Kick Drawers: Utilize the space in the toe-kick area for slim recycling storage.
The Environmental Impact of Kitchen Drawer Replacement
Sustainability considerations for your kitchen drawer replacement project:
Responsible Material Choices
- Formaldehyde-Free Plywood: Standard plywood often contains formaldehyde. Look for NAF (No Added Formaldehyde) or ULEF (Ultra-Low Emitting Formaldehyde) certified products.
- FSC-Certified Wood: Ensures wood comes from responsibly managed forests.
- Bamboo and Other Rapidly Renewable Options: These materials regrow quickly, reducing environmental impact.
Recycling Old Materials
- Wood Recycling: Many communities have programs for wood waste recycling.
- Metal Hardware: Old drawer slides and handles can often be recycled as scrap metal.
- Upcycling Options: Old drawer boxes can become garden planters, wall shelves, or other useful items.
Long-Term Sustainability
According to Environmental Building News, choosing high-quality drawer systems that last 20+ years has less environmental impact than installing cheaper options that require replacement after 5-10 years, even if the initial materials have a higher footprint.
How to Extend the Life of Your Kitchen Drawer Replacement
Once you’ve completed your kitchen drawer replacement, these maintenance tips will ensure long-lasting performance:
Regular Maintenance
- Cleaning Drawer Slides: Every 6-12 months, vacuum any debris from drawer slides and wipe with a clean, dry cloth.
- Lubrication: Apply a small amount of silicone-based lubricant to drawer slides annually. Avoid using WD-40 or oil-based lubricants that attract dust.
- Check and Tighten Hardware: Periodically check all screws and tighten if necessary.
Weight Considerations
- Know the Weight Limits: Drawer slides have specific weight ratings—usually 75-100 lbs for standard drawers and up to 500 lbs for heavy-duty options.
- Distribute Weight Evenly: Place heavier items toward the back and center of drawers.
- Avoid Overloading: Respect the weight limits of your kitchen drawer replacement system.
Preventing Damage
- Use Drawer Dividers: These prevent items from jamming against the drawer sides or back.
- Open and Close Properly: Don’t force drawers or slam them closed, even with soft-close mechanisms.
- Address Spills Immediately: Liquids can damage drawer boxes, especially those made of particle board or MDF.
Troubleshooting Common Kitchen Drawer Replacement Issues
Even with careful installation, you might encounter these common issues:
Drawer Not Closing Completely
Possible Causes and Solutions:
- Obstacle in the cabinet: Check for and remove any items blocking the drawer path
- Slides not installed parallel: Reinstall to ensure perfect parallel alignment
- Cabinet not square: Use shims to adjust slide positioning
Drawer Front Misalignment
Possible Causes and Solutions:
- Mounting screws not tight: Tighten all screws connecting front to box
- Adjustment needed: Most drawer fronts have adjustment screws—usually two on the inside of the drawer box connected to the front
- Box racking (not square): Check for square and reinstall if necessary
Slides Not Working Smoothly
Possible Causes and Solutions:
- Debris in slides: Clean thoroughly
- Damage to slide components: Replace if ball bearings are missing or tracks are bent
- Improper installation: Verify slides are level and properly spaced
Drawer Box Failing
Possible Causes and Solutions:
- Bottom pulling away: Reinforce with additional fasteners and glue
- Side joints separating: Clamp and reinforce with appropriate fasteners
- Water damage: Replace affected components and address the source of moisture
Expert Tips for Kitchen Drawer Replacement Success
After completing dozens of kitchen drawer replacement projects, I’ve gathered these professional tips:
- Buy Quality Slides: This is not the place to economize. Quality slides make the difference between frustrating drawers and those that are a joy to use every day.
- Consider Future Needs: When replacing drawers, think about how your storage needs might change. Installing larger or more versatile drawer systems now can prevent the need for another replacement later.
- Use Templates: Create installation templates for drawer slides to ensure consistent placement across multiple drawers.
- Pre-drill All Holes: Pre-drilling prevents splitting and ensures screws go in straight.
- Leave Adjustment Room: When attaching drawer fronts, use methods that allow for later adjustment to perfect the alignment.
- Document Your Project: Take photos and notes on the specific slides and materials used for future reference when maintenance is needed.
- Consider a Test Drawer: If replacing multiple drawers, complete one drawer entirely before proceeding with others. This allows you to catch any issues with your process before repeating them.
💫 Transform Your Kitchen Today with Quality Drawer Solutions! 🔧
➡ Ready to upgrade your kitchen storage? The products mentioned in this guide are available now with fast shipping. Click any highlighted product name to check current pricing and read verified customer reviews. Quality drawer systems make cooking and organization significantly easier—it’s an investment you’ll appreciate every single day!
Conclusion: Making the Most of Your Kitchen Drawer Replacement Project
Kitchen drawer replacement represents one of the most cost-effective ways to improve your kitchen’s functionality and appearance. Whether you’re replacing a single damaged drawer or undertaking a complete kitchen cabinet drawer replacement project, the improvements to your daily kitchen experience can be substantial.
Remember that successful kitchen drawer replacement depends on accurate measurements, quality materials, and careful installation. Taking the time to plan properly and select the right components for your specific needs will result in drawers that function flawlessly for years to come.
Consider starting with one drawer to perfect your technique before moving on to others. This approach allows you to adjust your process as needed without repeating the same mistakes across multiple drawers. And don’t be afraid to invest in quality—especially for frequently used drawers. The difference between budget and premium drawer slides is often just $20-30 per drawer, but the improvement in daily use experience is significant.
Finally, view kitchen drawer replacement as an opportunity to rethink your kitchen organization. Modern drawer systems offer amazing organizational possibilities that weren’t available when most older kitchens were built. Taking advantage of these innovations can transform not just how your kitchen looks, but how effectively you can use it every day.
FAQs About Kitchen Drawer Replacement
❓ How much does it cost to replace kitchen drawer slides?
✅ For standard kitchen drawers, expect to pay $15-80 per drawer for just the slides, depending on quality and features. Basic side-mount slides start around $15 per pair, while premium soft-close, full-extension slides can cost $40-80. Professional installation adds $50-100 per drawer...
❓ Can I replace kitchen drawer boxes without replacing the fronts?
✅ Yes, this is a common and cost-effective approach. Most drawer fronts attach to the box with screws from inside, making them transferable to new boxes. Ensure your new box dimensions match the original for proper front alignment and slide function...
❓ What's the best material for kitchen drawer replacement boxes?
✅ Baltic birch plywood offers the best balance of durability and value for most kitchen drawer replacement projects. It's resistant to warping, holds screws well, and withstands kitchen humidity variations. For premium drawers, solid maple or walnut provide exceptional strength and can last decades...
❓ How long does a typical kitchen drawer replacement project take?
✅ For DIY installation, budget 1-2 hours per drawer for your first attempt, then 30-45 minutes for subsequent drawers once you've learned the process. Professional installation is faster, with contractors typically replacing 6-8 drawers in a single day. Complete kitchen cabinet drawer replacement projects may take 2-3 days...
❓ Can I convert regular cabinets to pull-out drawers during kitchen cabinet drawer replacement?
✅ Absolutely! Cabinet-to-drawer conversion is one of the most popular kitchen upgrades. Most standard base cabinets can accommodate 2-3 drawers of varying heights. This conversion typically requires removing shelves, installing drawer slides at appropriate heights, and adding custom-sized drawer boxes with coordinating fronts...
Recommended for You:
- 10 Stunning Dark Brown Kitchen Cabinets Ideas That Transform Any Space in 2025
- The Timeless Appeal of Cherry Kitchen Units: A Complete Guide for 2025
- The Ultimate Guide to Hickory Kitchen Cabinets in 2025: Beauty, Durability, and Timeless Appeal
Disclaimer: This article contains affiliate links. If you purchase products through these links, we may earn a small commission at no additional cost to you.
✨ Found this helpful? Share it with your friends! 💬🤗