
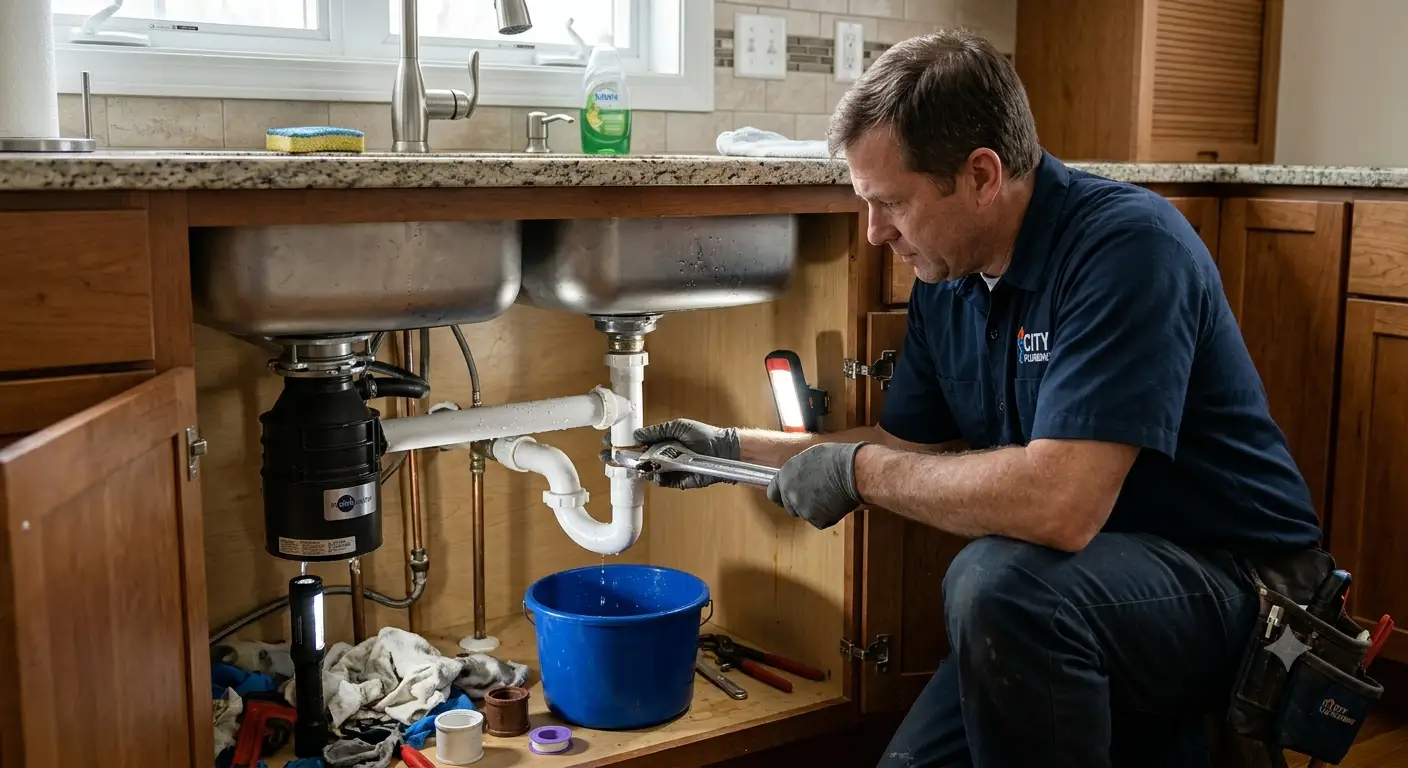
Introduction: Why reactive kitchen repairs Deserve a Plan
Reactive kitchen repairs are the fixes you make after something in the kitchen has already failed — a dripping faucet, a jammed garbage disposal, a clogged sink, a pinhole leak under the cabinet, or a countertop outlet that keeps tripping. Instead of scheduled upkeep, you respond to the breakdown, diagnose it, and restore function as quickly and safely as possible.
That sounds simple, but here’s the catch: most kitchen failures happen at the worst possible moment. The disposal jams twenty minutes before guests arrive. The faucet starts dripping on a holiday weekend when a plumber’s call-out fee doubles. In maintenance language, this approach is called corrective maintenance — work carried out after a failure is detected, with the goal of getting the equipment back to doing its job. The difference between a $10 fix and a $300 service call is usually not skill. It’s whether the right part or tool is already sitting in a drawer.
That’s what this guide is about. We compared seven real, widely available products that cover the most common emergency kitchen repairs: leaks, clogs, jams, failed seals, and electrical hiccups. Each pick is analyzed from its actual spec sheet and real aggregated customer feedback — no invented tests, no fake testimonials. You’ll get honest commentary on who each tool suits, where it falls short, and how to combine them into a compact kitchen repair kit for 2027.
You’ll also find step-by-step DIY kitchen repairs guidance, a problem-to-solution playbook, cost analysis, and the safety lines you should never cross. Think of it as the fire extinguisher philosophy applied to plumbing and wiring: you hope you never need it, but when you do, you need it now.
Quick Comparison: The reactive kitchen repairs Toolkit at a Glance
| Product | What It Fixes | Skill Level | Typical Price Range | Best For |
|---|---|---|---|---|
| Moen 1225 Replacement Cartridge | Dripping or stiff single-handle Moen faucet | Beginner–Intermediate | Around $25–$45 | Moen 1225 Replacement Cartridge: owners of older single-handle Moen faucets |
| SharkBite Max 1/2-Inch Slip Coupling | Burst or pinholed 1/2″ copper/CPVC line | Intermediate | Around $15–$25 | SharkBite Max 1/2-Inch Slip Coupling: fast, permanent pipe repair without soldering |
| J-B Weld WaterWeld | Small leaks, cracks, holes (even wet) | Beginner | Under $10 | J-B Weld WaterWeld: stop-gap sealing until a full repair |
| RIDGID PowerSpin+ | Kitchen sink clogs and grease buildup | Beginner | Around $50–$75 | RIDGID PowerSpin+: recurring sink clogs |
| InSinkErator Jam-Buster Wrench | Jammed InSinkErator disposal | Beginner | Around $10 | InSinkErator Jam-Buster Wrench: anyone with an InSinkErator unit |
| GE Advanced Silicone 2 Kitchen & Bath | Failed sink, backsplash, and counter seals | Beginner | Under $15 | GE Advanced Silicone 2 Kitchen & Bath: re-sealing after water damage |
| Klein Tools RT250 GFCI Tester | Tripping or dead countertop outlets | Beginner | Around $20–$30 | Klein Tools RT250 GFCI Tester: diagnosing outlet faults safely |
Looking at the table, the cheapest items are often the ones that save the most money: the InSinkErator Jam-Buster Wrench and J-B Weld WaterWeld together cost less than a pizza, yet they handle two of the most common panic calls. The RIDGID PowerSpin+ is the biggest upfront spend, but it’s also the only reusable tool here that pays for itself every time it replaces a drain-cleaning visit. If your faucet is a Moen, the Moen 1225 Replacement Cartridge is the single highest-impact fix — just confirm your faucet model first.
💬 One click helps other shoppers make an informed choice too! 😊
Top 7 Tools for reactive kitchen repairs: Expert Analysis
1. Moen 1225 Replacement Cartridge — fixes the drip at its source
Most single-handle faucet drips aren’t a “new faucet” problem — they’re a worn-cartridge problem, and this part addresses exactly that. The Moen 1225 Replacement Cartridge is a genuine OEM part that fits most Moen single-handle kitchen and bathroom faucets, except Posi-Temp and ExactTemp shower valves. In practice, that broad compatibility means one inexpensive part can rescue a faucet that might otherwise cost $150–$300 to replace. It ships with a plastic twisting cap that helps break the old cartridge loose, which matters because a stuck cartridge is the number-one reason DIY faucet repairs stall.
Based on the spec sheets, this is the right pick for homeowners with an older single-handle Moen that drips, feels stiff, or mixes temperature inconsistently. One important nuance: Moen faucets manufactured after roughly 2009 may use the 1255 cartridge instead, so check your faucet’s model number before ordering. Also note that petroleum-based greases can damage the cartridge seals — use only silicone grease approved for faucets.
Aggregated customer feedback at major retailers consistently describes installation as straightforward, with the included removal tool frequently mentioned as the reason the job went smoothly.
Pros:
- ✅ Fixes leaks for a fraction of faucet replacement cost
- ✅ Fits most Moen single-handle faucets
- ✅ Includes a cartridge removal tool
Cons:
- ❌ Newer faucets may need the 1255 instead
- ❌ Stubborn old cartridges can still require a puller
Typically priced around $25–$45 (check the current price), it’s excellent value when it prevents a full faucet replacement.
2. SharkBite Max 1/2-Inch Slip Coupling — permanent pipe fix, no torch
When a supply line under the sink splits or develops a pinhole, the SharkBite Max 1/2-Inch Slip Coupling (model UR3008A) lets you cut out the damaged section and reconnect — no soldering, no glue. The slip design allows you to remove up to about 2 inches of damaged pipe with a single fitting, which is the key practical advantage: you don’t need extra pipe or a second coupling. It works on copper and CPVC, and the Max generation is marketed as requiring roughly half the insertion force of first-generation SharkBite fittings.
Here’s what to weigh: this is a genuine repair, not a patch, so it suits intermediate DIYers who can shut off the water, cut pipe squarely, and deburr the end. If you’ve never cut pipe before, add a mini tubing cutter to your kit — a crooked cut is the most common cause of push-fit leaks. You’ll also need the SharkBite disconnect clip to slide the slip fitting into position.
Reviews at Lowe’s are strongly positive overall, with buyers repeatedly calling it a quick fix for pinhole leaks; a recurring caution is that it doesn’t work on flexible plastic hose and requires a clean, square cut.
Pros:
- ✅ Removes up to 2 inches of damaged pipe
- ✅ No soldering, torch, or glue needed
- ✅ Works on copper and CPVC lines
Cons:
- ❌ Requires a square, deburred pipe cut
- ❌ Not compatible with flexible plastic hose
Usually around $15–$25, it costs far less than an emergency plumber visit for the same repair.
3. J-B Weld WaterWeld — seals leaks even when wet
The J-B Weld WaterWeld (model 8277) is the “buy yourself time” tool every kitchen should have. It’s a hand-mixable two-part epoxy putty that can set up on wet surfaces and even under water, which means you can stop a weeping drain joint or a cracked trap without fully drying everything first. According to J-B Weld’s specs, it sets in about 25 minutes, cures hard in roughly an hour, and can then be drilled, sanded, filed, or painted. It’s also NSF-certified for contact with potable water, which matters if the repair touches a drinking-water line.
Based on comparing the specs, WaterWeld shines as a temporary or semi-permanent fix: a pinhole in a drain pipe, a crack in a plastic trap, or a leaking joint you can’t replace tonight. Published strength figures vary between retailers, so don’t treat it as a substitute for a proper fitting on a pressurized supply line long-term.
Customer ratings are more mixed than for the other picks here — some retailer averages land in the high-3-star range — so expect results to depend heavily on surface prep and correct kneading.
Pros:
- ✅ Sets on wet or submerged surfaces
- ✅ NSF-certified for potable water contact
- ✅ Cheap enough to keep several on hand
Cons:
- ❌ Results vary more than mechanical fixes
- ❌ Best as a stop-gap on pressurized lines
Usually under $10, it’s the best dollar-for-dollar insurance in this guide.
4. RIDGID PowerSpin+ — clears clogs without the mess
Chemical drain cleaners are tempting, but the RIDGID PowerSpin+ (model 57043) is the mechanical alternative that actually removes the blockage instead of dissolving part of it. It packs 25 feet of 1/4-inch MaxCore cable inside a sealed drum and is rated for drain lines from about 1/2 inch to 1-1/2 inches in diameter — exactly the range of a typical kitchen sink branch. The AutoFeed trigger advances the cable for you, and you can run it by hand or chuck it into a cordless drill up to 500 RPM for tougher grease clogs.
On paper, this is the pick for households that clog more than once a year — heavy cooks, big families, or homes with older, narrower drain lines. The sealed drum keeps the gunk contained, which is a real quality-of-life improvement over a bare cable snake. One caveat from RIDGID itself: it isn’t designed for toilets, which need a dedicated closet auger.
Detailed U.S. customer reviews were limited in our research, so our analysis rests primarily on the spec sheet; RIDGID backs it with a lifetime warranty.
Pros:
- ✅ 25-foot cable reaches most kitchen clogs
- ✅ Hand or drill-powered operation
- ✅ Sealed drum keeps the mess contained
Cons:
- ❌ Not suitable for toilet clogs
- ❌ Highest upfront cost in this kit
Typically around $50–$75, it can pay for itself after a single avoided drain-cleaning visit.
5. InSinkErator Jam-Buster Wrench — unjams a disposal in seconds
If your InSinkErator disposal hums but won’t spin, the InSinkErator Jam-Buster Wrench (WRN-00) is usually the entire fix. It’s a small hex wrench that fits the center socket on the bottom of the unit; turning it back and forth manually rotates the grinding plate and frees whatever is wedged inside. That’s the practical magic: you fix the jam from under the sink, with no hands anywhere near the grinding chamber.
This is the easiest recommendation in the guide for anyone who owns an InSinkErator — but only them. It’s designed exclusively for InSinkErator units, and InSinkErator notes that a standard 1/4-inch Allen wrench can substitute if you’ve lost the original. Other disposal brands use their own tools or different socket sizes, so check your manual.
Aggregated reviews are overwhelmingly positive and strikingly consistent: buyers report freeing a jam with a turn or two, and several mention taping the wrench to the disposal so it never goes missing again.
Pros:
- ✅ Frees jams from below, safely
- ✅ Genuine OEM fit for InSinkErator units
- ✅ Extremely inexpensive and durable
Cons:
- ❌ Works only on InSinkErator disposals
- ❌ Won’t fix motor or electrical failures
Around $10, it’s practically mandatory if you own an InSinkErator.
6. GE Advanced Silicone 2 Kitchen & Bath — rebuilds failed seals fast
A failed caulk line behind the sink is how small splashes become rotted cabinets, and the GE Advanced Silicone 2 Kitchen & Bath sealant is built for that exact zone. It’s 100% silicone and fully waterproof, it’s water-ready in about 30 minutes, and it reaches full cure in roughly 24 hours. It meets ASTM C-920 Class 35, which in plain English means it can flex with ±35% joint movement — useful where a sink, counter, and backsplash expand and shift at different rates.
The neutral-cure formula is the underrated detail here: it’s low-odor and won’t blemish most high-end metal finishes like chrome or nickel, so you can run a bead right up to the faucet base. The tradeoff is that it isn’t paintable, so it’s the wrong choice for trim you plan to paint. GE also advertises 10-year mold-free product protection on the cured sealant.
Customer reviews across Amazon and hardware retailers are strongly positive across thousands of ratings, with common praise for easy tooling and durable, mold-resistant seals.
Pros:
- ✅ Water-ready in about 30 minutes
- ✅ Won’t blemish most metal finishes
- ✅ Flexible Class 35 joint movement
Cons:
- ❌ Not paintable once cured
- ❌ Full cure takes about 24 hours
Usually under $15, it’s cheap protection against the most expensive kind of kitchen damage: slow water rot.
7. Klein Tools RT250 GFCI Tester — diagnoses outlet faults instantly
When a countertop outlet goes dead or keeps tripping, the Klein Tools RT250 GFCI Tester tells you why before you start guessing. It plugs into standard North American 120V three-wire outlets and its backlit LCD shows the actual voltage, identifies common wiring faults, and even displays how long a GFCI takes to trip. It also flags open-neutral and open-ground conditions, which simple three-light testers can miss.
Here’s what most buyers overlook: a “dead” kitchen outlet is often downstream of a tripped GFCI somewhere else on the counter. The Klein Tools RT250 GFCI Tester helps you confirm whether you’re dealing with a simple reset, a failed GFCI device, or a wiring fault that needs an electrician — and that distinction is the whole game in safe reactive repairs. It carries a CAT II 135V safety rating and an auto-hold feature so you can read the screen after unplugging.
Aggregated reviews at Lowe’s highlight ease of use and versatility for testing both standard and GFCI outlets.
Pros:
- ✅ Shows voltage and specific wiring faults
- ✅ Measures GFCI trip time
- ✅ Detects open neutral and open ground
Cons:
- ❌ Only for 120V three-wire outlets
- ❌ Diagnoses problems but doesn’t repair them
Around $20–$30, it’s an inexpensive way to know when not to DIY.
Side-by-Side: All 7 Compared
| Product | Repair Type | Reusable? | Permanent or Temporary | Key Spec | Best For |
|---|---|---|---|---|---|
| Moen 1225 Replacement Cartridge | Faucet | No (part) | Permanent | Includes removal cap | Moen 1225 Replacement Cartridge: Moen faucet drips |
| SharkBite Max 1/2-Inch Slip Coupling | Supply pipe | No (part) | Permanent | Spans up to ~2″ of damage | SharkBite Max 1/2-Inch Slip Coupling: burst lines |
| J-B Weld WaterWeld | Leaks/cracks | No (consumable) | Temporary to semi-permanent | Sets ~25 min, cures ~1 hr | J-B Weld WaterWeld: emergency sealing |
| RIDGID PowerSpin+ | Drain clogs | Yes | Permanent (clears clog) | 25 ft × 1/4″ cable | RIDGID PowerSpin+: frequent clogs |
| InSinkErator Jam-Buster Wrench | Disposal jams | Yes | Permanent (clears jam) | Hex fit, OEM | InSinkErator Jam-Buster Wrench: InSinkErator owners |
| GE Advanced Silicone 2 Kitchen & Bath | Seals | No (consumable) | Permanent | ASTM C-920 Class 35 | GE Advanced Silicone 2 Kitchen & Bath: sink/backsplash seals |
| Klein Tools RT250 GFCI Tester | Electrical diagnosis | Yes | Diagnostic only | GFCI trip-time readout | Klein Tools RT250 GFCI Tester: dead outlets |
The pattern is worth noticing: three of these products are reusable tools, and four are parts or consumables. A smart kit leans on the reusable tools — the RIDGID PowerSpin+, InSinkErator Jam-Buster Wrench, and Klein Tools RT250 GFCI Tester — and keeps one or two of each consumable in reserve. The J-B Weld WaterWeld is the only item here that’s truly a stop-gap, so pair it with a permanent fix like the SharkBite Max 1/2-Inch Slip Coupling whenever a supply line is involved.
✨ Don’t wait for the next 2 a.m. drip!
🔍 Take your kitchen preparedness to the next level with this carefully curated lineup. Click a highlighted item to check current pricing and availability. These picks will help you handle leaks, clogs, and jams calmly — the whole family will appreciate the peace (and quiet)!
How to Build a 30-Minute Emergency Kitchen Repair Kit
A kitchen repair kit is only useful if you can grab it in under a minute. Here’s a practical setup routine that turns the seven products above into a ready-to-go system.
Step 1 — Find and label your shutoffs (10 minutes). Open the cabinet under the sink and locate the hot and cold supply valves. Turn each one fully off and back on to make sure it isn’t seized — a stuck valve is the most common reason a small leak becomes a flood. Then find your home’s main water shutoff and tag it with a bright label.
Step 2 — Record your model numbers (5 minutes). Snap photos of your faucet’s model number, your disposal’s brand label, and the faucet’s original documentation if you have it. This is what tells you whether you need the Moen 1225 Replacement Cartridge or a different part, and whether the InSinkErator Jam-Buster Wrench fits your unit.
Step 3 — Assemble the bin (10 minutes). Use a shallow plastic bin that fits under the sink. Inside: the J-B Weld WaterWeld, a tube of GE Advanced Silicone 2 Kitchen & Bath, the Klein Tools RT250 GFCI Tester, a flashlight, nitrile gloves, a small bucket, old towels, a tubing cutter, and a SharkBite Max 1/2-Inch Slip Coupling with its disconnect clip. Store the RIDGID PowerSpin+ right beside it.
Step 4 — Attach the disposal wrench (1 minute). Following a tip that shows up repeatedly in customer reviews, tape the InSinkErator Jam-Buster Wrench to the side of the disposal itself. You’ll never hunt for it again.
Step 5 — Do a 30-day check. In your first month, test every countertop GFCI with the Klein Tools RT250 GFCI Tester, inspect the caulk line behind the sink, and run water while watching the trap for drips. Most “sudden” failures leave early clues — catching them turns a reactive repair into a calm, planned one.
Problem → Solution: 5 Common Kitchen Breakdowns and the Exact Fix
Problem 1: The disposal hums but won’t spin. Turn off the switch and cut power at the breaker or unplug the unit. Insert the InSinkErator Jam-Buster Wrench into the bottom socket and work it back and forth until it rotates freely. Remove any debris from the chamber with tongs — never hands — then press the red reset button and restore power. InSinkErator’s own step-by-step guide to fixing a jammed disposal walks through the same sequence.
Problem 2: The faucet drips from the spout. On a single-handle Moen, the cartridge is the prime suspect. Shut off both supply valves, remove the handle and retaining clip, and swap in the Moen 1225 Replacement Cartridge. If it still drips after replacement, the issue may lie elsewhere in the faucet body, so a pro inspection is worth it.
Problem 3: The sink drains slowly or not at all. Skip the chemical cleaner, which can harm older pipes and makes mechanical cleaning more hazardous. Remove the trap if needed, then feed the RIDGID PowerSpin+ cable into the branch line and work through the grease plug.
Problem 4: A pinhole leak sprays under the cabinet. Shut the supply valve first. For a fast stop-gap, knead J-B Weld WaterWeld and press it over the leak. For a permanent fix, cut out the damaged section and install the SharkBite Max 1/2-Inch Slip Coupling.
Problem 5: The countertop outlet is dead. Press the reset button on every GFCI along the counter — one upstream device can kill several outlets. If power doesn’t return, plug in the Klein Tools RT250 GFCI Tester to identify the fault. Anything beyond a reset or a clearly failed device is electrician territory.
Real-World Scenarios: Matching the Kit to Your Home
Not every home needs all seven tools on day one. Here’s how the picks map onto three realistic profiles.
Profile A: The first-time renter (budget under $40). You can’t renovate, and your landlord handles major repairs — but you still deal with the 9 p.m. jam or a sudden slow drain. Start with the InSinkErator Jam-Buster Wrench (if your disposal is an InSinkErator), a stick of J-B Weld WaterWeld for emergency leak control until maintenance arrives, and the Klein Tools RT250 GFCI Tester to tell your landlord exactly what’s wrong with a dead outlet. Documenting the fault clearly tends to speed up landlord responses, and you avoid touching anything you’re not authorized to change.
Profile B: The busy family homeowner (budget around $100–$150). You cook daily, the disposal works hard, and the sink sees grease. Your highest-value additions are the RIDGID PowerSpin+ for recurring clogs and a tube of GE Advanced Silicone 2 Kitchen & Bath to reseal the sink rim and backsplash once a year. Add the Moen 1225 Replacement Cartridge only if your faucet model is confirmed compatible — ordering it “just in case” without checking can leave you with the wrong part.
Profile C: The older-home owner (budget around $150–$200). Older copper lines, aging faucets, and outlets that predate modern GFCI rules make you the most likely to face multiple failures. The full kit makes sense here, with special emphasis on the SharkBite Max 1/2-Inch Slip Coupling for supply-line failures and the Klein Tools RT250 GFCI Tester to verify that countertop outlets actually trip when they should. Older homes are also where reactive kitchen repairs most often reveal deeper issues, so treat every fix as an inspection opportunity.
How to Choose Tools for reactive kitchen repairs
- Start with what you own. Your faucet brand, disposal model, and pipe material dictate which parts fit. A perfect part for the wrong faucet is useless at midnight.
- Prioritize by failure frequency. Clogs and disposal jams happen far more often than burst pipes, so reusable clog and jam tools deliver the fastest return.
- Separate stop-gaps from permanent fixes. Epoxy putty buys time; a push-fit coupling or new cartridge ends the problem. Keep at least one of each type.
- Check certifications on anything touching drinking water. NSF certification on putties and lead-free fittings on supply lines are non-negotiable.
- Favor diagnostic tools for electrical issues. In the kitchen, electricity and water share space, so a tester that tells you what’s wrong is more valuable than any repair part.
- Match the tool to your skill level. Be honest: if you’ve never cut pipe, practice on scrap first or keep the pro’s number handy.
- Store everything in one place. A kit spread across three rooms isn’t a kit — it’s a scavenger hunt during an emergency.
These criteria explain why the seven picks above skew toward specific, inexpensive, and fast tools rather than all-in-one “kitchen repair kits” sold as bundles. Bundles often pad the box with generic items you’ll never use, while the right single-purpose tool solves the actual failure. The emergency kitchen repairs you’ll face most — drips, clogs, jams — are precisely the ones a targeted tool handles in minutes.
reactive kitchen repairs vs Preventive Maintenance: Which Saves More?
Reactive and preventive approaches aren’t rivals — they’re two halves of a sensible strategy. In professional maintenance, reactive (or run-to-failure) maintenance is considered reasonable for low-cost, non-critical assets, while critical systems get scheduled care. Your kitchen works the same way.
A disposal jam is low-risk and cheap to fix, so reacting when it happens is perfectly rational. A slow supply-line leak inside a cabinet, however, can quietly rot subflooring for months before you notice. That’s where a little preventive checking pays off. The EPA’s WaterSense program estimates that household leaks can waste nearly 10,000 gallons of water a year in the average home, and that a faucet dripping once per second wastes more than 3,000 gallons annually — details you can explore on the EPA’s Fix a Leak Week page.
| Approach | Upfront Cost | Response Speed | Risk of Hidden Damage | Best For |
|---|---|---|---|---|
| DIY reactive repair with kit | Low (one-time tools/parts) | Minutes | Medium | InSinkErator Jam-Buster Wrench, RIDGID PowerSpin+: jams and clogs |
| Calling a pro after failure | None until it breaks | Hours to days | Medium–High | Gas lines, major electrical, hidden leaks |
| Preventive inspection | Small time investment | N/A (prevents failure) | Low | GE Advanced Silicone 2 Kitchen & Bath, Klein Tools RT250 GFCI Tester: seals and GFCI checks |
| Full fixture replacement | High | Days | Low after install | Faucets beyond cartridge repair |
The takeaway: DIY reactive repair wins on speed and cost for simple failures, while preventive checks win on hidden-damage risk. The sweet spot is a kit built for reactive fixes that you also use for quick monthly checks — testing GFCIs with the Klein Tools RT250 GFCI Tester and eyeballing the caulk line takes five minutes and catches problems before they become emergencies.
Long-Term Cost and Maintenance: The Real ROI
Let’s translate the kit into dollars. Assembling all seven products typically lands somewhere in the $150–$225 range at the time of writing, depending on retailer and pack sizes — check current prices, as they shift often.
| Item | Approximate Cost Range | What It Can Replace | Value Verdict |
|---|---|---|---|
| InSinkErator Jam-Buster Wrench | Around $10 | A disposal service call | Exceptional |
| J-B Weld WaterWeld | Under $10 | An emergency after-hours visit (temporarily) | Exceptional |
| GE Advanced Silicone 2 Kitchen & Bath | Under $15 | Cabinet and subfloor water damage | Excellent |
| Klein Tools RT250 GFCI Tester | Around $20–$30 | A diagnostic electrician visit (for simple cases) | Very good |
| SharkBite Max 1/2-Inch Slip Coupling | Around $15–$25 | A plumber’s pipe repair | Very good |
| Moen 1225 Replacement Cartridge | Around $25–$45 | A new faucet plus installation | Very good |
| RIDGID PowerSpin+ | Around $50–$75 | Repeat drain-cleaning visits | Good to excellent (depends on clog frequency) |
Service call costs vary widely by region, but even a single avoided visit often covers a large share of the full kit. The best-value items are the cheapest: the InSinkErator Jam-Buster Wrench and J-B Weld WaterWeld cost little and address high-frequency or high-urgency problems.
Maintenance for the kit itself is minimal. Rinse and dry the RIDGID PowerSpin+ cable after each use to prevent rust inside the drum. Replace the AAA batteries in the Klein Tools RT250 GFCI Tester annually. Silicone and epoxy have shelf lives, so check dates once a year and replace opened caulk tubes that have skinned over.
Common Mistakes to Avoid With DIY Kitchen Repairs
Skipping the shutoff test. Many homeowners discover their under-sink valves are seized only when water is already spraying. Exercise them now.
Buying parts by appearance. Faucet cartridges look similar across models and generations. The Moen 1225 Replacement Cartridge fits most single-handle Moen faucets, but newer units may need the 1255 — always confirm by model number.
Reaching into the disposal. Even with the switch off, never put your hand in the grinding chamber. Use the InSinkErator Jam-Buster Wrench from below and tongs from above.
Mixing chemicals and mechanical tools. If you’ve already poured a chemical drain cleaner, don’t immediately snake the line — splashback can cause burns. Flush thoroughly first, or tell your plumber what you used.
Treating epoxy as a forever fix. J-B Weld WaterWeld is excellent for buying time, but pressurized supply lines deserve a mechanical repair like the SharkBite Max 1/2-Inch Slip Coupling.
Caulking over old caulk. New silicone doesn’t bond reliably to old silicone. Strip the old bead completely, clean, dry, and then apply GE Advanced Silicone 2 Kitchen & Bath.
Resetting a GFCI that keeps tripping. Repeated tripping is a warning, not an annoyance. Test with the Klein Tools RT250 GFCI Tester, unplug appliances one at a time, and call an electrician if the cause isn’t obvious.
Safety, Codes, and Standards for reactive kitchen repairs
Kitchens combine water, electricity, sharp blades, and sometimes gas — so safety rules aren’t optional extras.
Electrical. The U.S. Consumer Product Safety Commission explains that a GFCI monitors current and shuts power off in a fraction of a second if electricity leaks to ground — for example, when an appliance falls into a sink. Its GFCI fact sheet also covers portable GFCIs, which are a smart option for renters and older homes without built-in protection. The National Electrical Code requires GFCI protection for kitchen receptacles serving countertop surfaces in dwelling units, though which code edition applies depends on your local jurisdiction. A tester like the Klein Tools RT250 GFCI Tester helps you verify that protection works, but replacing receptacles or touching panel wiring should follow local permit rules — many areas expect a licensed electrician.
Plumbing. For drinking-water lines, use lead-free fittings and NSF-certified products. The SharkBite Max 1/2-Inch Slip Coupling is a lead-free brass fitting, and J-B Weld WaterWeld is NSF-certified for potable water contact.
Gas. If your range or water heater uses gas and you smell it, leave immediately and call your utility from outside. No reactive repair kit covers gas — ever.
What’s new for 2027? At the time of writing, we found no verified federal rule change taking effect in 2027 that specifically alters these DIY kitchen repairs. Electrical and plumbing codes are adopted on a state and local schedule, so check with your local building department before any work that might need a permit.
Features That Actually Matter (and Ones That Don’t)
Matters: compatibility. Exact fit beats every other spec. A genuine OEM part like the Moen 1225 Replacement Cartridge or InSinkErator Jam-Buster Wrench removes guesswork that universal parts introduce.
Matters: cure and set times. In an emergency, minutes count. The J-B Weld WaterWeld sets in about 25 minutes, and GE Advanced Silicone 2 Kitchen & Bath is water-ready in about 30 minutes — meaning you can use the sink the same evening.
Matters: diagnostic detail. A three-light outlet tester only hints at problems; the Klein Tools RT250 GFCI Tester shows voltage and GFCI trip time, which turns guessing into knowing.
Matters: containment. The sealed drum on the RIDGID PowerSpin+ sounds minor until you’ve watched a bare cable fling grease across a cabinet.
Doesn’t matter much: “pro-grade” marketing. Labels like “contractor-grade” are rarely tied to any measurable standard. Look for real certifications (NSF, ASTM C-920, CAT ratings) instead.
Doesn’t matter much: giant bundles. Huge “200-piece kitchen repair kit” boxes usually include generic washers and fittings that may not match your fixtures. Seven targeted tools beat 200 random ones.
Doesn’t matter much: color options. Clear versus white caulk is purely cosmetic — choose whatever matches your existing seal and move on.
FAQ: reactive kitchen repairs
❓ What should a basic kit for reactive kitchen repairs include?
✅ Start with a disposal wrench, epoxy putty for leaks, a drain auger, kitchen-grade silicone, a GFCI tester, and a push-fit coupling. Add a faucet cartridge once you've confirmed your model. Store everything in one bin under the sink…
❓ Is it cheaper to fix a leaky kitchen faucet or replace it?
✅ Usually repairing is cheaper. A replacement cartridge often costs a fraction of a new faucet, and installation takes under an hour for most DIYers. Replace the faucet if the body is cracked or parts are discontinued…
❓ Can I use SharkBite fittings for a permanent kitchen repair?
✅ Yes, push-to-connect fittings like SharkBite Max are designed as permanent repairs on copper, CPVC, and PEX when installed on a square, deburred cut at full insertion depth. Check local code, as rules vary by jurisdiction…
❓ Which drain snake size fits a kitchen sink?
✅ Most kitchen sink branch lines are about 1-1/2 inches, so a 1/4-inch cable around 25 feet long covers typical clogs. Avoid using sink augers on toilets, which require a dedicated closet auger…
❓ When should I stop DIY and call a professional?
✅ Call a pro for gas smells, repeated GFCI trips without an obvious cause, leaks inside walls, or any repair needing a permit. If shutting off water doesn't stop a leak, contact a plumber immediately…
Conclusion: Make reactive kitchen repairs Calm, Fast, and Cheap
The kitchen will always break eventually — that’s not pessimism, it’s physics, water, and daily wear. What you control is how prepared you are when it happens. Reactive kitchen repairs stop being stressful the moment the right tool is already in reach.
If you only buy two things, make them the cheapest: the InSinkErator Jam-Buster Wrench (for InSinkErator owners) and a stick of J-B Weld WaterWeld. Together they handle the most frequent panic and the most urgent leak for very little money. Next, add the RIDGID PowerSpin+ if clogs are a recurring theme, and the Klein Tools RT250 GFCI Tester so you never have to guess about a dead outlet. Round out the kit with GE Advanced Silicone 2 Kitchen & Bath for seals, a SharkBite Max 1/2-Inch Slip Coupling for supply-line failures, and the Moen 1225 Replacement Cartridge once you’ve confirmed your faucet model.
Above all, respect the limits: shut off water before touching plumbing, cut power before touching wiring, and hand off anything involving gas, hidden leaks, or permits. A good kit doesn’t replace professionals — it means you call them only when you truly need them. Heading into 2027, that’s the smartest, most budget-friendly kitchen strategy there is.
🛠️ Build your kitchen rescue kit today!
🔍 Don’t let the next drip, clog, or jam catch you off guard. Click a highlighted product to check current pricing and availability, and give your kitchen the backup it deserves — your future self (and your water bill) will thank you!
Recommended for You
- 5 Deadly Frying Mistakes: Unlocking best cooking temperature for frying foods in 2026
- 5 Professional Secrets on how to cook food evenly in pan (2026 Guide)
- 5 Secrets: how to use lid when cooking properly in 2026
Disclaimer: This post contains affiliate links. As an Amazon Associate, I earn from qualifying purchases made through these links, at no additional cost to you.
✨ Found this article helpful? Share it with someone who needs it! 💬🤗
[wpf_share]