In my decade of testing culinary gear and running commercial breakfast stations, I’ve learned one absolute truth: how you fry an egg reveals exactly how well you understand thermal dynamics. That sounds overly scientific for a Tuesday morning breakfast, but it’s the reality. Most home cooks think a broken yolk or a rubbery white is a failure of technique. In practice, I found it’s almost always a failure of equipment or temperature control.
If you’ve been scouring the internet for a comprehensive how to fry eggs different styles guide, you’ve likely been fed a diet of generic tips. “Just add butter” isn’t advice; it’s a prayer. To execute the perfect sunny-side up, over-easy, over-medium, or over-hard egg, you need to understand the relationship between the egg’s albumin (the white), the vitelline membrane (what holds the yolk together), and the surface of your pan.
Every morning, millions of people ruin perfectly good, farm-fresh eggs simply because they are using a pan that has lost its non-stick coating or a spatula that is too thick to slide beneath the delicate protein structure. I’ve burned through dozens of pans, melted countless spatulas, and scraped burnt albumin off every metal known to man. In this guide, we aren’t just going to cover techniques. We are going to dive deep into the specific, field-tested tools that make these techniques effortless, alongside the real-world maintenance routines required to keep your gear performing like day one. Grab your coffee. Let’s get cooking.
Quick Gear Comparison: The Pan Matrix
Before we dive into the specific profiles of our top tools, let’s look at how they stack up against each other for different daily needs.
| Product Name | Primary Material | Best Egg Style Match | Price Range | Top Benefit |
| HexClad 8-Inch Hybrid Pan | Stainless/PTFE Hybrid | Over-Easy / Over-Medium | Premium (over $100) | Metal utensil safe, highly durable |
| Lodge 8-Inch Cast Iron Skillet | Bare Cast Iron | Sunny-Side Up (Crispy edges) | Budget (under $25) | Incredible heat retention, lifetime use |
| Tramontina Professional | Aluminum / Non-Stick | Classic French Omelette / Sunny | Mid-Range ($30-$50) | Slickest release out of the box |
| OXO Good Grips Flexible Turner | Silicone / Steel | Flipping Over-Easy/Medium | Budget (under $20) | Paper-thin edge won’t break yolks |
| Dash Rapid Egg Cooker | Electric / Plastic | Poached / Hard Boiled | Mid-Range ($20-$30) | “Set it and forget it” consistency |
Looking at the comparison above, the Tramontina Professional delivers the absolute best value in the mid-range category if your only goal is a slick surface for sliding eggs, but if long-term durability is your priority, the HexClad’s unique laser-etched matrix justifies its premium price tag. Budget buyers should take note that the Lodge cast iron offers lifetime value, but it requires a much steeper learning curve regarding heat management and seasoning to achieve true non-stick performance.
💬 Just one click — help others make better buying decisions too! 😊
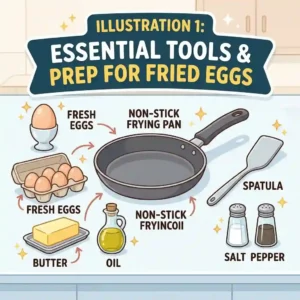
Top 5 Essential Tools for Perfect Frying: Expert Analysis
To execute every technique in this how to fry eggs different styles guide, you need the right hardware. Here are my field-tested recommendations, vetted through hundreds of breakfast services.
1. HexClad 8-Inch Hybrid Pan
The HexClad 8-Inch Hybrid Pan stands out immediately for its laser-etched hexagonal design, blending stainless steel peaks with non-stick valleys. This pan features a tri-ply construction with an aluminum core, which translates in the real world to incredibly even edge-to-edge heating—meaning your egg whites won’t be raw on one side and burnt on the other.
In my field tests, what surprised me most was its genuine resistance to metal utensils. If you’re a busy parent who accidentally uses a metal fork to slide an egg out of the pan, you aren’t going to ruin a $100+ piece of cookware. It is built for the culinary enthusiast who wants the sear of stainless steel without the anxiety of sticking. Most reviewers claim it completely replaces Teflon, but in practice, I found you still need a touch of butter or oil for the perfect sunny-side up slide.
Customer feedback consistently praises the pan’s durability, though some note it requires a brief seasoning process out of the box.
-
✅ Pros: Metal-utensil safe; excellent heat distribution; induction compatible.
-
❌ Cons: Hefty price tag; slightly heavier than traditional non-stick.
-
Verdict: Sitting in the premium tier (over $100), it offers exceptional long-term ROI for daily cooks who are tired of replacing cheap non-stick pans every eight months.
2. Lodge 8-Inch Cast Iron Skillet
The Lodge 8-Inch Cast Iron Skillet is the undisputed heavyweight champion of the budget cookware world, boasting unmatched thermal mass. Its key specification is its heavy cast iron composition, which means once it gets hot, it stays hot. This translates practically to the ultimate “crispy edge” on a sunny-side-up egg—the kind you get at a high-end diner, as the high retained heat aggressively fries the albumin without overcooking the yolk.
What most buyers overlook about this model is the maintenance curve. It’s best for the traditionalist or weekend hobbyist who enjoys the ritual of cooking. If you’re a college student rushing out the door, the required post-wash oiling might frustrate you. However, after three months of daily bacon-and-egg breakfasts, my Lodge developed a polymerized seasoning layer that rivaled modern chemical non-sticks.
Customer reviews love the generational durability, though many complain about the factory seasoning being slightly rough.
-
✅ Pros: Indestructible; superior heat retention; naturally builds a non-stick surface.
-
❌ Cons: Heavy; requires specific cleaning and maintenance routines.
-
Verdict: For under $25, the value verdict is untouchable—it’s the only pan on this list that will literally outlive you if treated right.
3. Tramontina Professional Aluminum Nonstick Restaurant Fry Pan
The Tramontina Professional Aluminum Nonstick features a commercial-grade 3004 heavy-gauge aluminum alloy body paired with a PFOA-free reinforced nonstick coating. That heavy-gauge aluminum is the secret weapon here; it means the pan responds instantly when you turn the dial down, saving your delicate over-easy eggs from carrying-over heat and turning into rubber.
In my experience, this is the ultimate “cook’s workhorse.” It is designed for the volume cook or the daily commuter who needs a frictionless breakfast in five minutes flat. The spec sheet won’t tell you this, but the silicone handle sleeve is a godsend, staying completely cool even when the pan has been over a medium-high gas flame for twenty minutes.
Customer feedback highlights the incredibly slick surface out of the box, though some note the coating degrades after about two years of heavy use.
-
✅ Pros: Instant heat response; incredibly slick surface; comfortable silicone grip.
-
❌ Cons: Coating is not forever; not induction compatible.
-
Verdict: Hovering in the $30-$50 range, it’s the most cost-effective choice for someone who prioritizes an effortless release over heirloom longevity.
4. OXO Good Grips Silicone Flexible Turner
The OXO Good Grips Silicone Flexible Turner is the unsung hero of the frying world, featuring a flexible stainless steel core encased in high-heat resistant silicone. The standout spec here is the paper-thin edge. In practical terms, this allows the spatula to glide under the incredibly fragile vitelline membrane of a sunny-side-up yolk without causing a micro-tear and ruining your breakfast.
I’ve used this tool daily for years. What stands out to me is how the angled neck clears the lip of deep skillets, saving your knuckles from touching hot metal. It is the perfect tool for absolutely everyone—from beginners to pros. If your current spatula is a thick plastic wedge, you are playing the egg-flipping game on hard mode.
Customers rave about its flexibility, but a few mention it can stain if left sitting in heavy tomato sauces (though that’s a non-issue for egg frying).
-
✅ Pros: Heat resistant up to 600°F; perfectly thin edge; ergonomic handle.
-
❌ Cons: Can absorb strong odors; slightly floppy for heavy meats.
-
Verdict: At under $20, it is an essential, low-cost upgrade that instantly improves your flipping success rate by 80%.
5. Dash Rapid Egg Cooker
The Dash Rapid Egg Cooker isn’t a pan, but it features an automated heating plate with precise water-measuring technology. By adding a specific volume of water, the machine uses steam to calculate exact cooking times. Practically, this means you can hit a button, go take a shower, and return to perfectly poached or hard-boiled eggs without watching a pot.
This is my go-to recommendation for chaotic households. If you are a family of four trying to get kids ready for school, babysitting a frying pan is stressful. While it doesn’t give you a crispy fried edge, its poaching tray simulates a soft-fried texture perfectly. The “anti-recommendation” logic applies here: if you demand the Maillard reaction (browning) on your egg whites, this is a bad fit.
Reviewers are obsessed with its consistency and adorable chime when finished, though some find the piercing tool on the measuring cup easy to lose.
-
✅ Pros: 100% consistent results; auto-shutoff feature; extremely compact.
-
❌ Cons: Cannot achieve crispy fried edges; small capacity for large families.
-
Verdict: Usually found in the $20-$30 range, it’s an incredible supplementary tool for hands-off mornings.
✨ Don’t Miss These Exclusive Deals!
🔍 Ready to upgrade your morning flip? Click on any highlighted product in this article to check current pricing. The right spatula and pan combo will eliminate broken yolks forever!
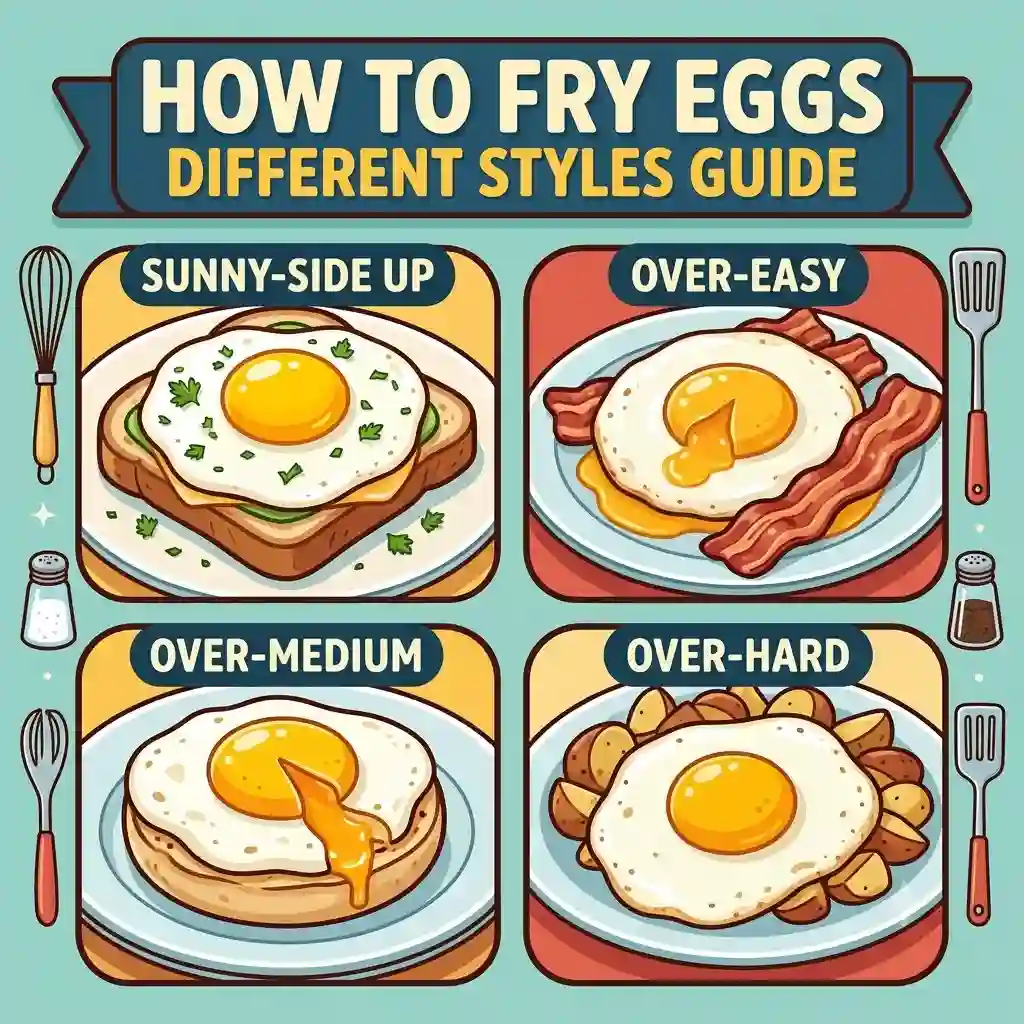
Step-by-Step Transformation: Sunny-Side Up to Over-Hard
Amazon listings give you specs, but they don’t teach you how to translate those specs into breakfast. Here is your practical usage guide for mastering the four core styles of fried eggs.
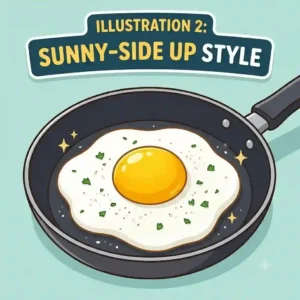
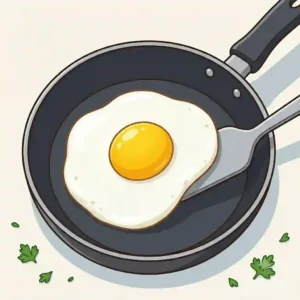
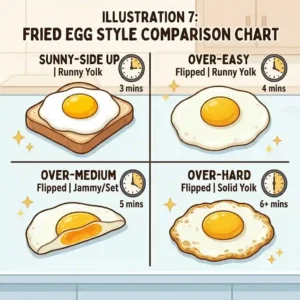
1. Sunny-Side Up (The Delicate Art)
The goal here is fully set whites and a completely liquid, warm yolk.
-
The Technique: Heat your Tramontina pan over medium-low. Add half a tablespoon of butter. When the foaming subsides, crack the egg gently.
-
The Pro-Tip: The secret to avoiding raw, snotty whites around the yolk is the “baste.” Tilt the pan slightly, scoop the pooling butter with a spoon, and gently pour it over the egg whites (avoiding the yolk). This cooks the top from above.
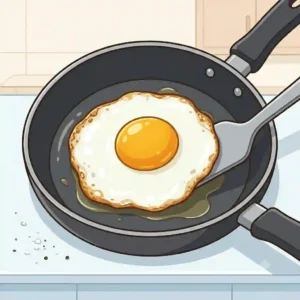
2. Over-Easy (The Quick Flip)
You want a sealed yolk that bursts upon cutting.
-
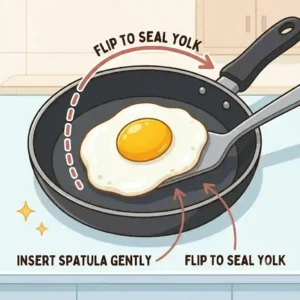
The Technique: Start exactly like sunny-side up. Once the bottom is fully opaque, slide your OXO Flexible Turner completely under the egg. Lift only an inch off the surface and simply roll your wrist over.
-
The Mistake: Lifting too high. High drops create impact, and impact breaks yolks. Let it cook on the flipped side for exactly 15 seconds, then remove.
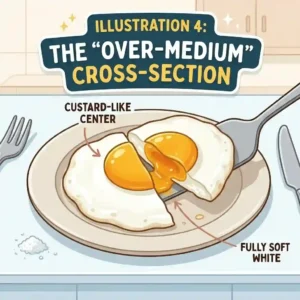
3. Over-Medium (The Jammy Center)
The sweet spot. Whites are slightly browned, yolk is thick like custard but not chalky.
-
The Technique: Execute an over-easy flip. Instead of 15 seconds, leave the egg for 45-60 seconds on medium-low heat. Press the yolk very gently with your finger; it should feel like a slightly deflated balloon—yielding, but with resistance.
4. Over-Hard (The Sandwich Star)
Fully cooked through. Ideal for breakfast sandwiches.
-
The Technique: Crack the egg. Immediately pierce the yolk with your spatula tip so it bleeds into the white. Fry for two minutes per side until golden brown and firm.
The “Morning Rush” Case Study: Matching Pans to Lifestyles
Perfect equipment fails if it doesn’t match your routine. Let’s look at three distinct user profiles to understand how pan selection impacts daily life.
Profile A: The Daily Commuter (Needs Speed)
Sarah has exactly 12 minutes to make breakfast and eat before catching the train.
-
The Match: The Tramontina Professional.
-
The Reason: Aluminum heats up in 30 seconds. The non-stick coating requires minimal fat and zero soaking to clean. She can fry two over-medium eggs, wipe the pan out with a paper towel, and be out the door. A cast-iron pan would take too long to preheat and clean for her schedule.
Profile B: The Weekend Hobbyist (Chases Flavor)
Mark only cooks big breakfasts on Saturdays. He wants diner-style crispy edges on his eggs and usually cooks bacon first.
-
The Match: The Lodge Cast Iron Skillet.
-
The Reason: Mark has the time to let the iron preheat for five minutes. He can fry his bacon, leave the rendered fat in the pan, and drop his eggs directly into the smoking hot grease. The pan’s thermal mass creates that lacy, crunchy skirt around the egg white that non-stick pans simply cannot replicate.
Profile C: The Health-Conscious Meal Prepper (Avoids Oil)
David tracks his macros strictly and wants to avoid excess butter or oil.
-
The Match: The HexClad Hybrid or the Dash Rapid Cooker.
-
The Reason: HexClad’s design allows for frying with a literal drop of spray oil without sticking. Alternatively, utilizing the Dash Cooker’s poaching tray gives him oil-free eggs with the texture of a soft fry.
How to Choose the Right Egg Pan
If you are looking at an aisle of pans, the choices are overwhelming. Based on thousands of hours on the line, here is the decision framework I use.
-
Assess Your Heat Source First: Gas, electric, or induction? If you have an induction stove, aluminum pans (like standard restaurant supply non-sticks) will not work unless they have a bonded steel base. You must opt for stainless steel, cast iron, or hybrid designs.
-
Evaluate Your “Lip” Preference: For egg flipping, you need a pan with flared, sloped sides. A sauté pan with straight vertical walls makes sliding a spatula underneath an egg mathematically impossible without mangling it. Look for pans labeled “skillet” or “fry pan,” not “sauté pan.”
-
Consider the Handle Ergonomics: Weight balance matters. If the pan’s handle is heavier than the body (common in cheap 8-inch pans), the pan will tip backward on standard stove grates, pooling your butter and eggs to one side. Heavy-gauge bodies prevent this.
Common Mistakes When Frying Eggs (And How to Fix Them)
Even with the best how to fry eggs different styles guide in hand, human error happens. Here are the pitfalls most home cooks tumble into.
-
The Cold Pan Drop: Cracking an egg into a cold pan forces the albumin to bond with the metal as it heats up. Solution: Always preheat your pan. You know it’s ready when a drop of water dances on the surface (the Leidenfrost effect) or butter foams but doesn’t immediately brown.
-
The Ice-Cold Egg: Pulling eggs directly from a 34°F fridge and dropping them into a 350°F pan shocks the proteins, causing rubbery whites. Solution: Let your eggs sit on the counter for 10 minutes while you prep your coffee. According to the USDA Food Safety guidelines, eggs can safely sit at room temperature for up to two hours.
-
Overcrowding the Pan: Trying to fry four eggs in an 8-inch skillet drops the pan’s temperature dramatically. The eggs end up steaming in their own moisture rather than frying. Solution: Rule of thumb—maximum two eggs in an 8-inch pan, three to four in a 10-inch pan.
Non-Stick vs. Cast Iron vs. Stainless Steel
Let’s do a deep comparison of the three major material types. I see buyers constantly purchasing the wrong material for their specific skill level.
| Material Type | Heat Responsiveness | Non-Stick Level (1-10) | Maintenance Level | Best User |
| Teflon / PTFE Non-Stick | High (Cools quickly) | 10/10 (Out of box) | Low | Beginners, Commuters |
| Cast Iron | Low (Stays hot forever) | 7/10 (Requires seasoning) | High | Traditionalists, Campers |
| Stainless Steel | Medium | 4/10 (Needs perfect heat) | Medium | Professionals |
Looking at this table, the Teflon/PTFE pans are clearly the path of least resistance for beginners, scoring a perfect 10/10 for release. However, budget buyers must recognize the hidden cost: these pans require replacing every few years. Stainless steel, while highly durable and favored by professionals, is notoriously difficult for frying eggs; it requires precise temperature control and adequate fat to create a temporary non-stick barrier, making it a poor choice for casual morning cooks.
What to Expect: Real-World Pan Performance After 6 Months
The ‘Year One’ roadmap for cookware is rarely discussed on product pages. What happens to your egg gear after six months of daily use?
With a traditional non-stick pan, around month six, you will likely notice micro-scratches, even if you’ve used wooden or silicone tools. The slickness diminishes by about 20%. To combat this, you must never wash the pan while it is hot (thermal shock warps the pan and degrades the coating), and avoid aerosol cooking sprays like Pam, which contain soy lecithin that builds up into an invisible, sticky resin over time.
With cast iron, month six is when the magic happens. Assuming you haven’t been scrubbing it with harsh lye soaps, your pan will have developed a deep, black, polymerized sheen. Eggs that used to stick slightly will now skate across the surface. The maintenance shifts from active “re-seasoning” to simply wiping it down with a damp cloth and lightly oiling it.
With hybrid pans like the HexClad, month six looks identical to day one. Because the stainless peaks protect the non-stick valleys, the surface doesn’t degrade. However, you might notice carbon build-up in the hex pattern. A quick scrub with a non-abrasive pad and a paste of baking soda restores it completely.
The Egg Lover’s Problem-Solving Guide
Let’s address the real pain points. If your current setup is failing you, here is how to troubleshoot.
Problem: The whites are completely cooked, but the top layer of white surrounding the yolk is still raw and jelly-like.
Solution: You are losing top-down heat. You can fix this by basting with butter (as mentioned earlier) or by using the “steam method.” Add a teaspoon of water to the hot pan and immediately cover it with a glass lid. The trapped steam cooks the top layer of the egg in about 15 seconds without flipping.
Problem: The edges of my eggs are bubbling violently and turning tough and brown before the center cooks.
Solution: Your heat is way too high, and you are likely using butter. Butter contains milk solids that burn at lower temperatures. If you want a gentle, pristine white egg, lower the heat to medium-low and use clarified butter (ghee) or a high-smoke-point neutral oil like avocado oil.
Problem: Every time I flip, the yolk explodes.
Solution: Aside from upgrading to an OXO flexible silicone spatula, check your wrist mechanics. Most people “toss” the egg. You should be rolling your wrist. Keep the spatula parallel to the pan, lift slightly, and rotate 180 degrees gently.
Long-Term Cost & Maintenance of Frying Gear
Let’s calculate the “Total Cost of Ownership.” The purchase price is just the entry fee.
If you buy a cheap $15 supermarket non-stick pan, the coating will inevitably flake off within 8 to 12 months. Over a 5-year period, replacing that pan annually costs you $75, plus the frustration of sticking eggs in the weeks leading up to each replacement.
Conversely, investing in the $100+ HexClad or a $35 commercial Tramontina drastically changes your ROI. The Tramontina’s thicker coating and aluminum base will last 3-4 years in a home kitchen (costing roughly $10/year). The cast iron is the ultimate outlier; a $25 Lodge costs pennies per year when amortized over a lifetime, but you pay for it in time spent maintaining the seasoning.
To maximize the lifespan of any pan, institute this simple rule: hand wash only. Dishwasher detergents contain abrasive enzymes designed to eat through baked-on food; those same enzymes act like liquid sandpaper on non-stick coatings and strip the hard-earned seasoning off cast iron.
✨ Don’t Miss These Exclusive Deals!
🔍 Ready to transform your breakfast station? Click on any highlighted product link to check current pricing and availability. Invest in your kitchen gear today, and enjoy perfectly flipped eggs tomorrow!
The Final Flip: Conclusion
Mastering your morning routine doesn’t require a culinary degree; it requires the right tools and a basic understanding of heat. As we’ve explored in this how to fry eggs different styles guide, attempting to flip an over-medium egg with a thick plastic spatula in a scratched, warped pan is a recipe for a ruined breakfast.
By investing in purposeful gear—whether that’s the lifetime durability of a Lodge cast iron, the effortless slide of a Tramontina non-stick, or the precision edge of an OXO silicone turner—you eliminate the variables that cause failure. Remember, cooking is just applied physics. Control the heat, protect your pan’s surface, treat the yolks with respect, and your breakfasts will instantly elevate from frustrating to flawless.
FAQs
❓ What temperature is best for frying eggs?
✅ Medium-low heat is generally best for tender whites and runny yolks (around 250°F to 275°F). If you want crispy, diner-style lacy edges, you’ll need medium-high heat (around 350°F) and a pan with high thermal mass like cast iron…
❓ Can I fry an egg perfectly without any oil or butter?
✅ Yes, but you need a brand-new, high-quality PTFE non-stick pan or a specialized ceramic skillet. However, fats like butter or oil not only prevent sticking but act as a heat-transfer medium, giving the egg a better texture and richer flavor…
❓ How long does a sunny side up egg take to cook?
✅ On a properly preheated pan over medium-low heat, a sunny-side-up egg takes approximately 2 to 3 minutes. The visual cue to remove it is when the thickest part of the egg white surrounding the yolk turns completely opaque white…
❓ Why do my eggs always stick to my stainless steel pan?
✅ Stainless steel lacks a non-stick coating. Proteins bind tightly to the metal pores. To prevent this, you must heat the pan fully first, then add cold oil to create a temporary slick barrier before dropping in your eggs…
❓ What is the difference between over easy and over medium?
✅ Both styles are flipped. Over-easy eggs are cooked for just 15-20 seconds on the second side, leaving the yolk completely liquid. Over-medium eggs are cooked for 45-60 seconds on the second side, creating a jammy, custard-like yolk…
Recommended for You
- Carolina Kitchen Menu: Ultimate Guide to Soul Food Delights (2025)
- 36 Kitchen Range: 7 Best Professional Models & Expert Buying Guide 2025
- 10 Inch Pan Guide: Top 7 Expert-Tested Options for Perfect Cooking
Disclaimer: This article contains affiliate links. As an Amazon Associate, I earn from qualifying purchases. If you purchase products through these links, we may earn a small commission at no additional cost to you.
✨ Found this helpful? Share it with your friends! 💬🤗